How to Add a Portfolio to a Bibliographic Record
Updated: 12/24/2025
Getting Started in Resource Management
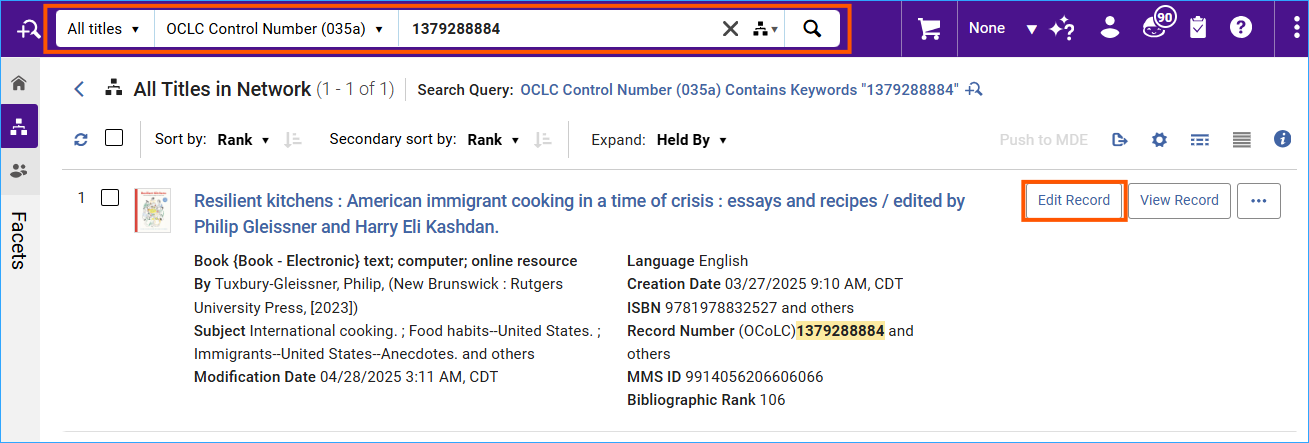
Find your record in Alma. This example is using a record from the Network Zone. When searching the Network Zone for bibliographic records, use the All Titles search.
Click the Edit Record button to open the record in the metadata editor.
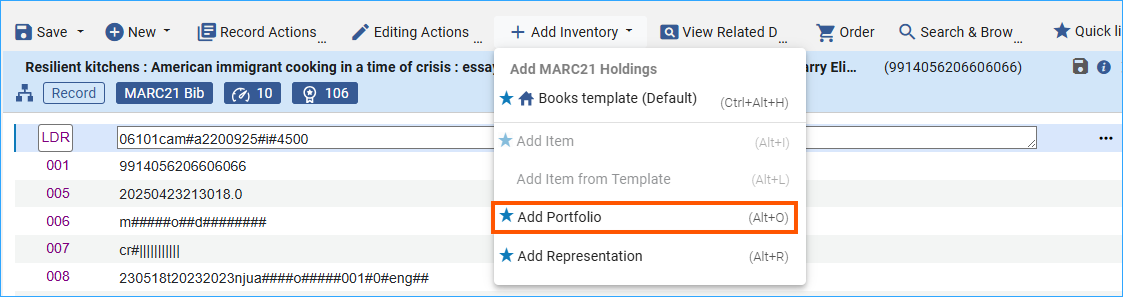
The metadata editor opens with the MARC record displaying. Click on the +Add Inventory menu and then select Add Portfolio.
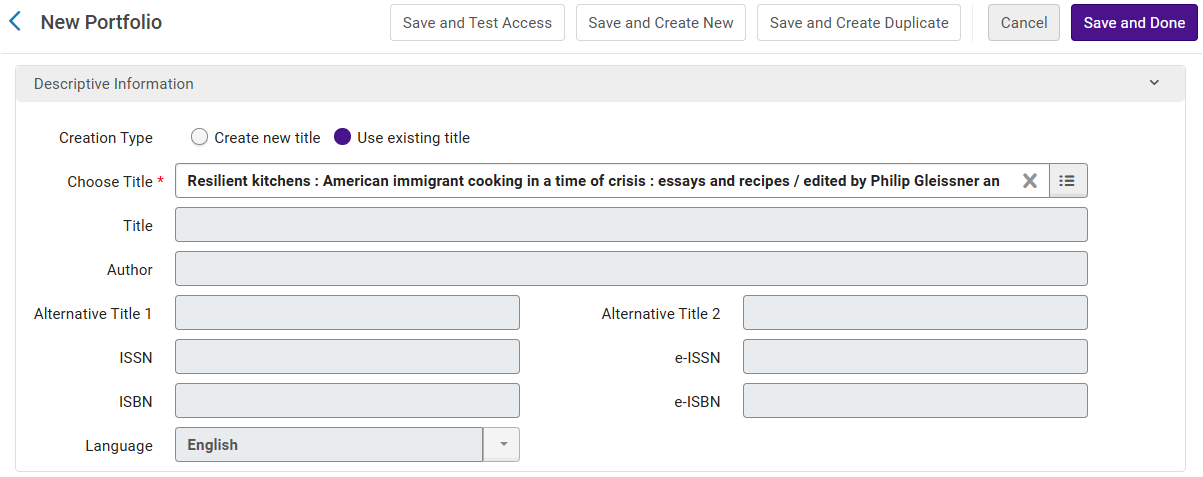
A form opens where you can add information to the portfolio. The top section of the form contains title information. The title from the MARC record appears by default. If you want to add a different title, click Create new title and fill in the information.
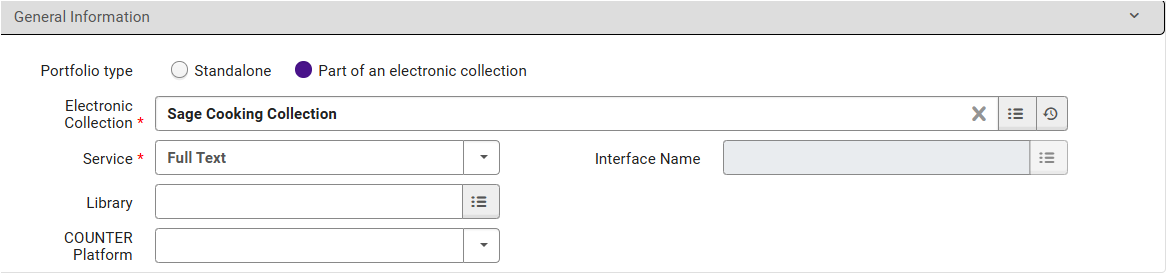
The next section of the portfolio work form is General Information. This is where you add the collection information for the portfolio. If the portfolio is standalone, you can leave it blank. To add collection information, click Part of an electronic collection. Use the Electronic Collection search box to find the correct collection. The form will then automatically fill in the service information.
The third section is Coverage Information. When adding portfolios for electronic journals, fill in coverage date information in this box.
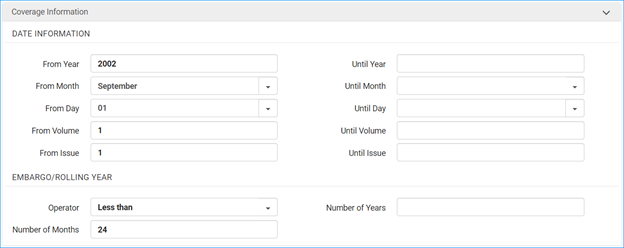
- For the Embargo/Rolling Year:
- Operator Less than will display as Most recent 24 month(s) available.
- Operator Greater than will display as Most recent 24 month(s) not available.
The fourth section is Inventory and Linking Information.
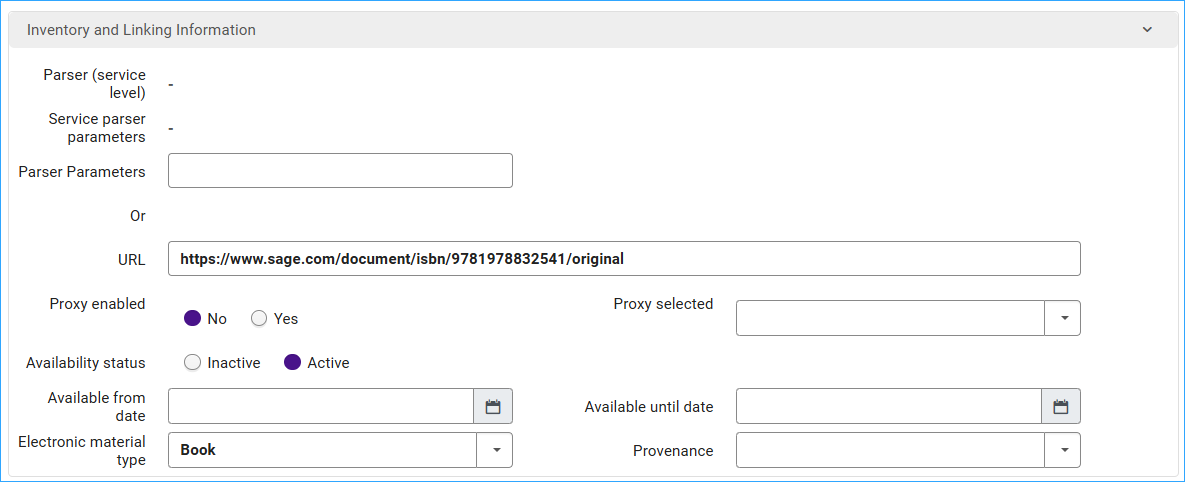
- Parser parameters- you can add them here if the portfolio’s parser is different from the electronic collection.
- If the portfolio has a URL enter it in the URL field.
- Proxy information- you can add them here (i.e. for each portfolio) or you may set it up in the service in the electronic collection. When the proxy is set up in the service of the collection, the settings in the portfolio are: Proxy enabled: No and leave selected proxy blank.

- Select the Electronic material type- Book, Government document, Journal, Streaming video, etc.
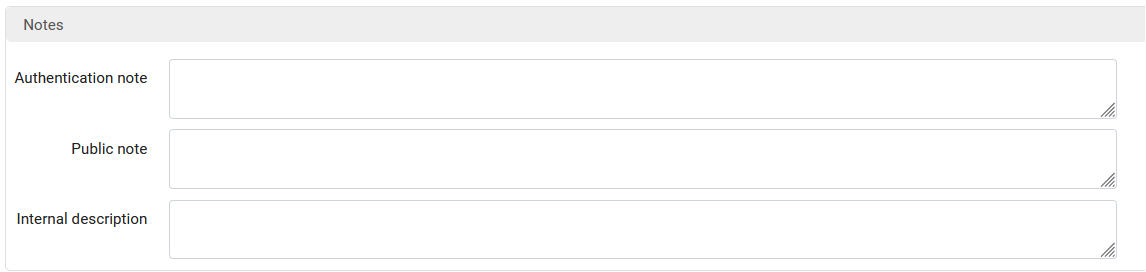
The last section is for Notes. A public note will appear in Primo VE.
Click Save and Done to save the portfolio and return to the metadata editor. If you want to test access at this point, click the Save and Test Access button to save the portfolio and test access to the remote resource.
Related Trainings:
Copy Cataloging using Search Resources in the Metadata Editor
Add a Local Extension Field to a Bibliographic Record
Placement Options in the Metadata Editor
Deleting Inventory Records in Alma
Marking Items as Missing in Alma
How to Create Brief Bibliographic Records in the Metadata Editor