PAC: How to Make the Format Icon (aka TOM) Display Correctly
updated: 06/04/2025
Note: Before making changes to a bibliographic record, make sure it is the correct record for the material you have. Do not change a bibliographic record from one format to another. For example, do not change a record for a videocassette to a DVD.
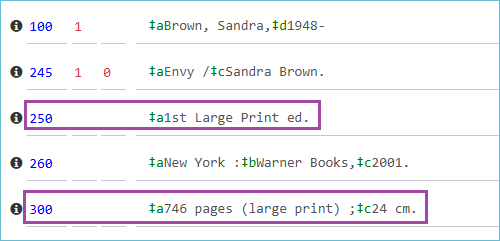
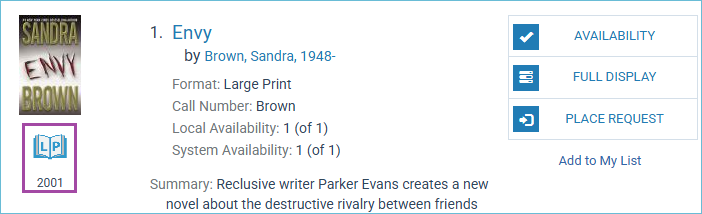
In this example, the bibliographic record is for a Large Print book, but the display in the PAC is for a regular print book.
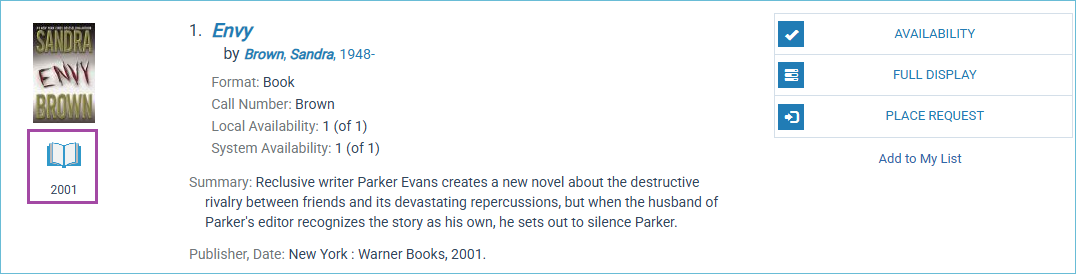
Here is what it looks like in the PAC with a regular print book icon.
In Polaris Documentation there is a chart that describes the fixed fields necessary to make different format icons appear in the PAC.
Scroll down the chart until you see the format you are looking for. For this example, we need to know what fixed field codes will display the Large Print icon in the PAC.

The chart shows there are three ways to make the Large Print icon appear. The columns at the top show which fixed field and position to place the values.
Working left to right in the chart from Polaris, we can check the Leader position 06 (LDR/06). In Leap, click the arrow icon next to the LDR field to open the work form.
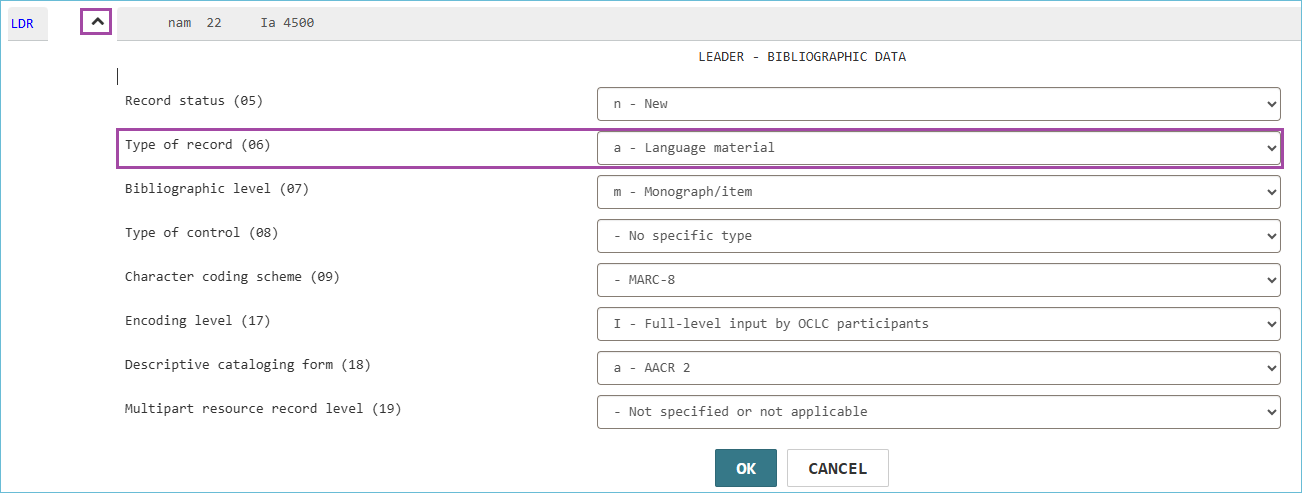
The record has the value "a" in it for language material. The chart above shows "a" in the top row, so we see the next thing to check is the 006 field of the bibliographic record. In the 00 position, the record needs either a, c, d, p, or t.
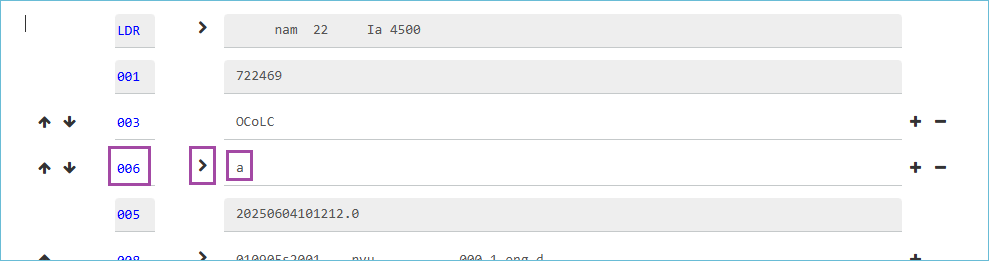
This bibliographic record doesn't have a 006 field, so that may be why the Large Print icon is not appearing in the PAC.
To add a fixed field to the bibliographic record, click a plus icon next to a fixed field. After you add the field, you can use the up and down arrows to position it correctly in the record.

After clicking the plus sign, enter 006 for the field and add an "a." The first part of the field is the 00 position. The "a" indicates the material is a book. After entering the "a" Leap will know what kind of work form to open when you click the arrow.
You may update the fixed fields in the 006 field or leave it as-is. For the icon, only the "a" is necessary.
The last thing to check is the 008 field position 23 to see if it has the value of "d".
Click on the arrow next to the 008 field to open the work form. This record did not have a "d" for large print in position 23.
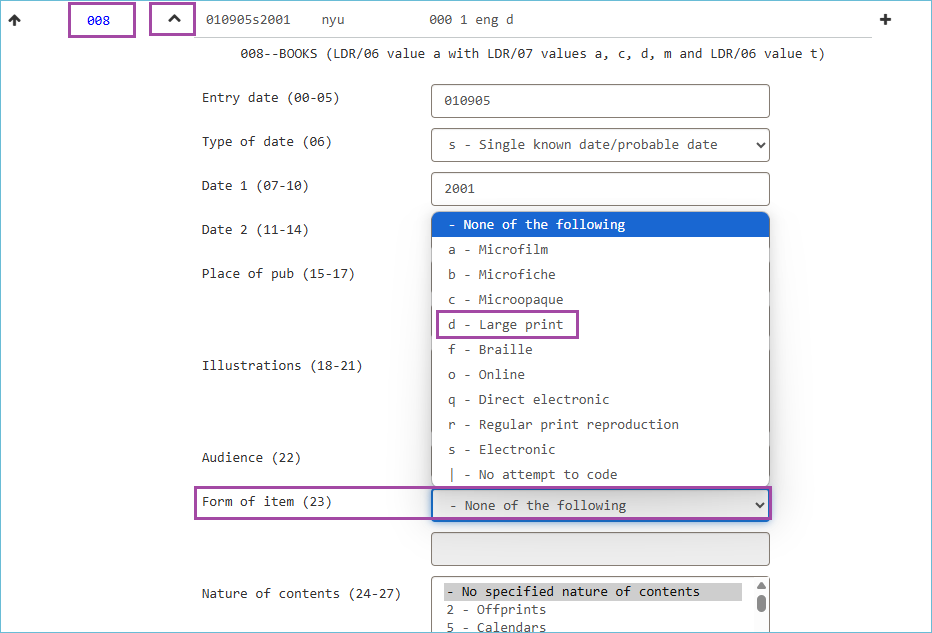
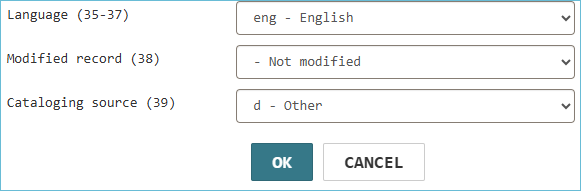
Select d - Large print from the drop-down. Then click the OK button at the bottom to save your selection and close the form.
Save the record. From the Links menu at the top of the bibliographic record, select PAC.
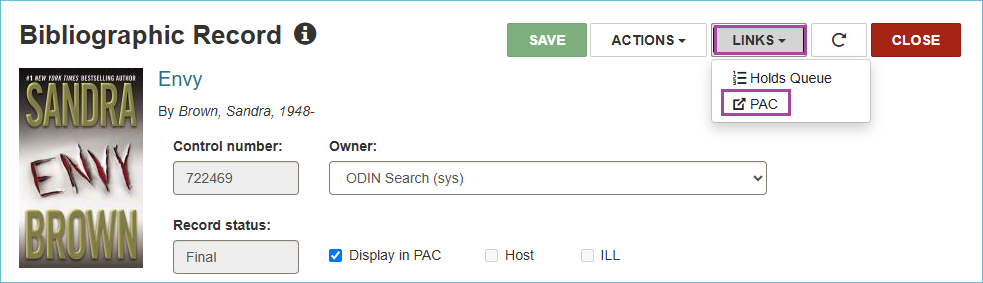
This is a quick way to view the updated record in the PAC and verify that the Icon has been updated.
Related Trainings:
PAC: Correcting the Wrong Book Cover