How to Create Serial Item Records
updated: 3/3/2026
Intermediate Topics in Resource Management
These methods are for libraries not using acquisitions in Alma.
Method 1: Easy
Search for the serial title in Alma- Search by Physical Titles or All Titles by title or ISSN. Click on the Items link on the right side of the record.
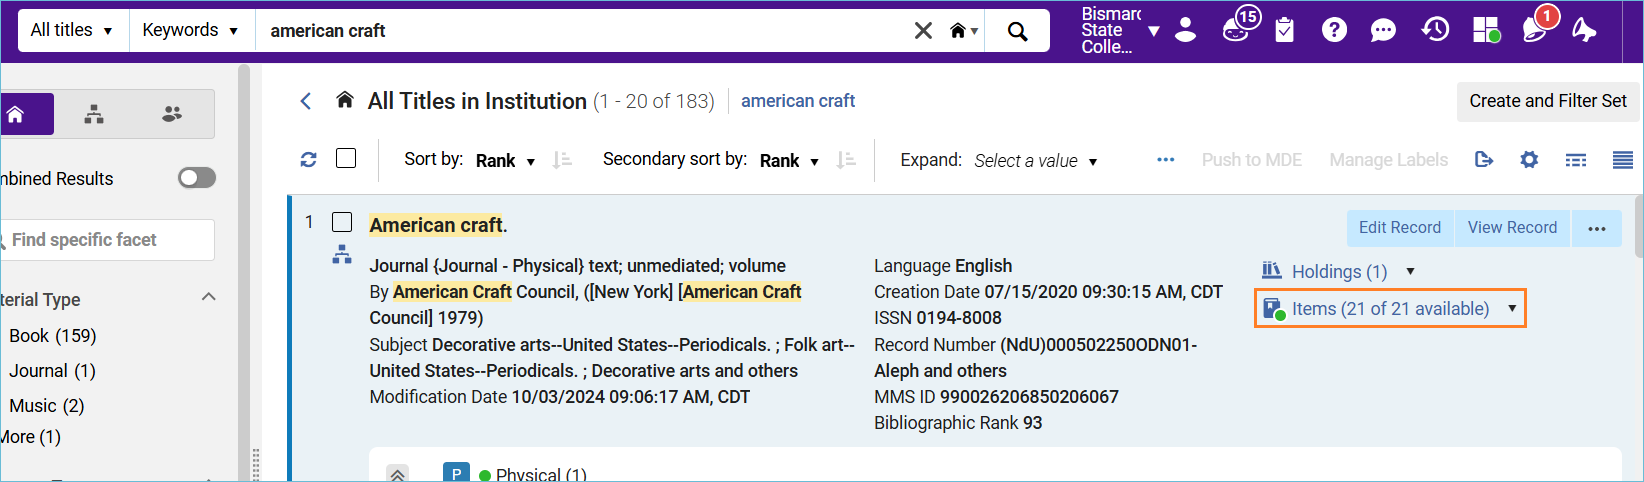
In our example there are many item records so it opened to the full item list, If you have only a few, a split-view opens and displays the items records. Click on View full items list.
Find the most recent issue in the list, and click the row action menu next to it, and select the menu option, Duplicate.
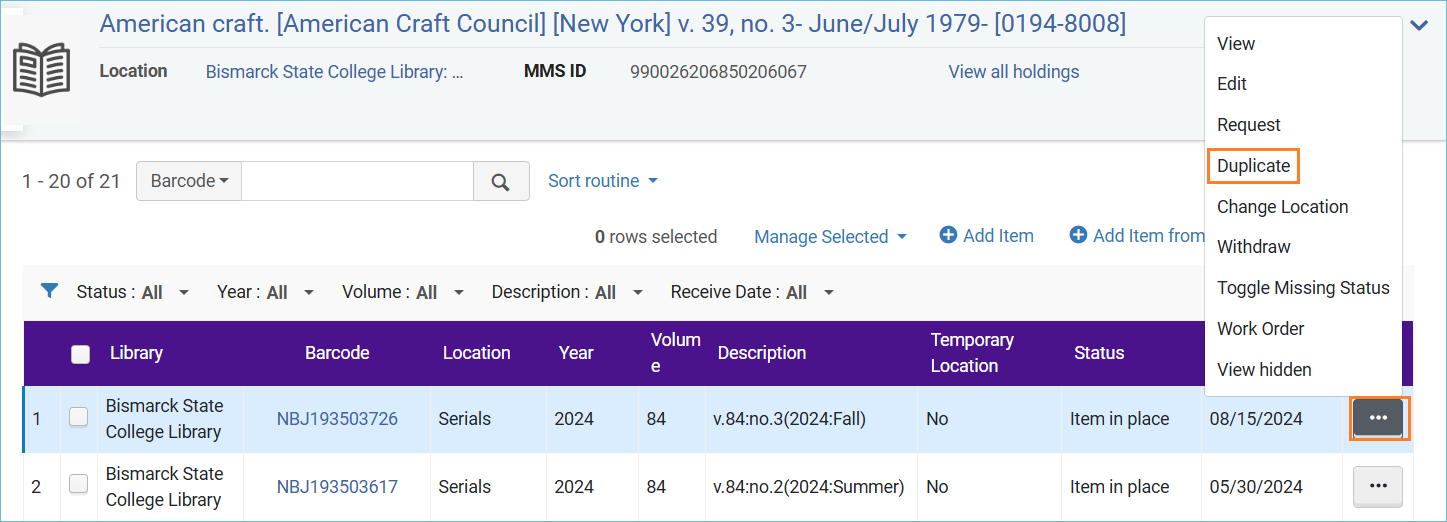
Information will be pre-filled. Update the barcode, enumeration, chronology, and description fields.

Click Save.
Method 2: Predicting issues and scanning in to receive
Find the title in Alma, as above.
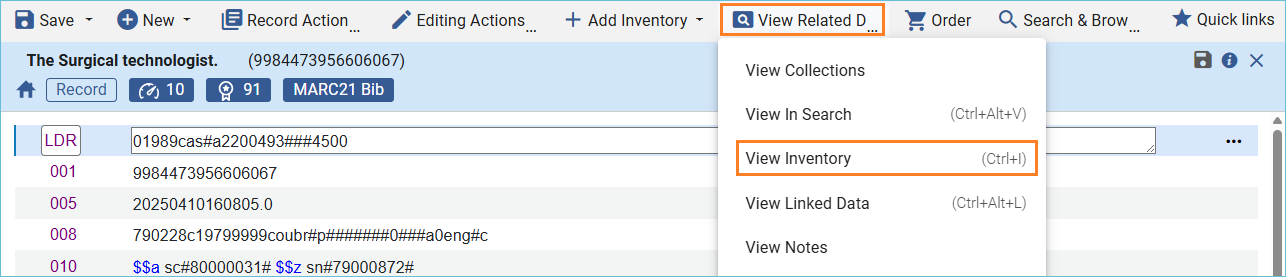
Open the title in the metadata editor, and click on the View Related Data menu, select View Inventory.
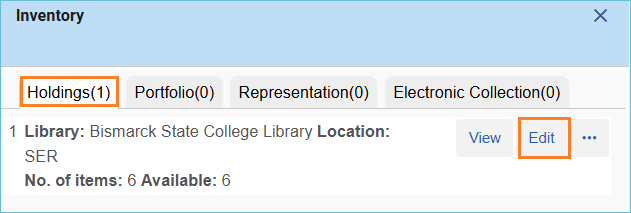
On the Holdings tab, click on Edit.
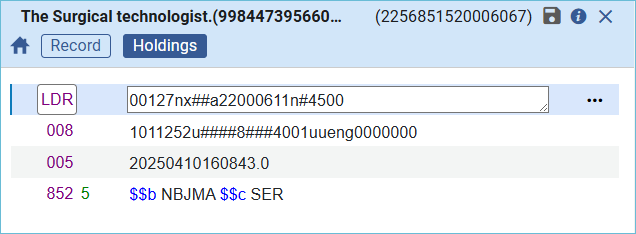
Here is the holding record before adding a prediction pattern.
Click on the Editing Actions menu, and select Expand from Template.
Select the template that best matches the serial you are working on. In this case, the serial is very regular, bimonthly.
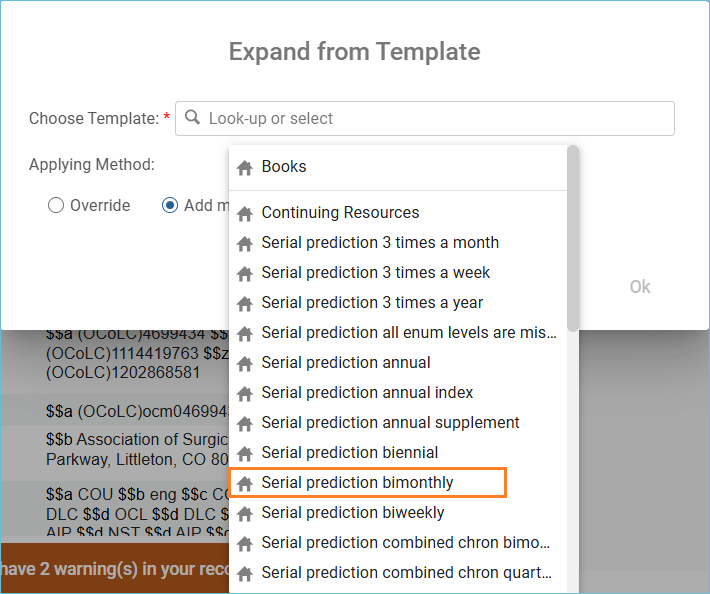
There are three choices for adding the template to the holdings record:
- Override - this will replace any existing matching fields of the record with the template fields.
- Add missing - the fields of the template will supplement only the template's fields missing in the record.
Add all - this will add all the template's fields to the record, keeping the record's existing fields, even if matched.
Image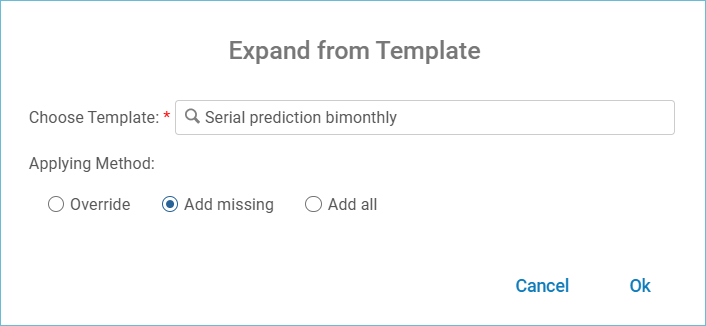
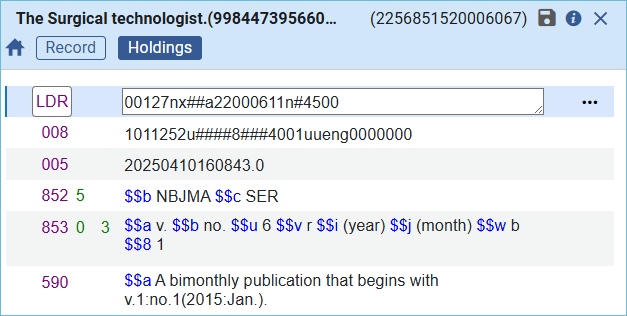
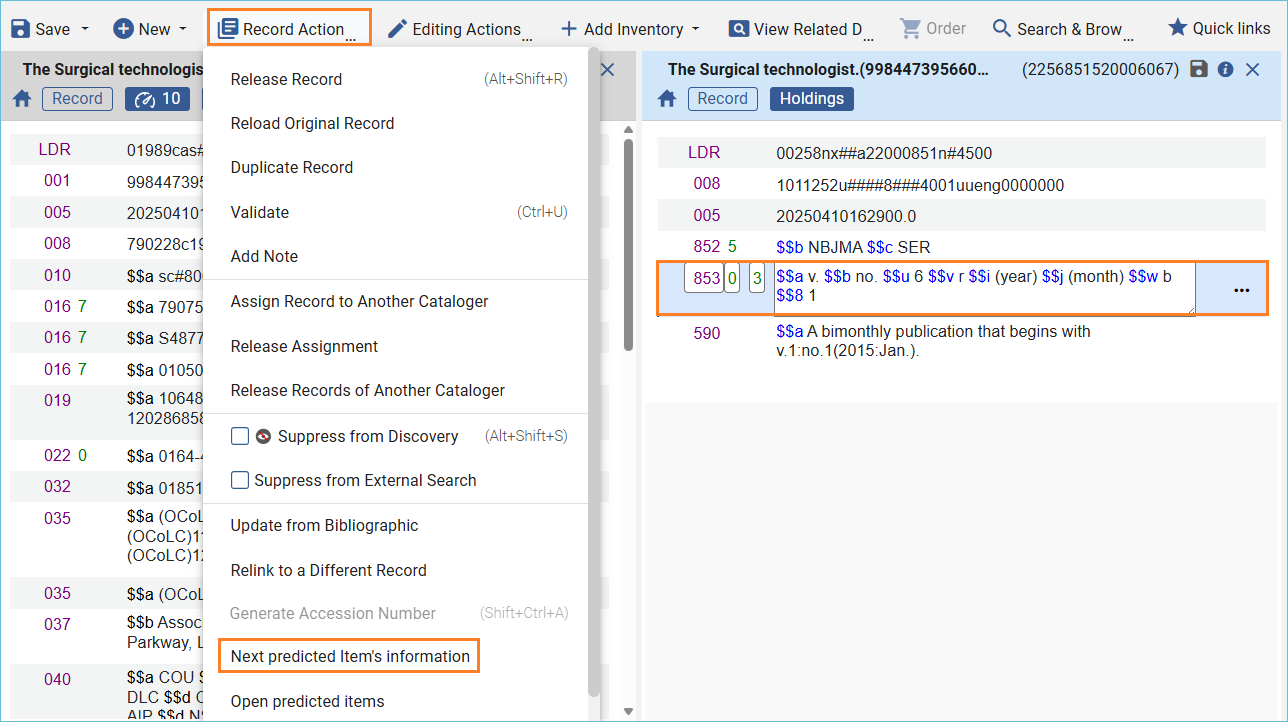
Click OK and the prediction is added to the holding record in the 853 field (or an 854/855 field depending on the template). A 590 is also added with a default message from the template. (This does not appear in Primo VE, so it is harmless. Also, it can be deleted.) Save the holdings record. Here is what the holding record looks like:
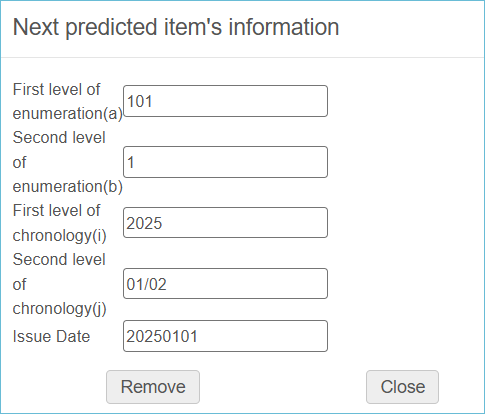
Next, add the information for the first predicted issue. Click to activate the 853 field, then click on the Record Actions menu, and select Next predicted item's information.
This box appears, fill in the issue's information. Click Close.
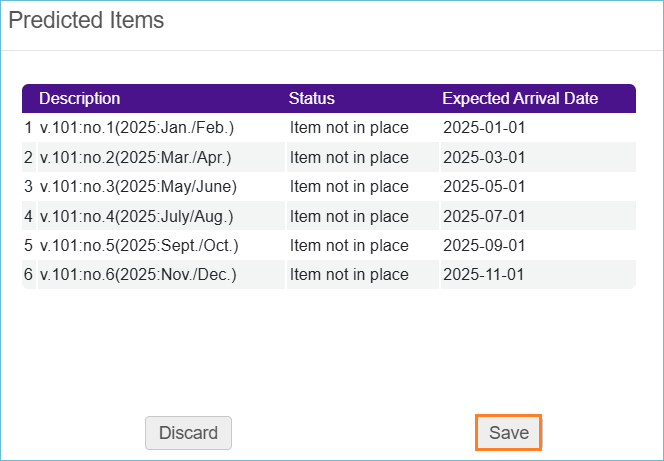
Now you can view and open the predicted issues by clicking the Record Actions menu and selecting Open predicted items. Each predicted cycle is for one year. If the prediction looks correct, click Save. If the prediction does not look correct, click Discard and edit either the holding record or the next predicted item's information.
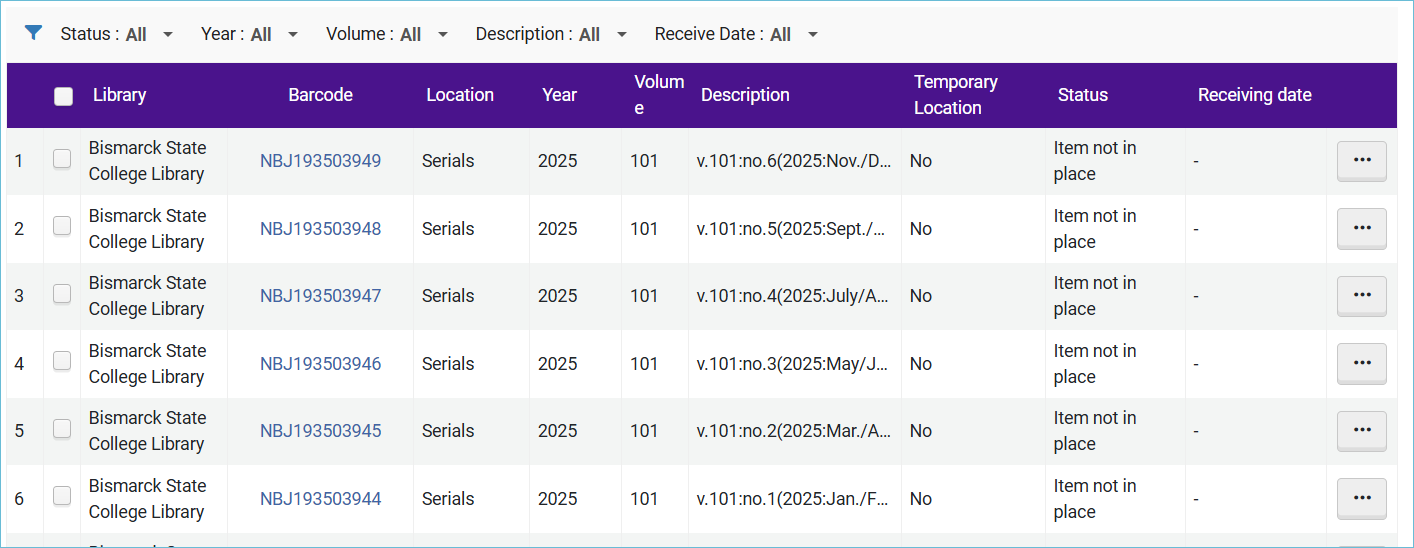
When you return to the item list for the serial, you will see the predicted items there:
The Get It area in the Primo VE view is also updated.

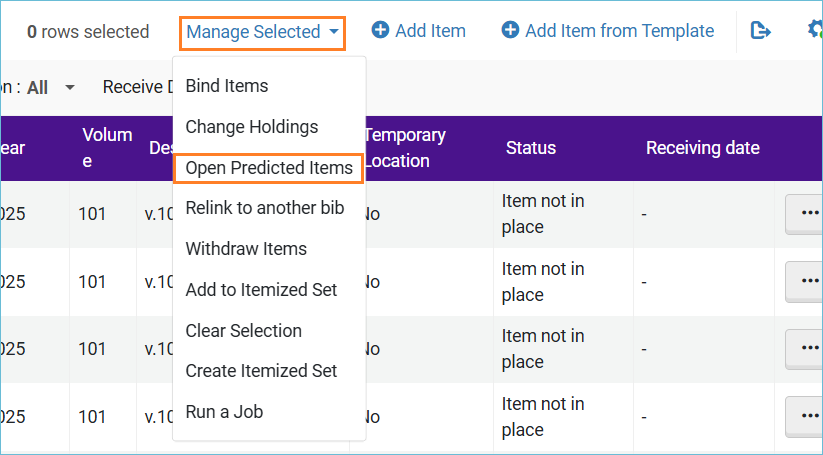
Once the holding record is set up, you can also open predicted issues from the item list. Click Manage Selected and click Open Predicted Items.
Receiving Predicted Serial Issues
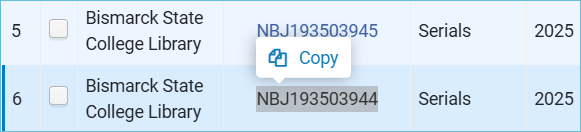
To receive a predicted issue, find the issue in the item list and copy the barcode.
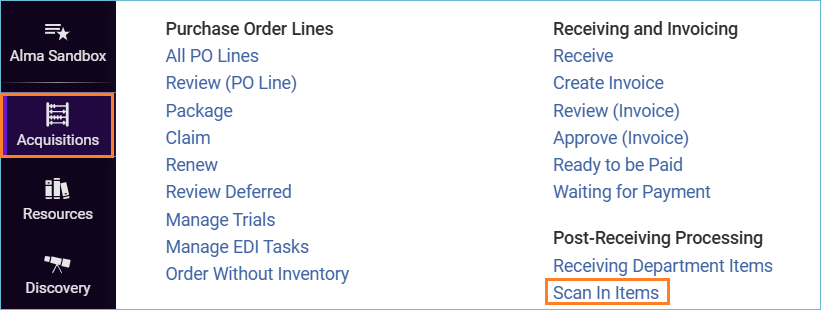
Navigate the Acquisitions menu, and under Post-receiving processing, click on Scan In Items.
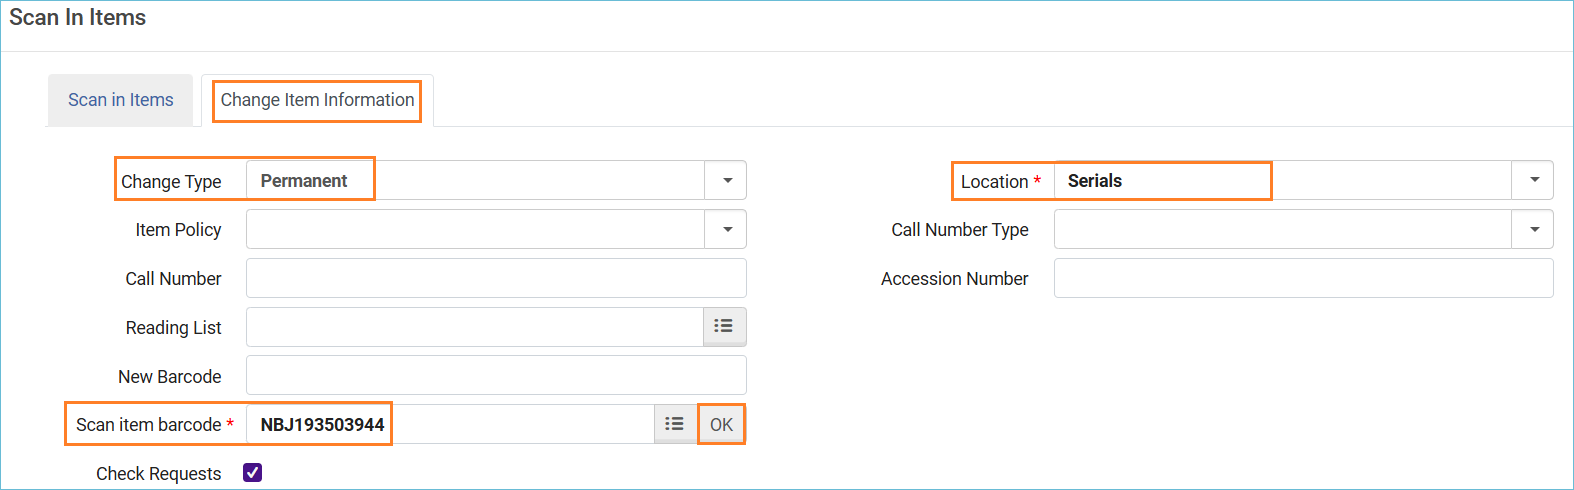
Click the Change Item Information tab to make it active. Set the change type to Permanent and set the location to the location where your library stores serials. Paste the barcode in the Scan item barcode field. Click OK.
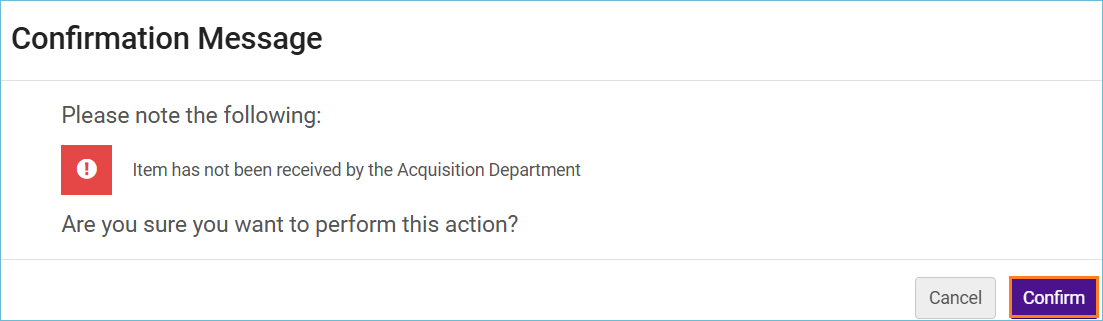
A message pops up to confirm you want to change the item's information even though the item was not received by the acquisitions department. Click Confirm.
The issue appears with the "Item in place" status after a reshelving period.

Related Trainings:
Assigning an Item to a Temporary Location
How to Move a Holdings Record to Another Bibliographic Record