SUSHI Harvesting in Alma
Updated: 3/5/2026
Alma Roles
The actions you can perform depend upon your role.
- As an Acquisitions Administrator, you can activate, deactivate, and schedule the automatic process, and you can run the job manually.
- As a Vendor Manager, you can run the job manually for a single vendor account and view a history of how often this was performed.
- As a Usage Data Operator, you can manually upload or delete COUNTER data for any vendor, manage the uploaded data files, and view usage data.
- As a General System Administrator, you can activate, deactivate, schedule, or monitor the job, view a job's history, report, and events, and configure email notifications for the job on the Monitor Jobs page.
If you have the first three roles you will be able to do most of the setup. If someone else on staff has the General System Administrator role, they can set up the automatic retrieval of SUSHI reports which only needs to be done once.
Setting Up a SUSHI Account
The configuration of the SUSHI account is done on the “Usage Data” tab of the vendor record. If you have not set up a vendor record yet, go to the Acquisitions menu > Acquisitions and Infrastructure > Vendors. Then click on +Add Vendor.

Set up the vendor account as you would any other acquisition vendor. If this vendor is solely for SUSHI harvesting, you will only need to fill in the form with the Vendor name, a code, and check the box for vendor type, “Licensor.”
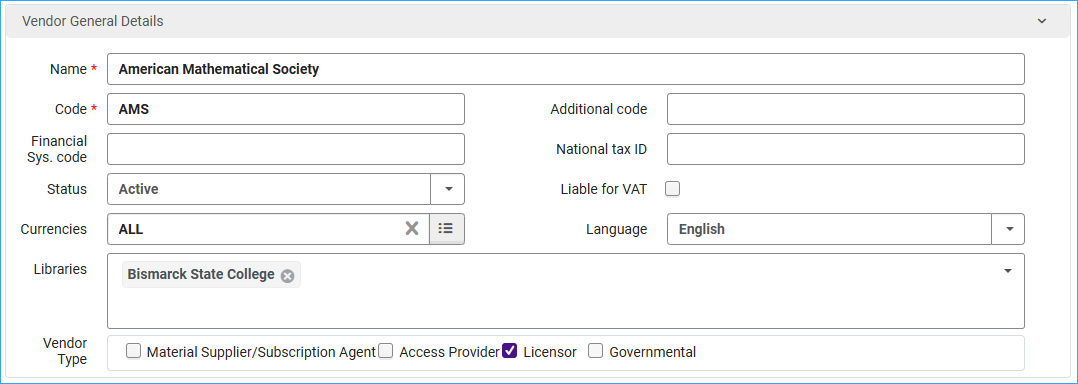
Click Save.
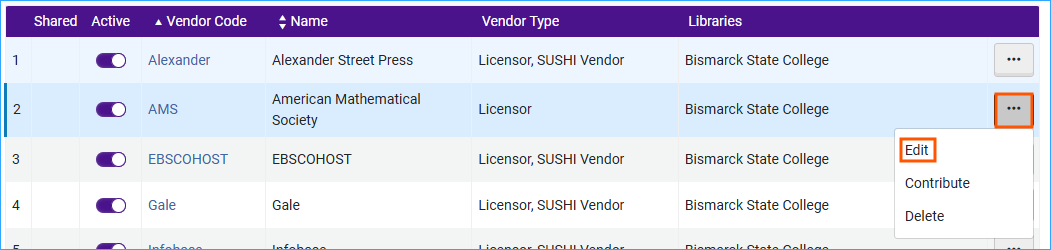
Now edit the vendor, by clicking on the Actions menu, and selecting Edit.
Click on the Usage Data tab.
Click +Add SUSHI Account. Select which SUSHI standard you want, release 4 or 5. Most vendors should be providing Release 5 data at this time.
The SUSHI Account work form appears. Click in the SUSHI Account box and start typing the vendor’s name. Alma will automatically start searching for the correct record. You can also click "the select from a list button" to the side and search from there. There is a 1:34-minute video on how to search for a Vendor account (opens in new window).
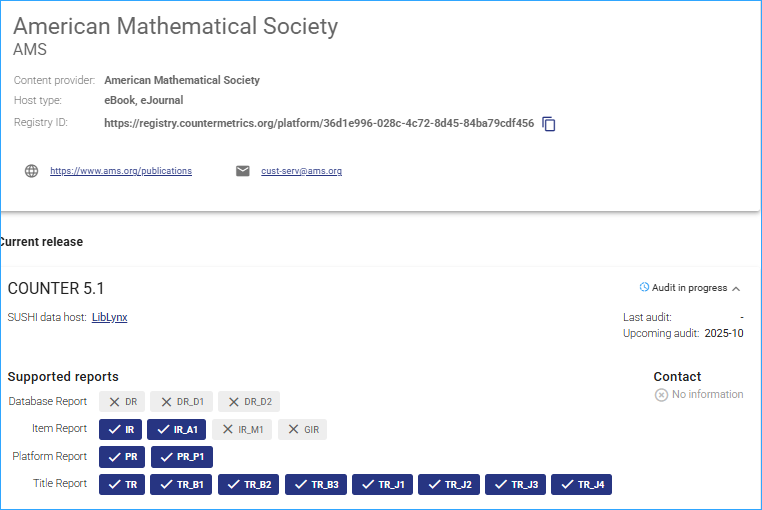
Next, you will need to enter the credentials for the account. Your vendor will supply you with credentials. Often you can find an API key by logging into the vendor's administration webpages by looking for SUSHI information. The Counter Metrics website maintains a registry of vendors, the report release they offer, and what they require for login (opens in new window).
Here is what we have filled in on our SUSHI Account Details so far (this is in the sandbox and the information is imaginary):
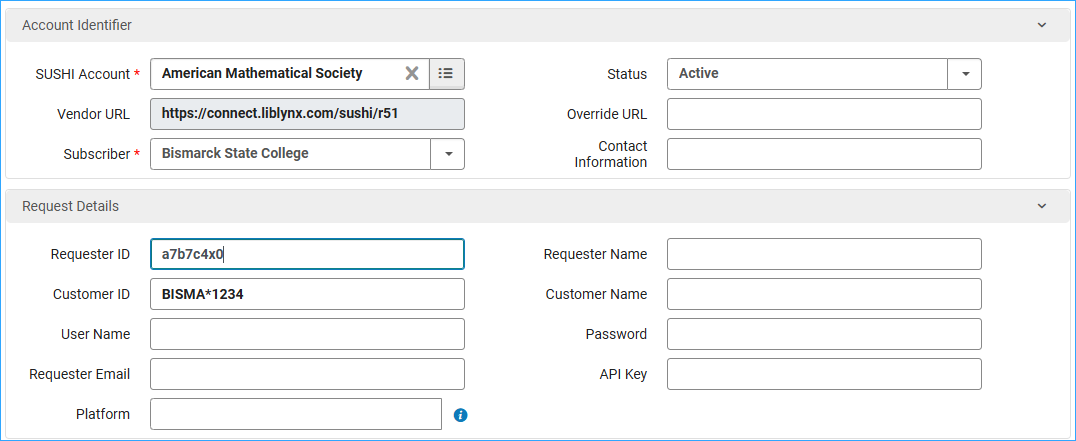
Do not fill in fields that are not required by the vendor.
To verify that the connection is working, click on the Test Connection button. A small file will be downloaded to your computer. Double-click to open it. It will open with the Visual Studio Code program. If you don’t have Visual Studio, open Notepad, use the Open menu to find the file and open it. A successful connection will have the line, "ServiceActive":true
Next, select reports to harvest from the vendor. Click on the +Add Report Type link and select reports from the dropdown list.
For information about which Counter reports are provided by a vendor, refer to the Counter Metrics Registry (opens in new window) information for the vendor.
Once you have added reports to your SUSHI account, save the SUSHI Account Details page.
Harvesting Reports
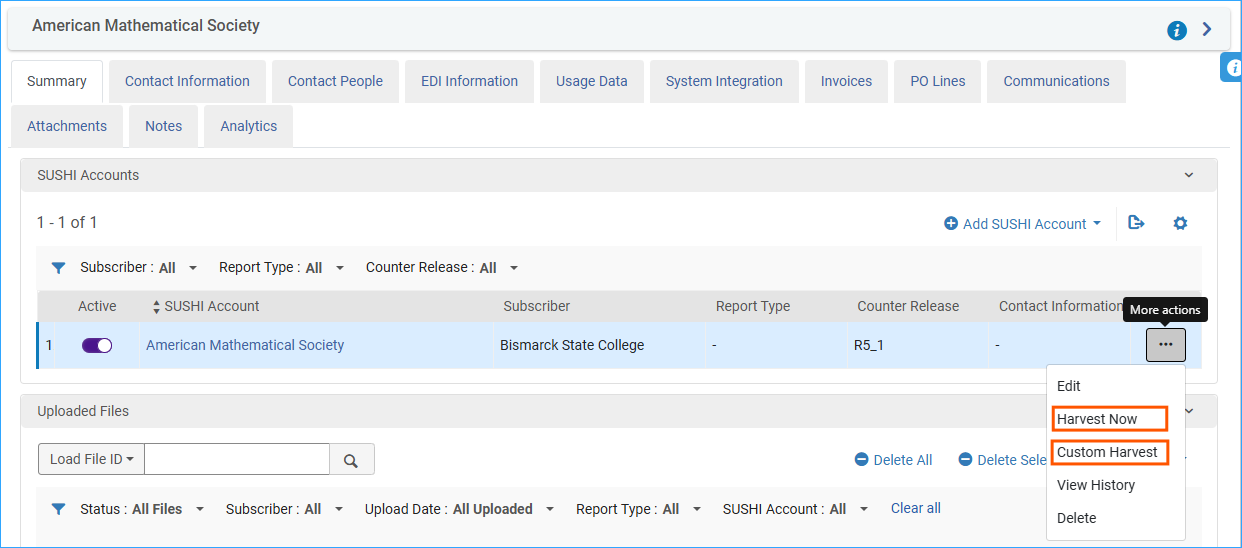
Now you can click on the Actions menu and harvest reports.
- Harvest Now – will harvest reports from the past 12 months
- Custom Harvest – presents a window that allows you to select a time frame for the harvest period
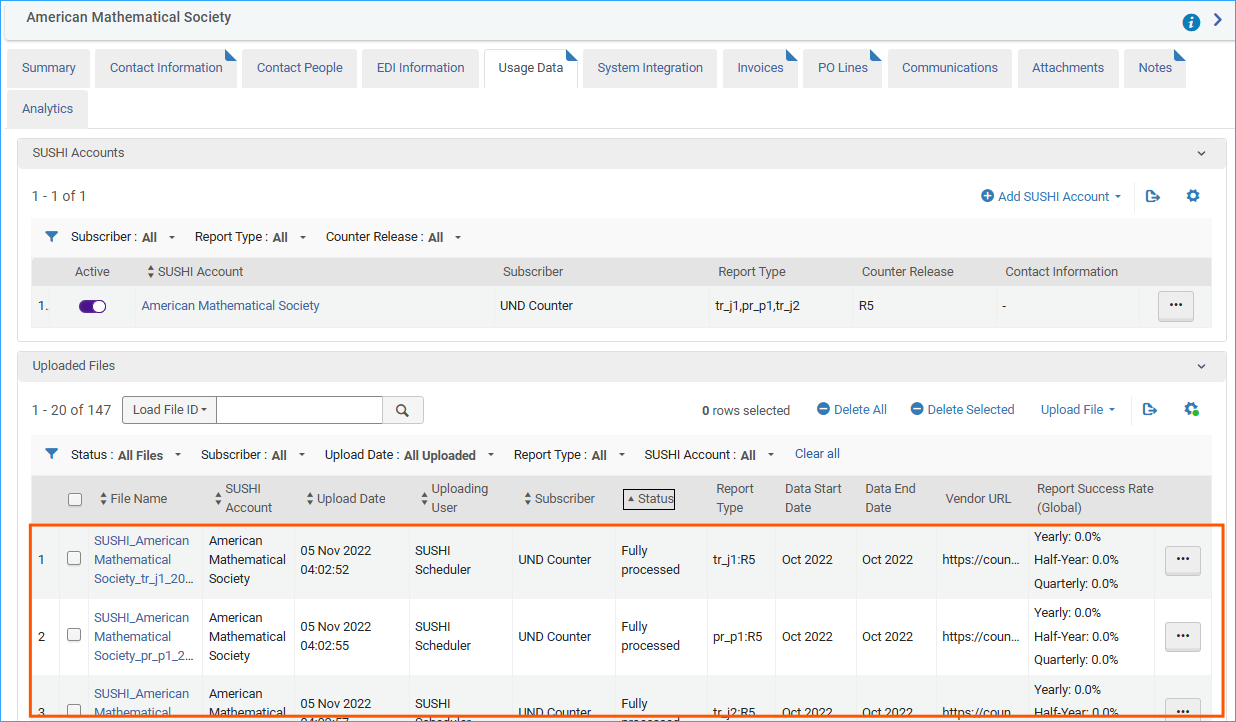
The SUSHI reports appear on the Usage Data tab in the Uploaded files area.
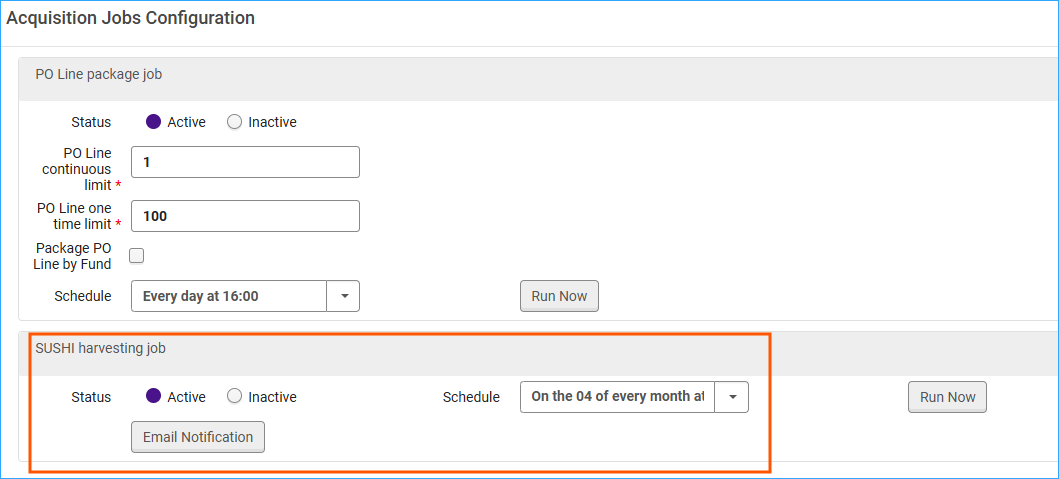
Configuring the Automatic Retrieval of SUSHI Reports
This only needs to be set up once. Go to the Configuration Menu > Acquisitions > General > Acquisition Jobs Configuration, and in the SUSHI harvesting job area, change the status to Active, and set the schedule (this can be weekly or monthly). Click Save.