Assigning an Item to a Temporary Location
updated 06/06/2025
Intermediate Topics in Resource Management
Method 1: Scan In Items
Go to the Scan In Items menu: Fulfillment > Resource Requests > Scan In Items

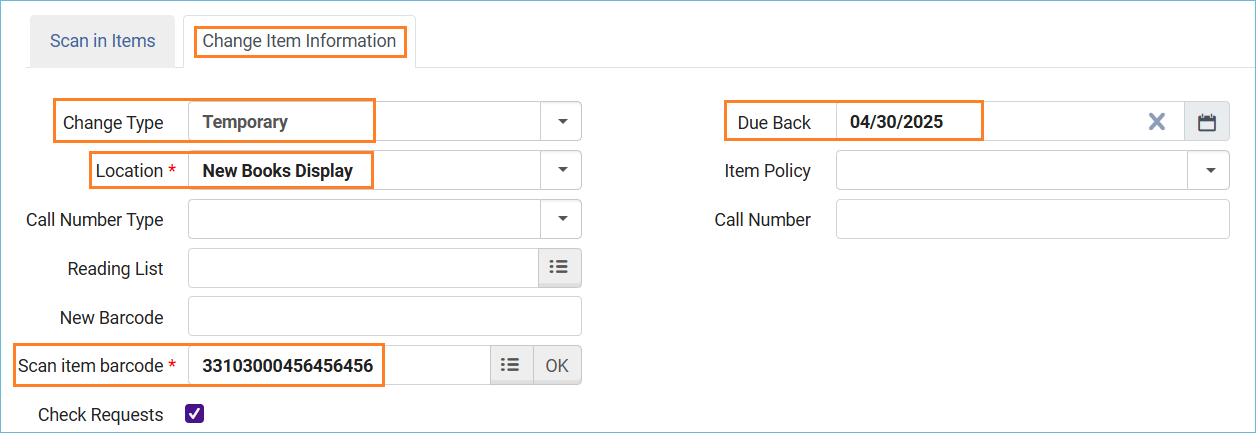
- Click the tab Change Item Information to make it active
- Make sure the Change Type is Temporary
- Enter the Location
- Due Back – This field is optional. There is a job that runs each night that will identify items that are due to be returned to their permanent location.
- Scan in the Item barcode and click OK
Now, in Primo, the item display shows in the new location:

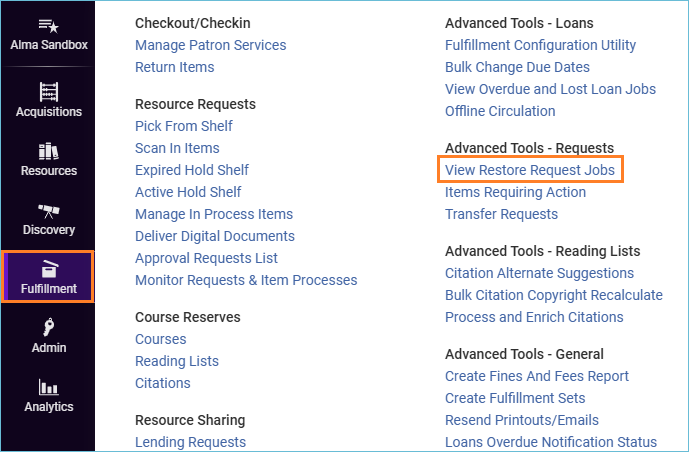
If you use the Due Back field, you will want to check the report that runs each night that indicates when items are to be returned to their permanent location.
Go to View Restore Request Jobs: Fulfillment > Advanced Tools > View Restore Request Jobs
Returning an Item to its Permanent Location
Go to the Scan In Items menu: Fulfillment > Resource Requests > Scan In Items
- Click the tab Change Item Information to make it active
- Make sure the Change Type is Restore
- Scan the barcode into the Scan item barcode box and click OK.

Method 2: Assign a Temporary Location When Creating the Item Record
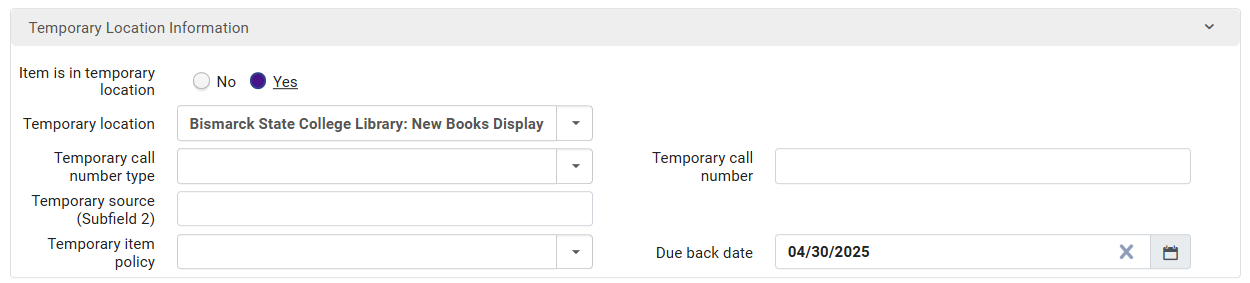
When creating an item record for material you can assign the material to a temporary location. Near the bottom of the work form there is a temporary location area.
- Is the item in a temporary location - select Yes
- Select the temporary location from the drop-down menu
- If there is a temporary item policy you can add that from a drop-down menu
- You can assign a Due back date
- View Restore Request Jobs will indicate when items are due back to their permanent locations
Related Trainings:
How to Move a Holdings Record to Another Bibliographic Record