Polaris Leap: Circulation Basics
Updated: 4/28/2025
OVERVIEW:
All Circulation functionality is available using the Polaris Leap web app. Since it is fully web-based, it is accessible from anywhere with an internet connection.
To access Leap, open a web browser (Chrome or Firefox is recommended) and sign in with your credentials.
- Leap Production/Live Environment: https://polaris.odinlibrary.org/leapwebapp/login
- Leap Test/Training Environment: https://odin-training.polarislibrary.com/leapwebapp/login
If you do not know your Username and/or Password, contact the ODIN Office to set up access for you.
SEARCHING
To loan materials to a patron, search for and retrieve the patron account using the quick-search bar or the FIND TOOL.
Quick-search bar
When using the quick-search, entering the patron barcode is recommended; however, their name, email address, mailing address, or phone number may also be used:
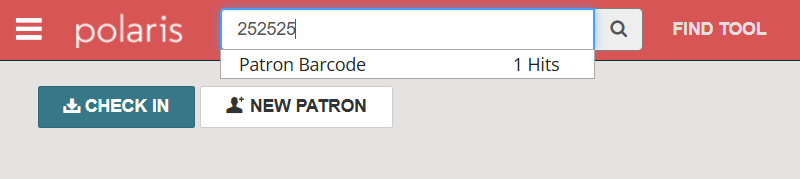
As you type in your search term, suggestions will populate below:

You may choose an option from the suggestions or complete typing your term manually before launching the search.
If your search term matches multiple records, the Find Tool will open automatically:
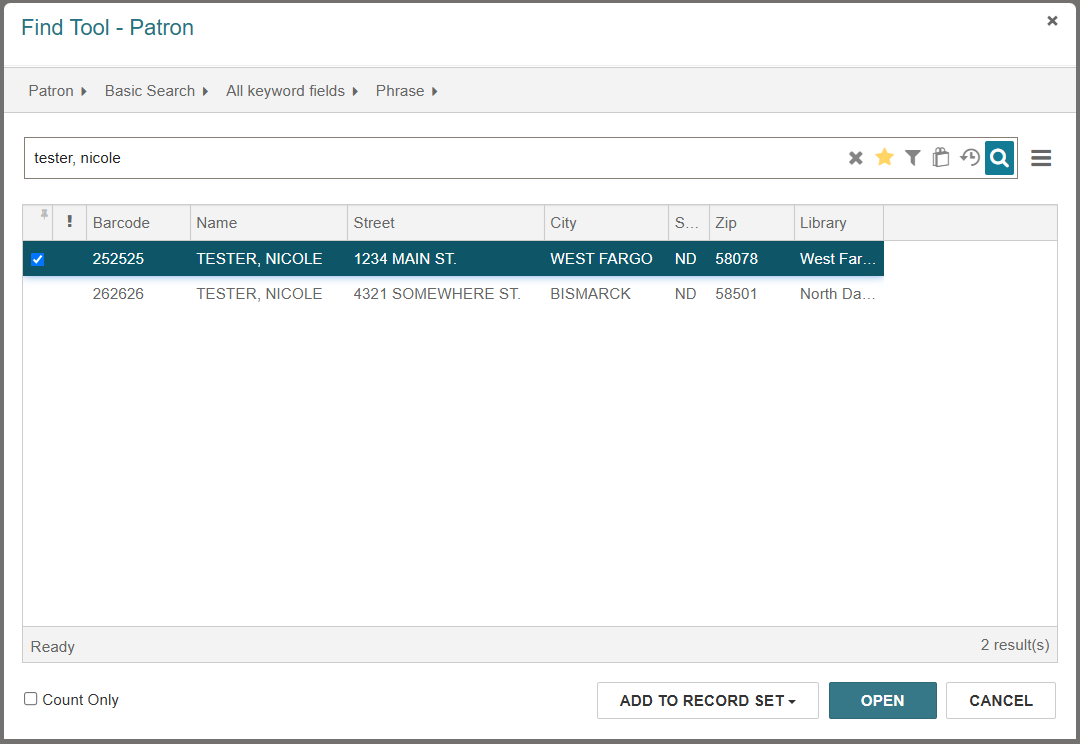
NOTE: If retrieving an account using a search term rather than a barcode, double-check the owning library to ensure the record belongs to your library. Some patrons have a ND State Library account as well as an account for their local library.
Find Tool
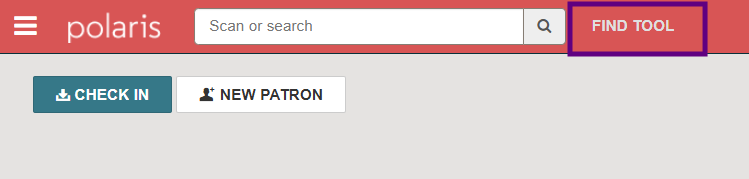
Alternatively, you may click the FIND TOOL button to start with a more granular search:
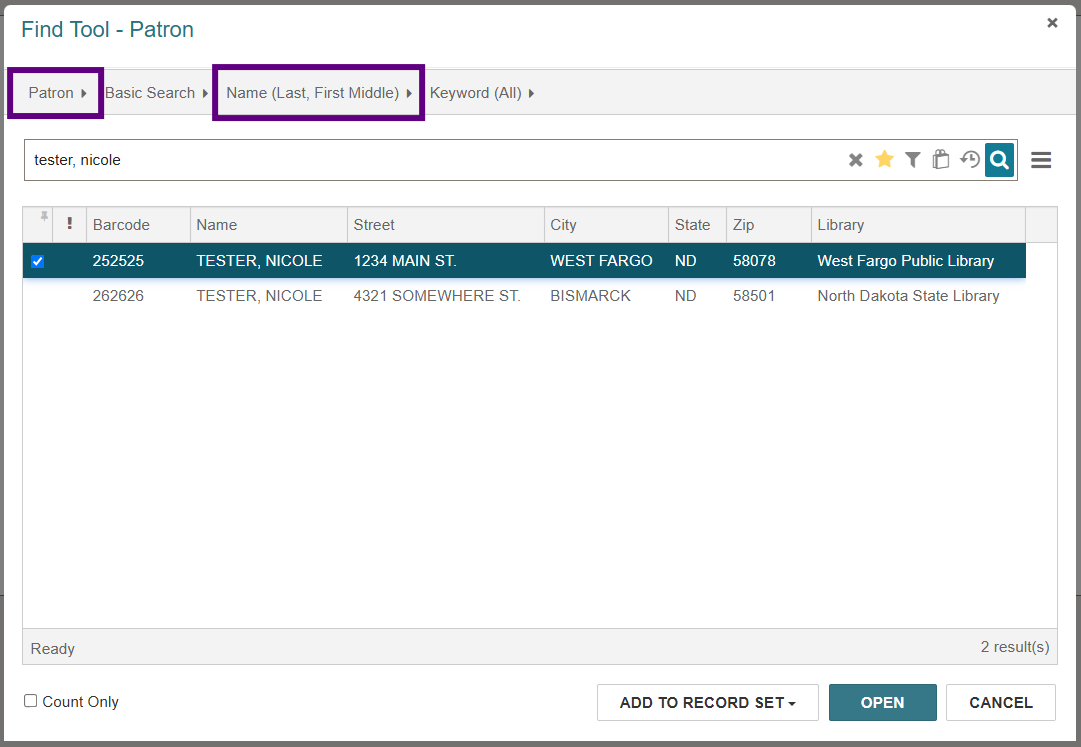
Ensure Patron is selected in the first column and set your search field (Qualifier) in the third column. Then, enter your search term and launch the search:
NOTE: You may choose to set a default search filter for your library. This ensures only your library’s accounts appear during a search.
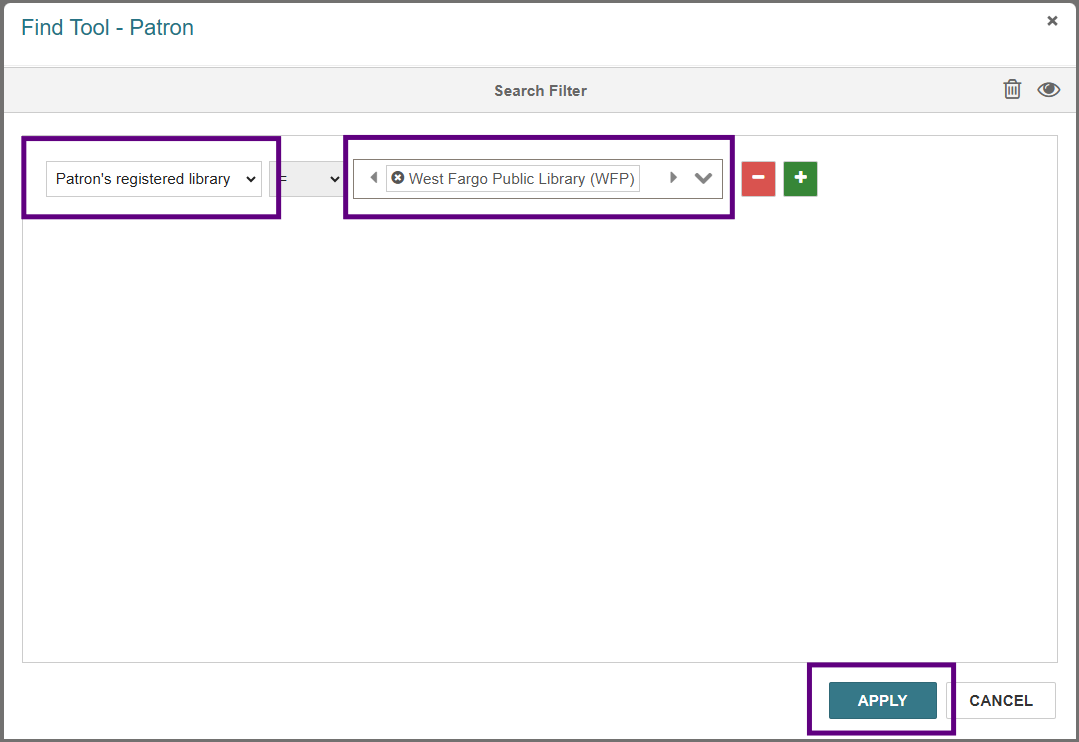
To set a default search, open the filter icon:

Click +ADD CONDITION, choose Patron’s registered library from the first drop-down menu, and select your library from the second drop-down menu. Click APPLY:
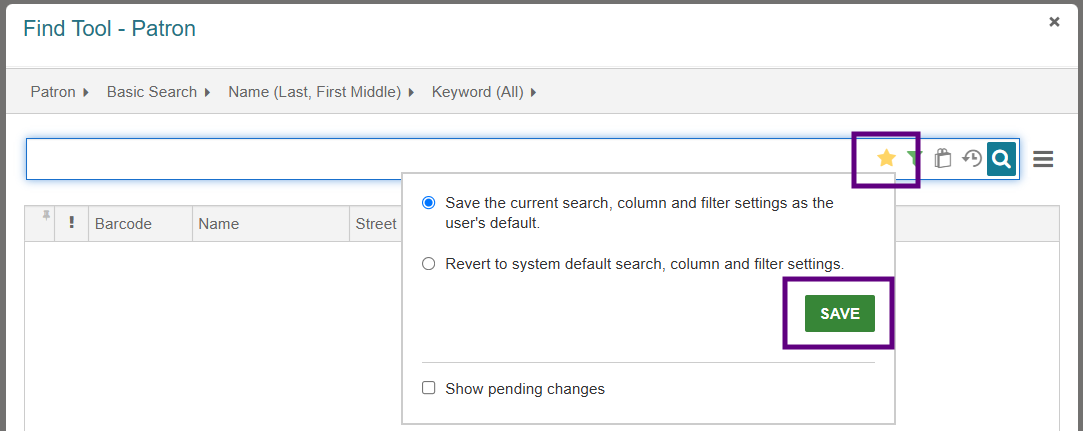
The filter icon will turn green, indicating at least one filter is in place. To save the filter as your default, open the star icon, select Save the current search, column and filter settings as the user’s default option, and click SAVE:
Now that your filter is in place, Leap will only retrieve results for your library:
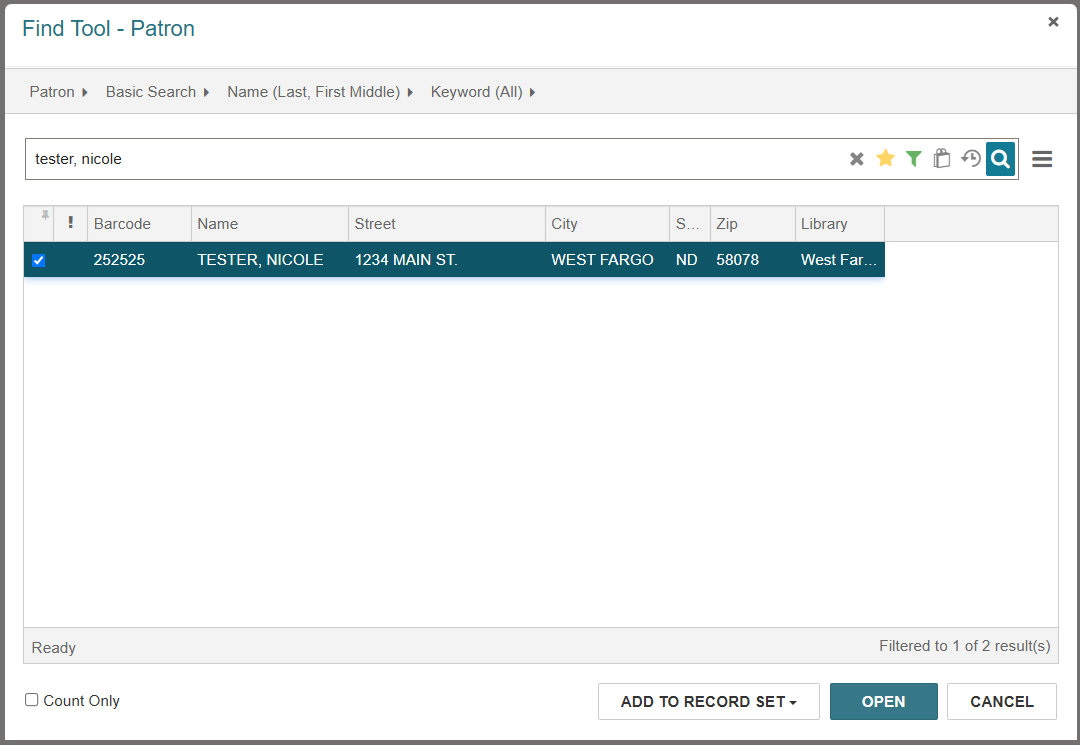
Open your selected record by double-clicking it or you may click the checkbox to highlight it and choose OPEN.
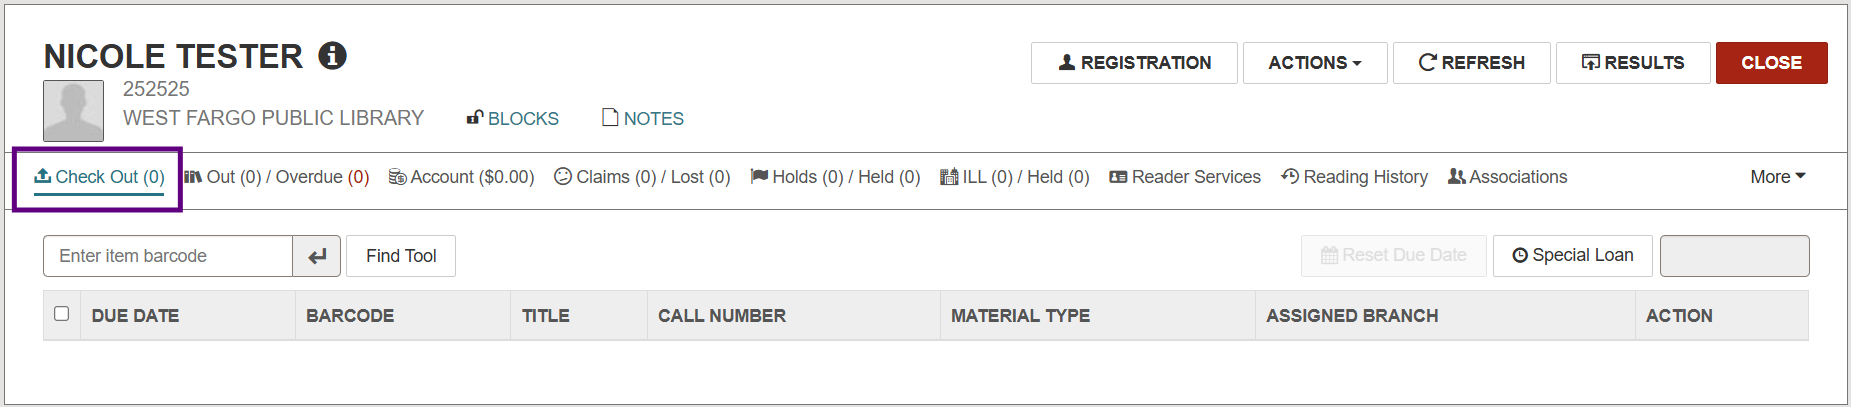
The patron record will open on the Check Out screen:
For additional information, visit Using the Leap Find Tool (coming soon!).
LOANING / CHECKING OUT
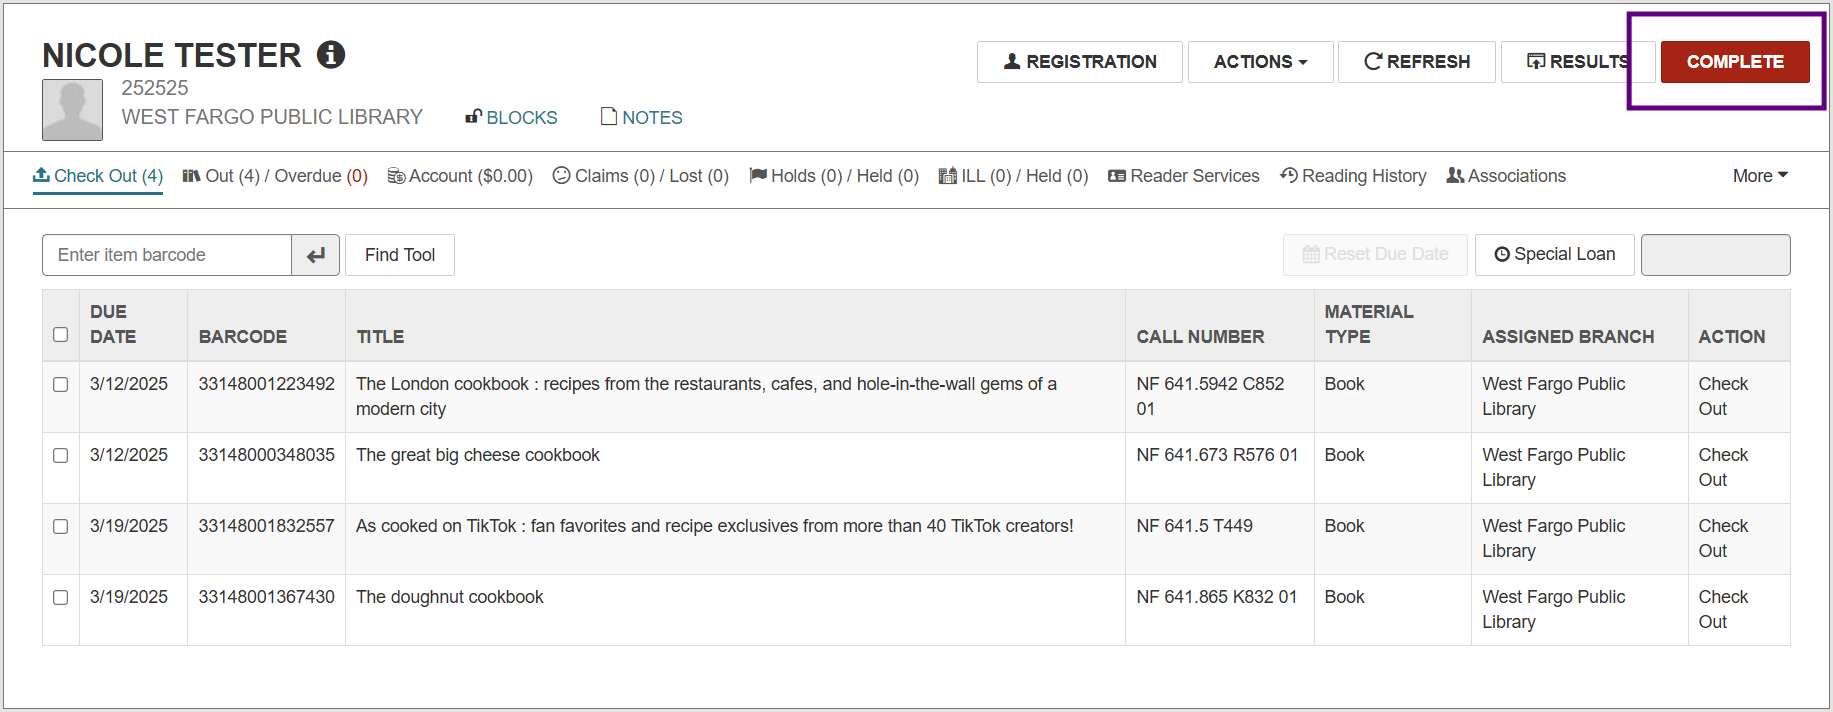
Under the Check Out screen of the patron record, scan (or type) the item barcode into the barcode field:
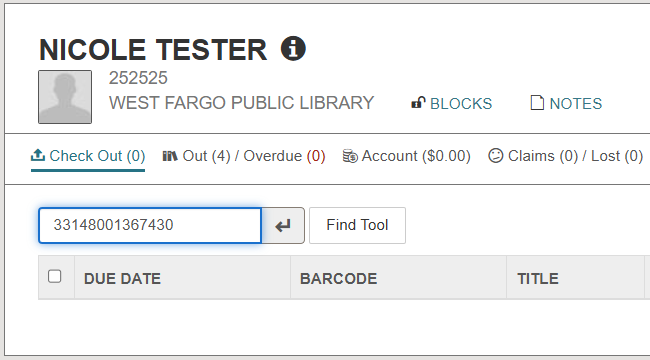
When the item is checked out, the due date, barcode, and applicable bibliographic information will display:
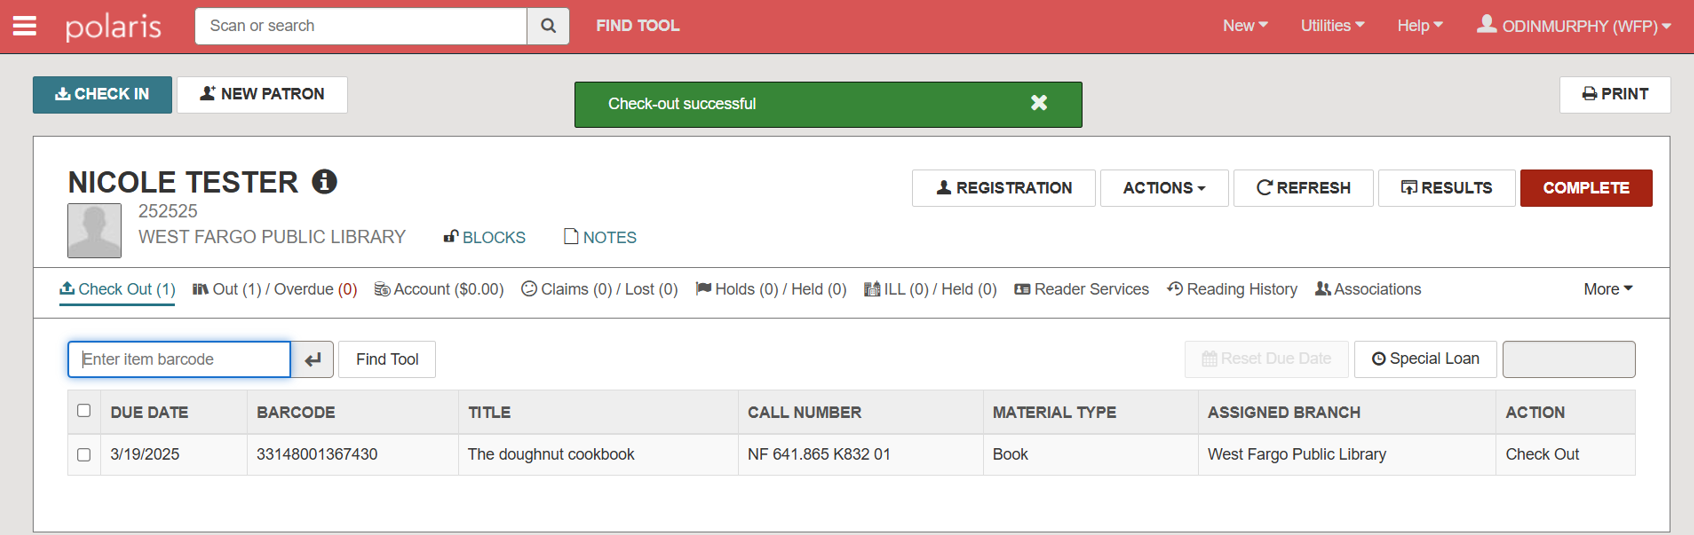
Continue scanning barcodes until all items have been checked out.
NOTE: If an item is missing a barcode, you may click Find Tool next to the barcode field to conduct a manual search for the item.
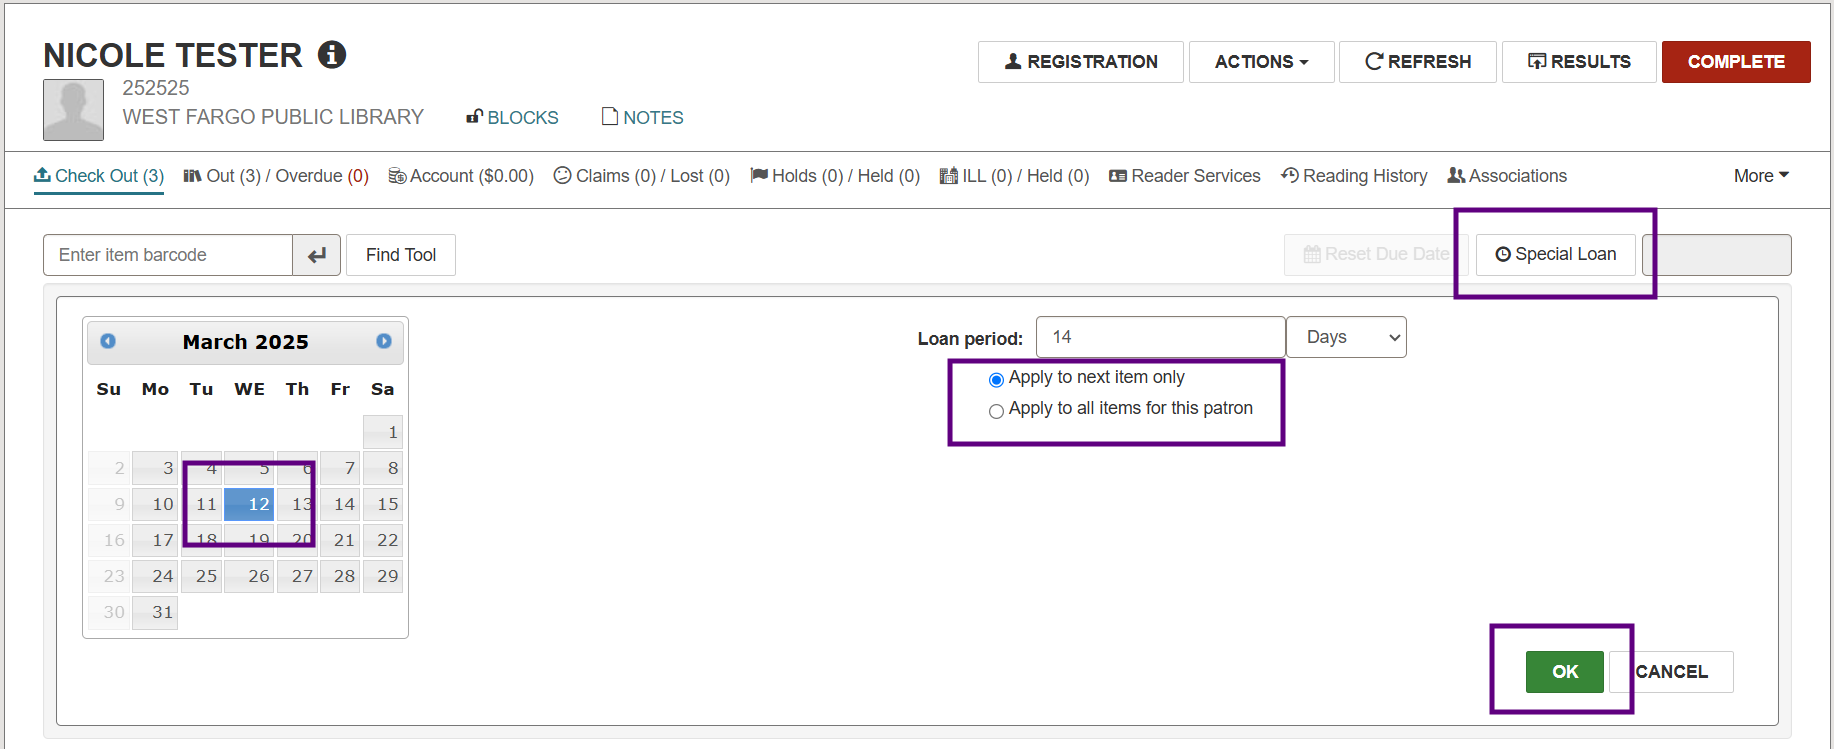
To assign a due date different than your system default, click Special Loan, select the new due date from the calendar, specify whether the new due date should apply to the next item only or all items for this patron, and click OK:
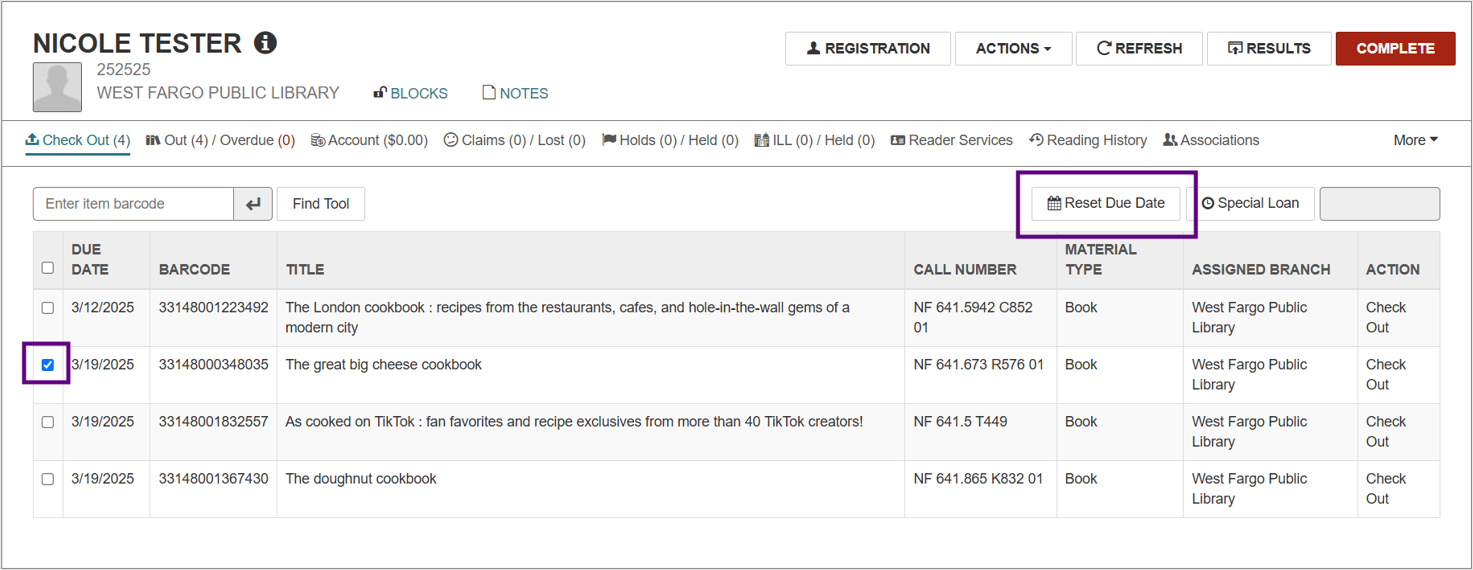
If necessary, you may assign a different due date to items that have already been scanned. When items are selected, the Reset Due Date button becomes active:
When you are ready to finalize the transaction, click COMPLETE. If you use a receipt printer, this will prompt a receipt to print:
RENEWING
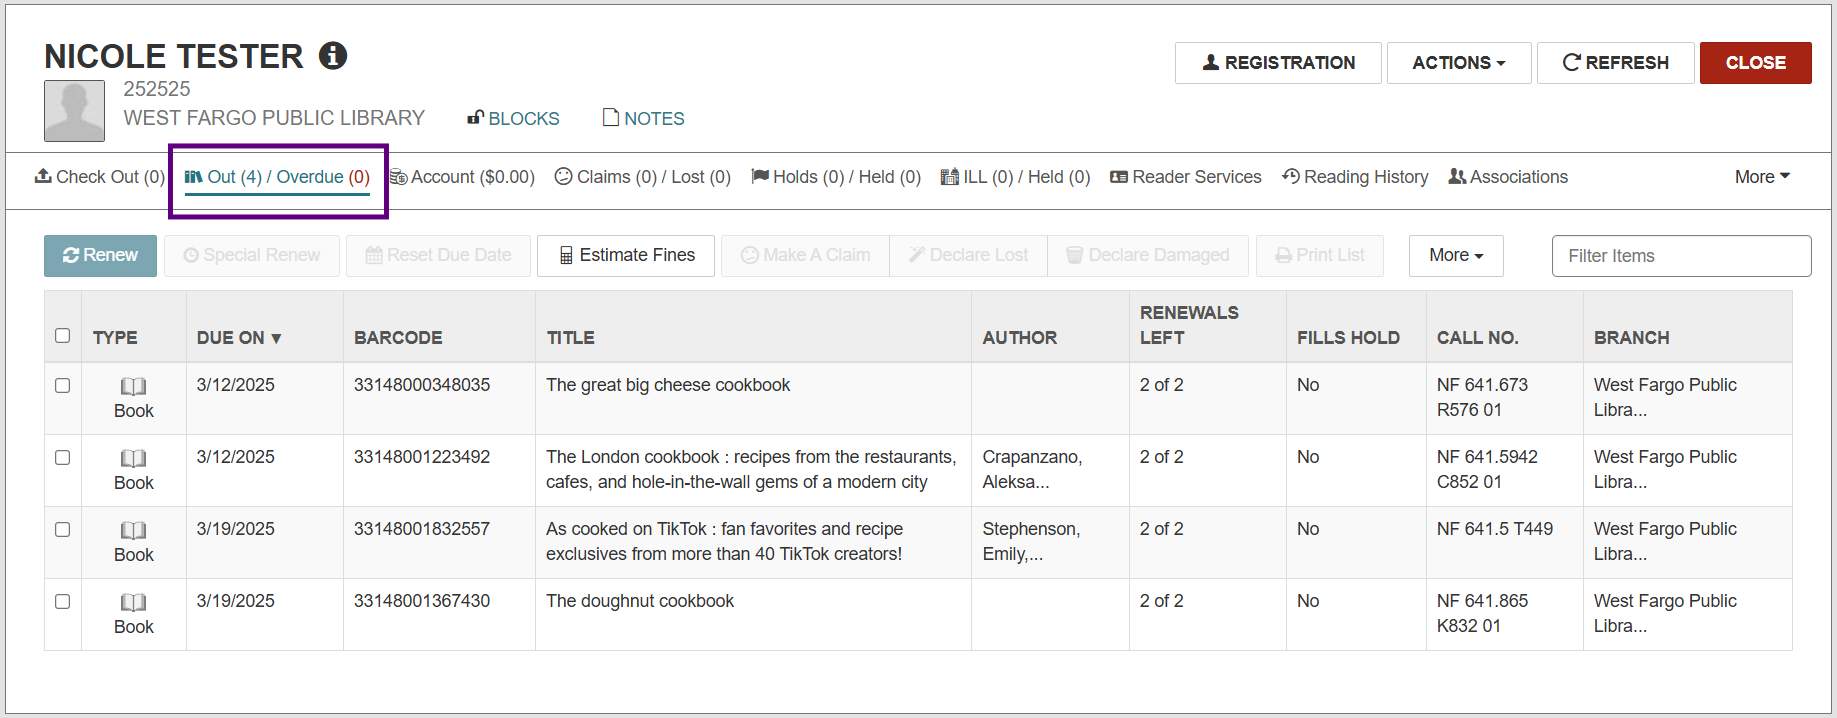
Search for and retrieve the patron’s account. Navigate to the Out / Overdue tab to view the patron’s current check-outs:
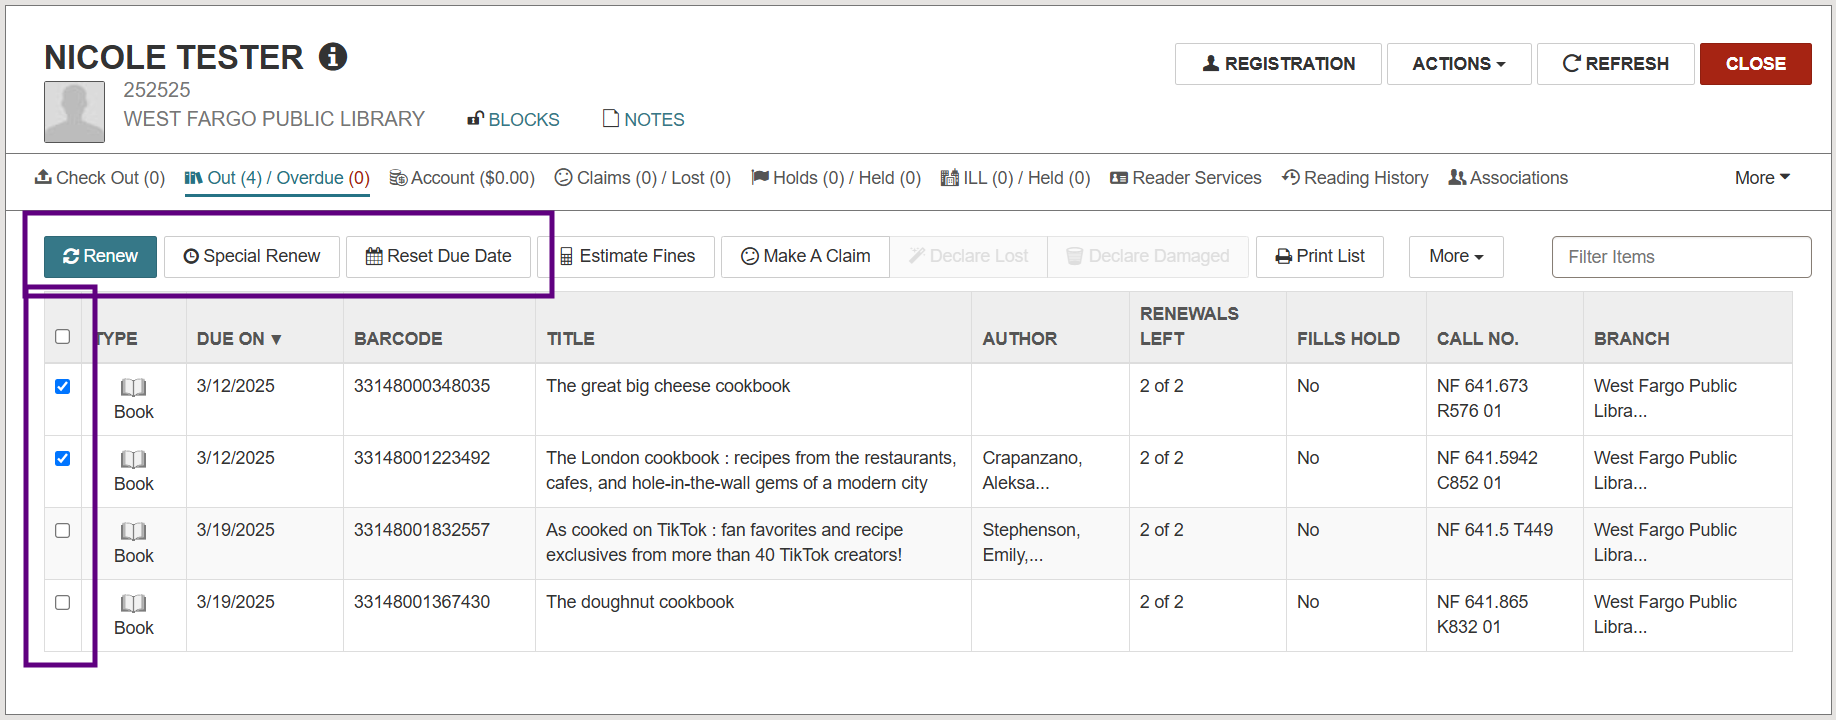
Once you select one or more of the checkboxes on the far left of the screen, the Renew, Special Renew, and Reset Due Date buttons will become active:
Renew: Renews all selected, eligible items for an additional loan period. For example, if the loan period for the item is 14 days, the renewal will add 14 days from the current date (rather than adding 14 days from the due date).
Special Renew: Renews all selected, eligible items to a specific date. When you click Special Renew, an additional screen will appear. Choose your desired due date from the calendar or enter an alternative loan period:

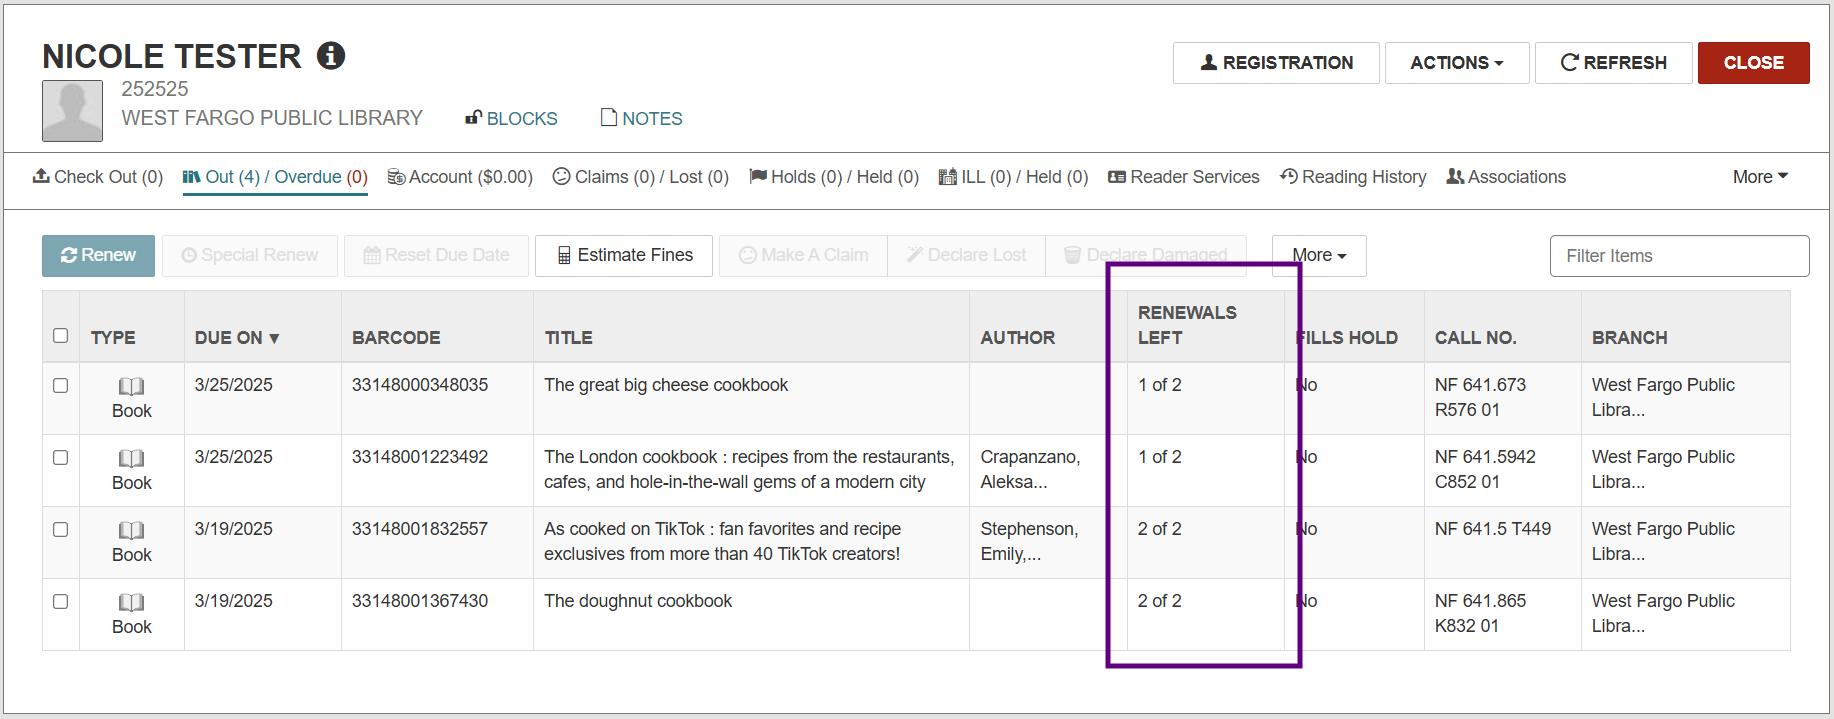
The Renew or Special Renew options will subtract 1 from the Renewals Left column:
Reset Due Date: Renews all selected, eligible items to a specific date without subtracting from the Renewals Left count.
RETURNING / CHECKING IN
Items can be returned or checked in to Leap a number of ways:
The CHECK IN screen
The most common way to check in returned materials is via the Leap CHECK IN screen. From the main Leap home screen, click the CHECK IN button in the upper left corner:

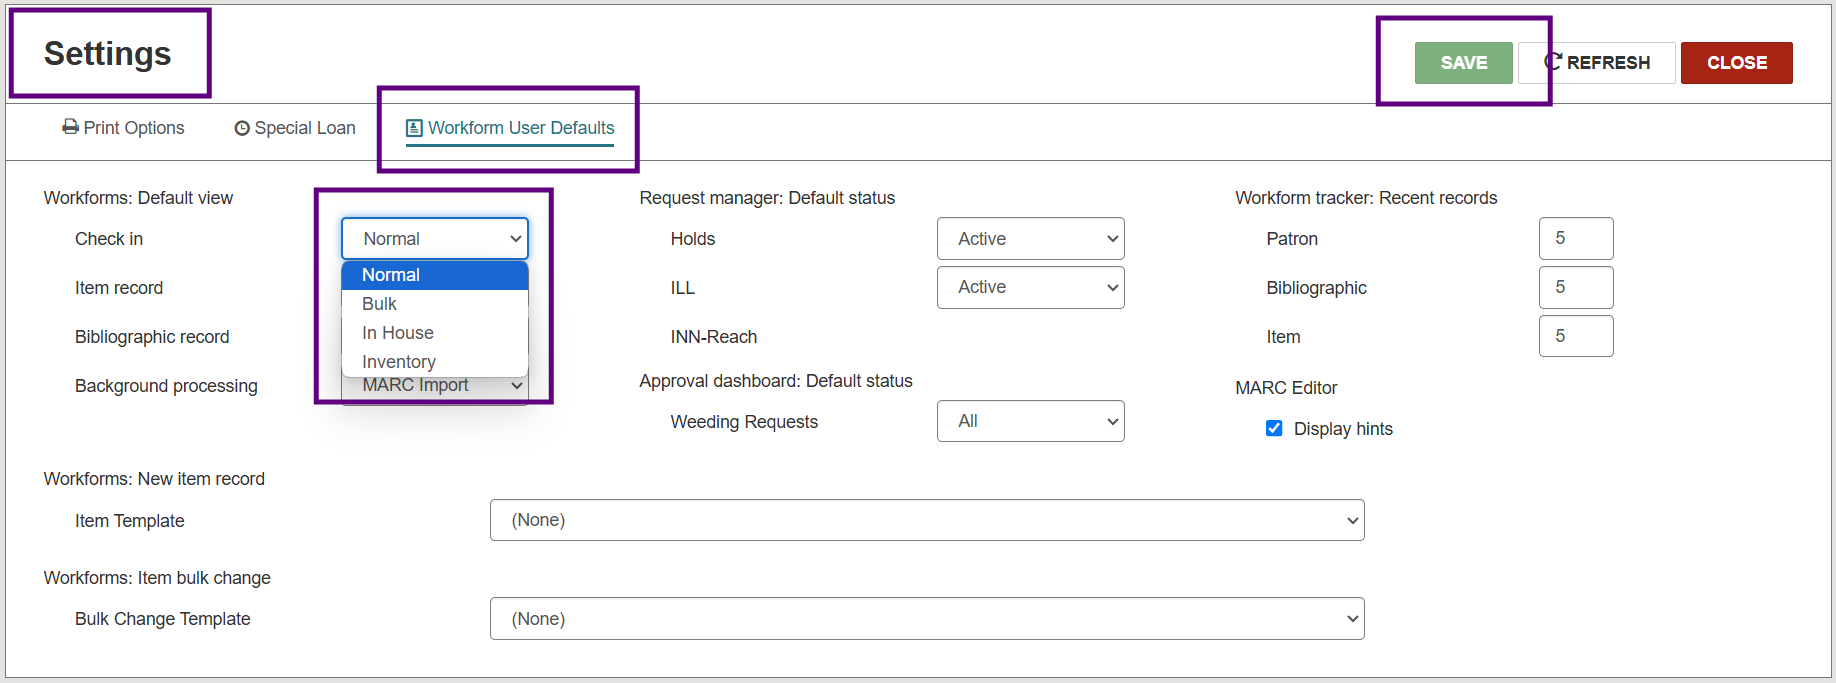
Note: Your CHECK IN screen can default to either Normal or Bulk check in, depending on your preference selected under Settings > Workform User Defaults:
The CHECK IN screen displays different “modes” for checking in materials:
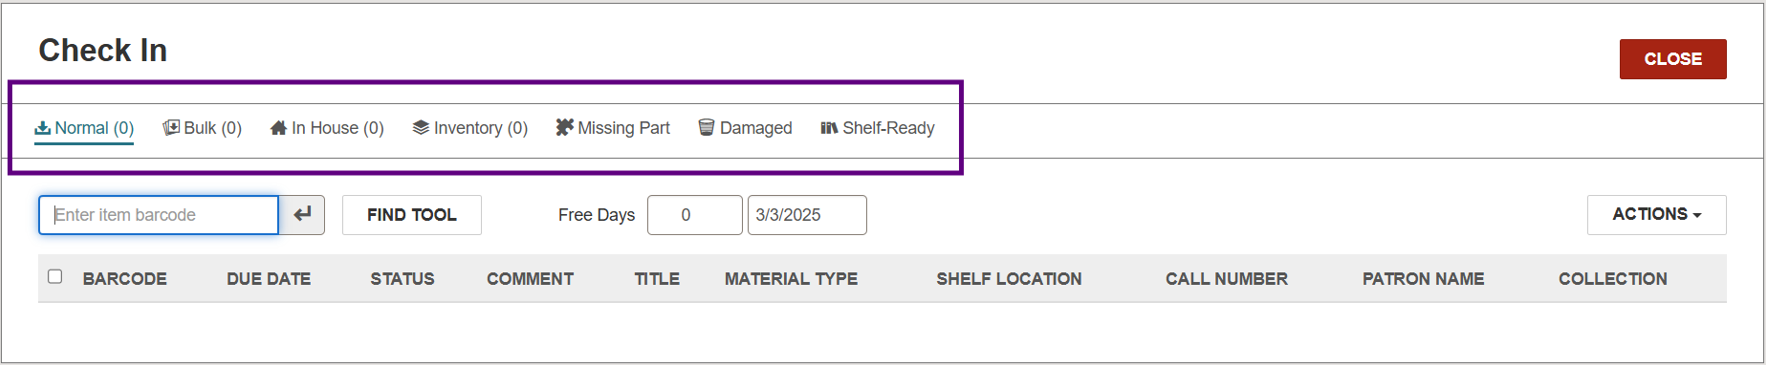
- Normal: Used for most returns, individual or bulk (i.e. a return drop). If there are overdue fines associated with any returns, Normal mode will display an Overdue Fine dialog box allowing staff the option to charge, adjust, or waive the fine before checking in the item(s).
- Bulk: Can be used for bulk returns. If there are overdue fines associated with any returns, Bulk mode will automatically apply them while checking in the item(s).
- Note: There is no difference between Normal & Bulk check in modes if your library does not charge overdue fines.
- Note: There is no difference between Normal & Bulk check in modes if your library does not charge overdue fines.
- In-House: Used for tracking usage of items that patrons use within the library (i.e. board games, puzzles, non-circulating materials).
- Inventory: Used for conducting inventory. Scanning items in under this tab will update the Last Inventory Date field in the item record. For additional information on conducting inventory, visit Inventory in Polaris Leap.
- Missing Part: ‘Manage Missing Parts’ dialog box will appear with the option to add a Special item Check-in Note or Make the Item Unavailable. Places item into Claim Missing Parts circulation status.
- Damaged: ‘Declare Item Damaged’ dialog box will appear with the option to Declare damaged: Charge and notify or Declare damaged: Update item only. You may also add an optional Special item Check-in Note. Places item into Damaged circulation status.
- Shelf-Ready: Used to check in shelf-ready materials received from a supplier (Enriched EDI).
Checking In via the Patron Record
Retrieve the patron’s record and navigate to the Out / Overdue tab. Upon selecting one of the checkboxes on the far left of the screen, the buttons above the headers will become active. Choose Check In:
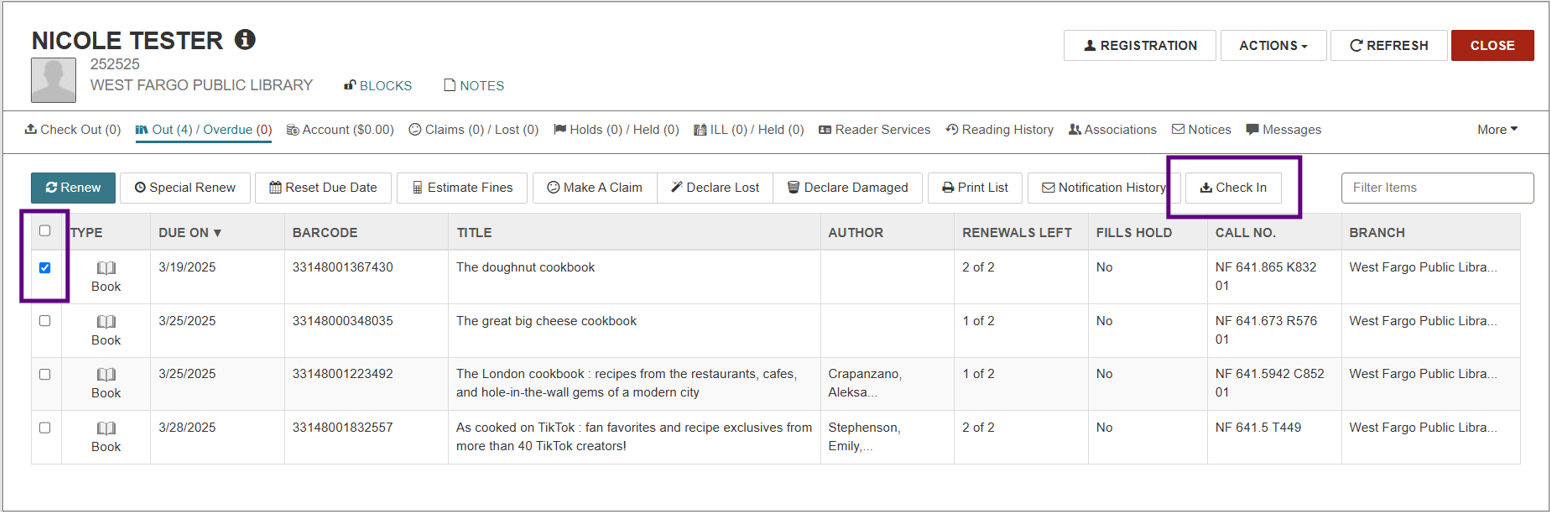
Depending on the size of your screen, you may need to click More > Check In:
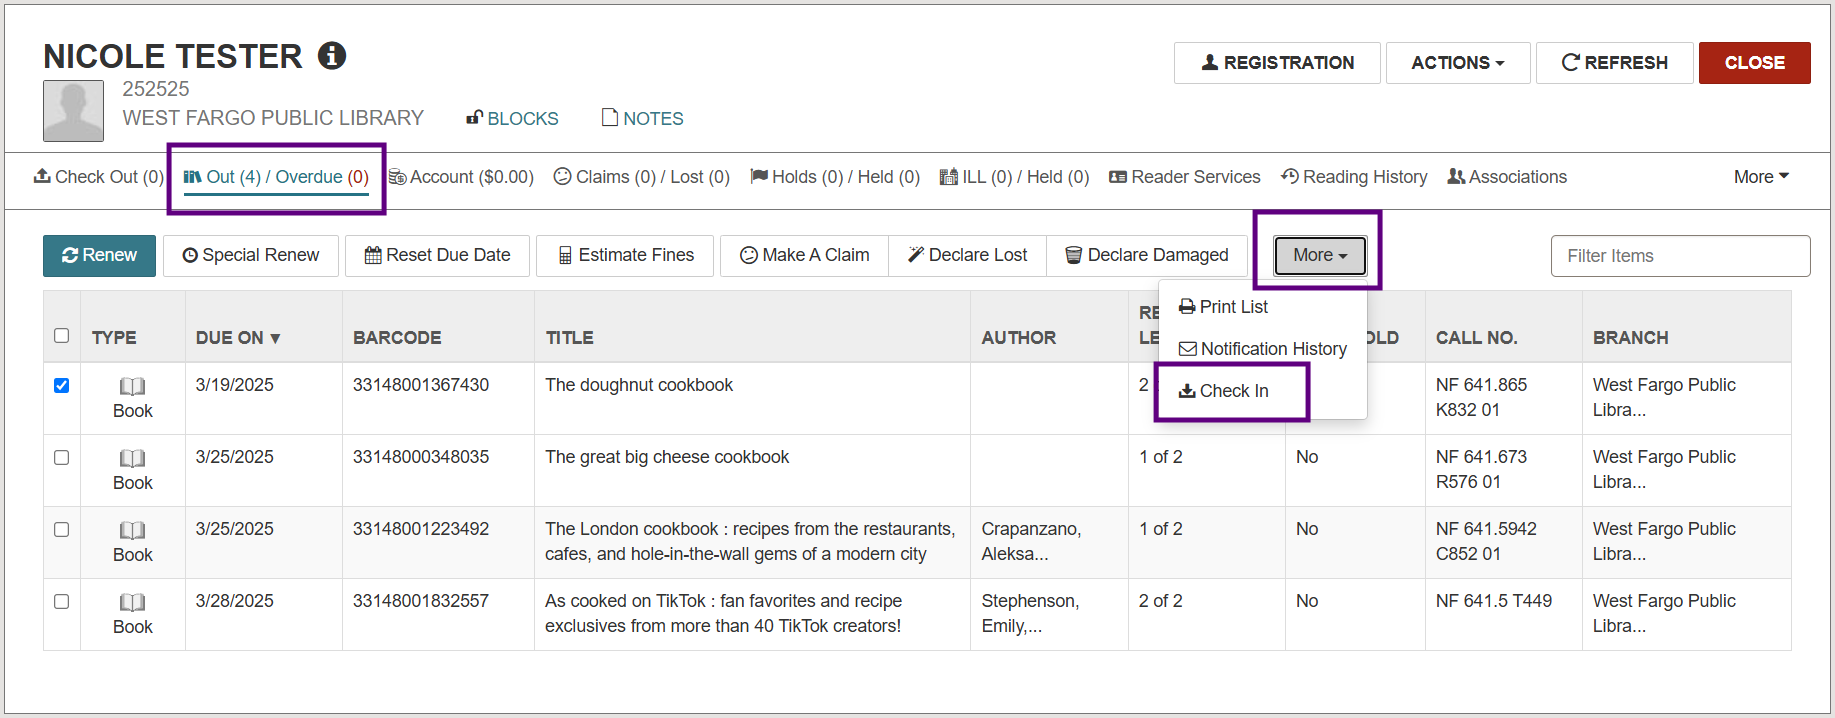
Note: You can only check in one item at a time using this method. If more than one item is selected, the Check In button becomes grayed out.
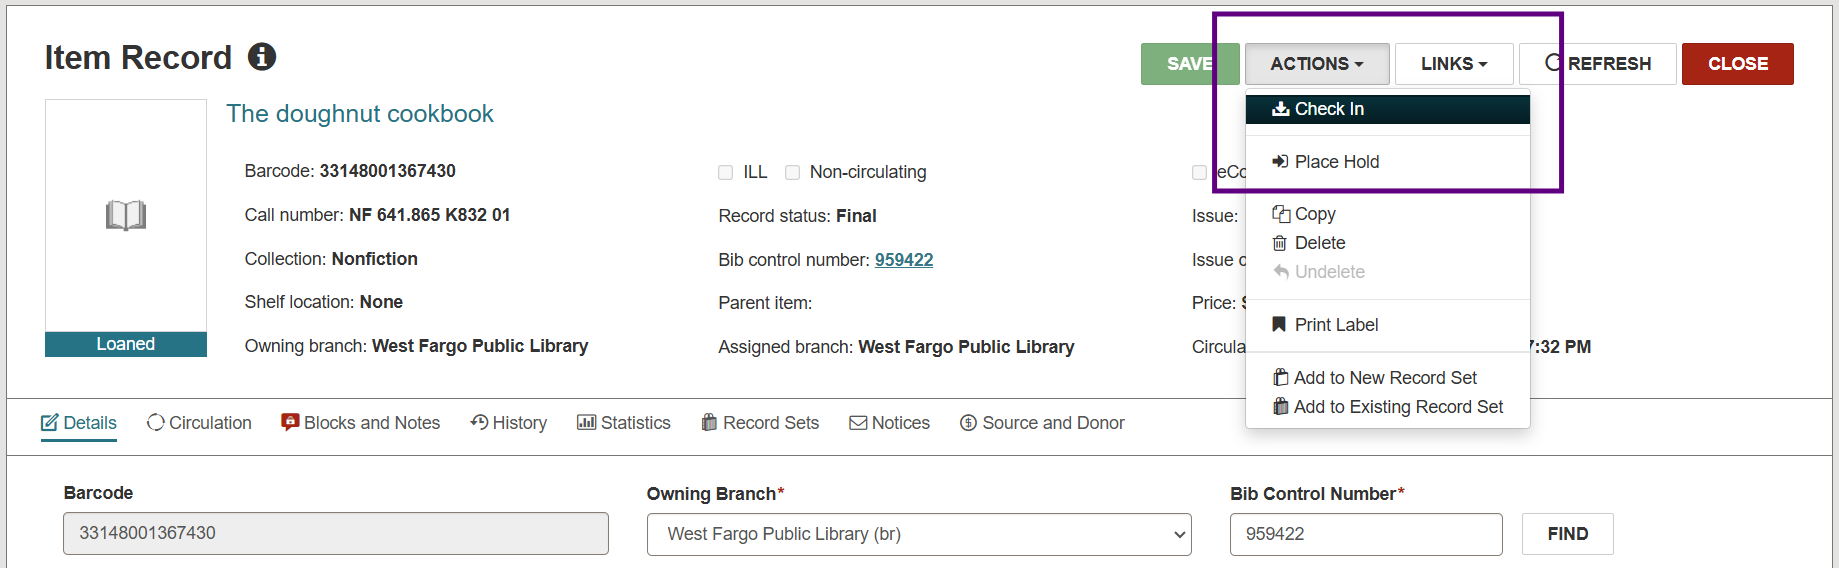
Checking in via the Item Record
A Loaned item may be checked in directly from the item record by clicking the Actions button and choosing Check In:
Checking in from a Record Set
To check in Loaned items directly from a record set, open the record set and select the item using the checkboxes on the far left of the screen. Once an item is selected, click More > Check In:
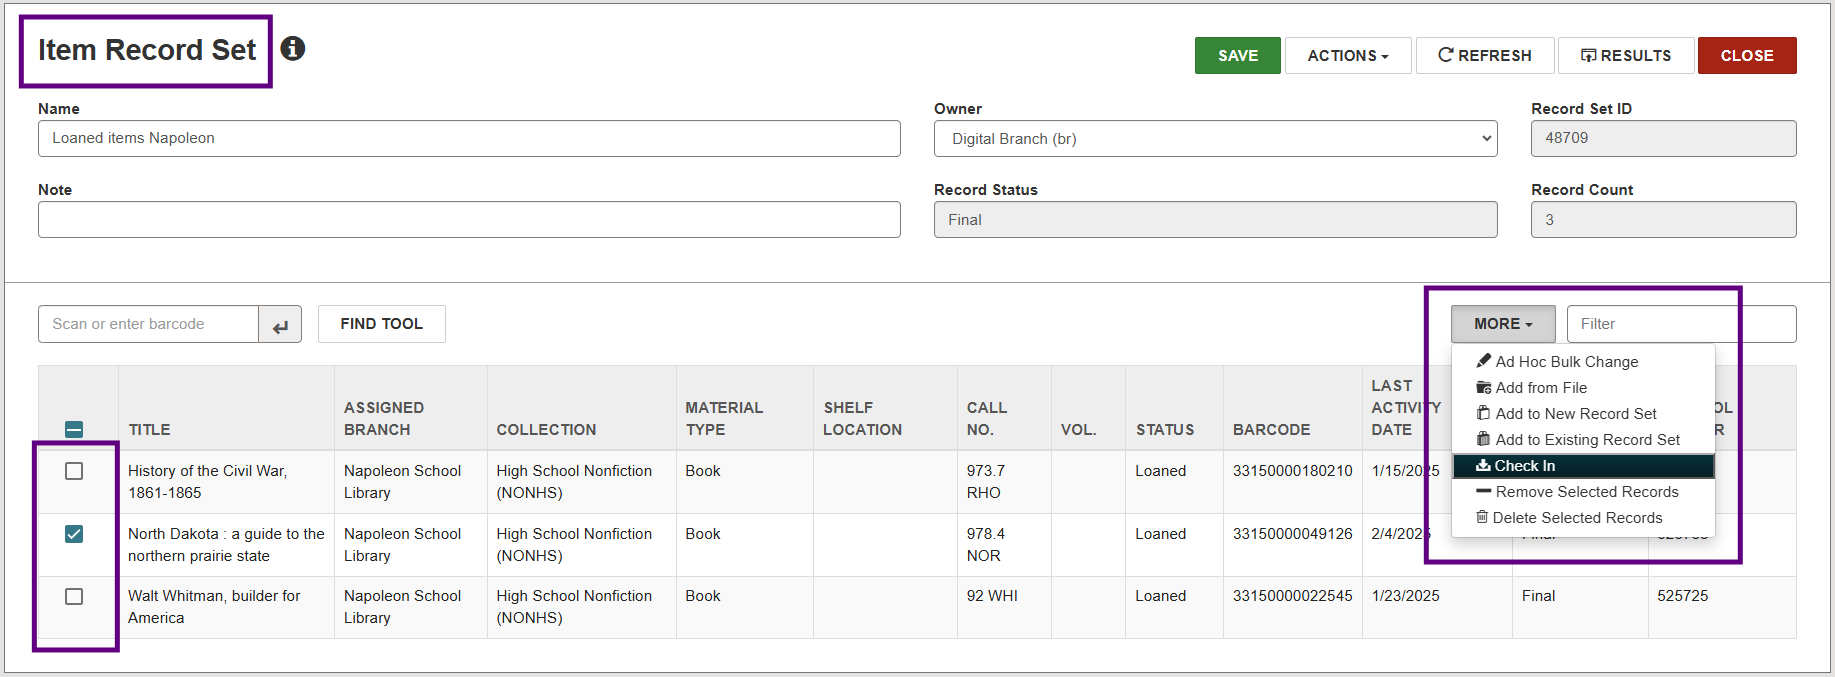
Note: You can only check in one item at a time using this method. If more than one item is selected, the Check In button becomes grayed out.