Polaris Client: Adding Item Templates
Basic Information for adding item record templates in the Polaris Cataloging Client.
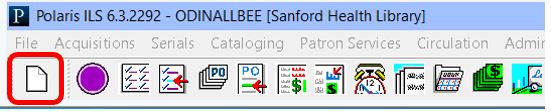
1. After logging into the client, select the new icon, go the File | New or click Ctrl+N
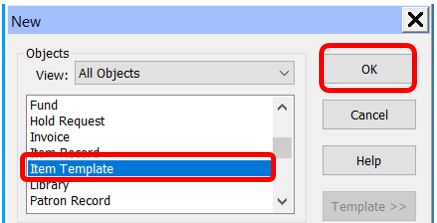
2. In the New dialog box, select Item Template and click OK.
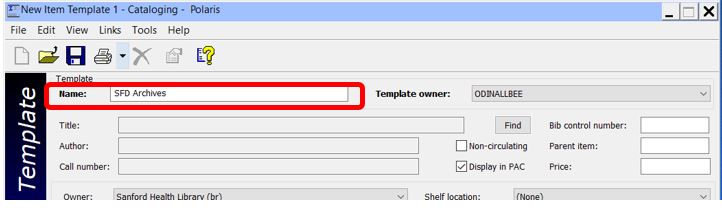
3. An empty item record displays. Enter the name of the template, It is recommending to use a naming convention where the name begins with your library’s 3 letter code such as SFD Archives.
4. Enter values you wish to be consistently applied when creating item records that fit the description for this template. For example, perhaps I wish to apply this template to every item I create that goes into the collection Archives. Those items have the same material type, same loan period, and same fine code. I can enter values into all of those fields, and then when I apply the template when creating new items, those values will automatically be entered into the record.
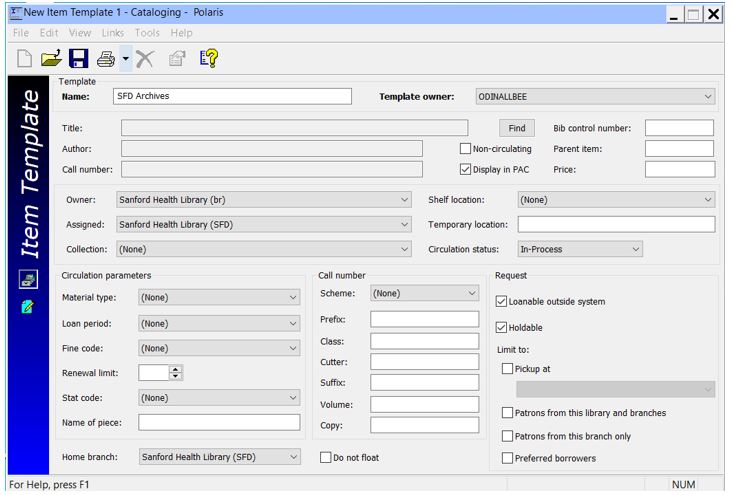
Fields that can be utilized in the template:
- Noncirculating check box
- Display in PAC check box
- Price
- Owner
- Assigned
- Collection
- Shelf location
- Material type
- Loan period
- Fine code
- Renewal limit
- Stat Code
- Call Number Scheme
- Loanable outside system
- Holdable
- Limited holds
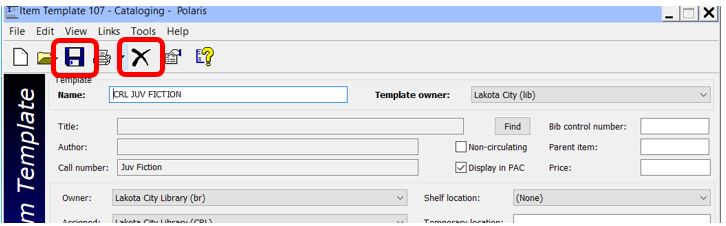
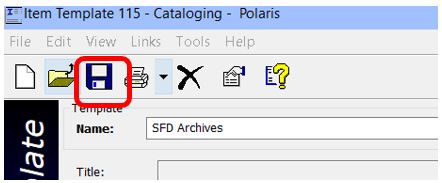
5. Once values have been added, click the save icon, select File | Save or Ctrl + S to save the template.
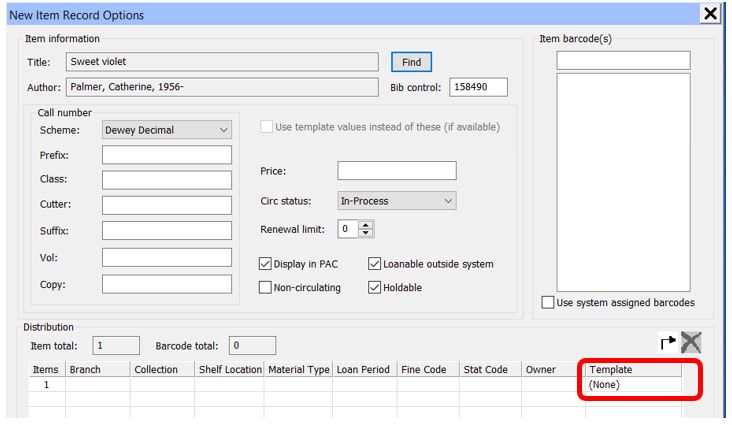
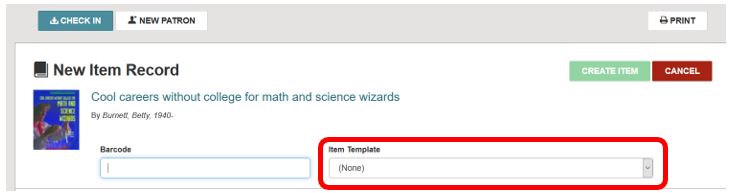
6. When creating items either in the Client or in Leap, you are able to apply the template to populate information.
Client:
Leap:
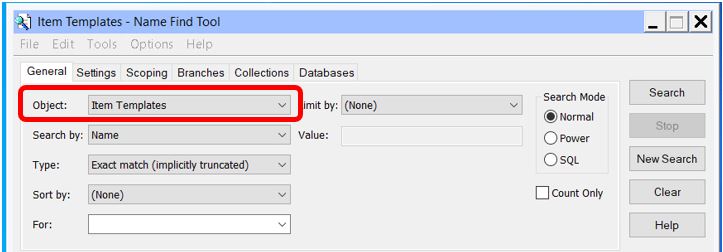
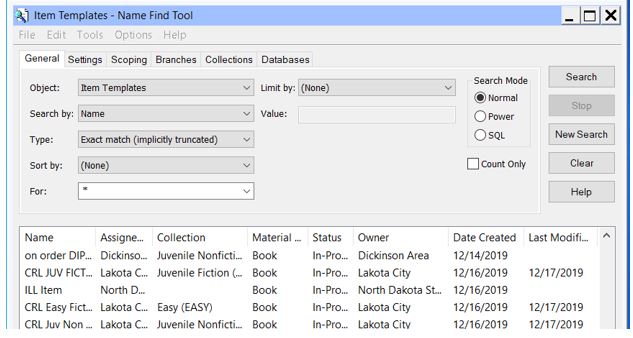
7. To modify or delete a template, first search for the template in the client. In an item search, change the object to Item Templates, or select Cataloging | Templates | Item.
Once you find your template, double-click on it.
The template displays, and you are able to edit and re-save it. Alternatively, the template can be deleted by selecting the delete icon, going to File | Delete or Ctrl + D.