Setting up Discovery Collections
Updated: 3/3/2026
You will need the role: Collection Inventory Operator and Collection Inventory Operator Extended
You can set up your discovery collections all at the top-level, or collections can be nested. You can have a top-level collection with subcollections inside it. Collections can be moved into other collections.
Part 1: Setting up a discovery collection
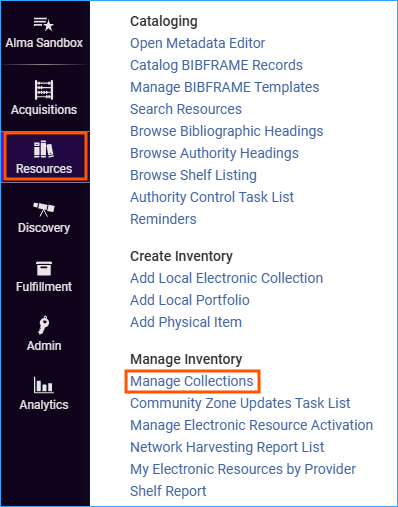
To set up a collection go to Resources > Manage Inventory > Manage Collections.
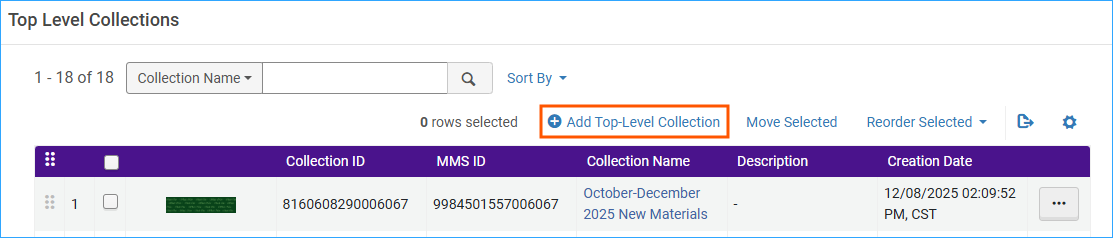
If your institution already has collections, they will appear on this screen.
Click +Add Top-Level Collection to create a new collection.
The Collection form appears:
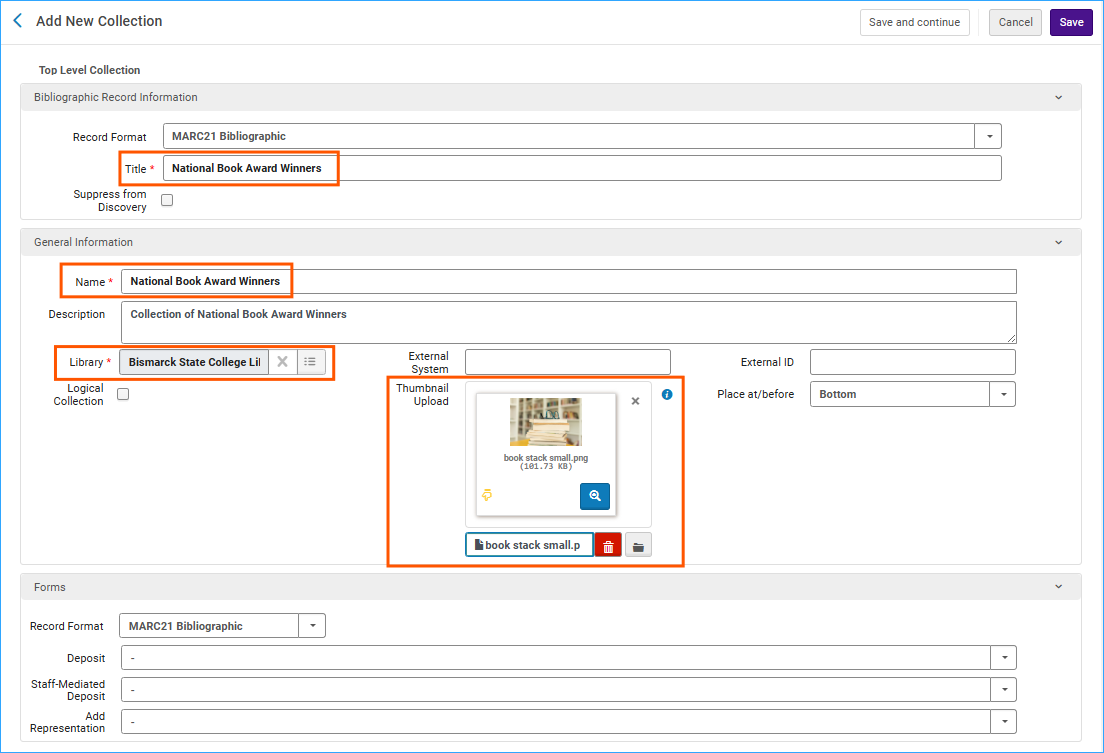
The top section is Bibliographic Record Information- This collection will be searchable in Primo VE. The title you enter here should be the name of the collection and will appear in search results.
General Information section
- Enter the name for the collection. It must be unique among top level collections.
- You must select the library for the collection.
- The thumbnail is optional here. Thumbnails can be up to 100k. The thumbnail will show in discovery as a tile for the collection, and it will appear as a pane across the top of the screen:

- Forms – this section is used for creating digital representations.
After filling in the information on this screen you can click “Save and Continue” to add material to the collection, or you can click “Save” which will save and close the collection.
Part 2: Adding records to the collection
Records can be added to the collection one at a time, or as a set.
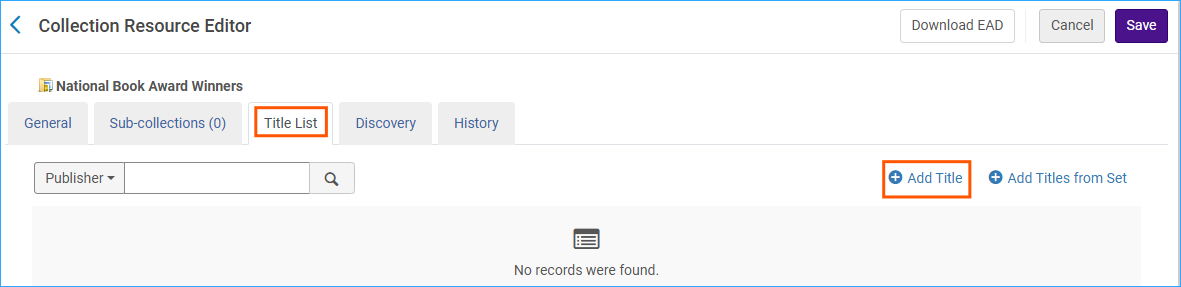
Click on the tab “Title List.”
To add a single title, click +Add Title:
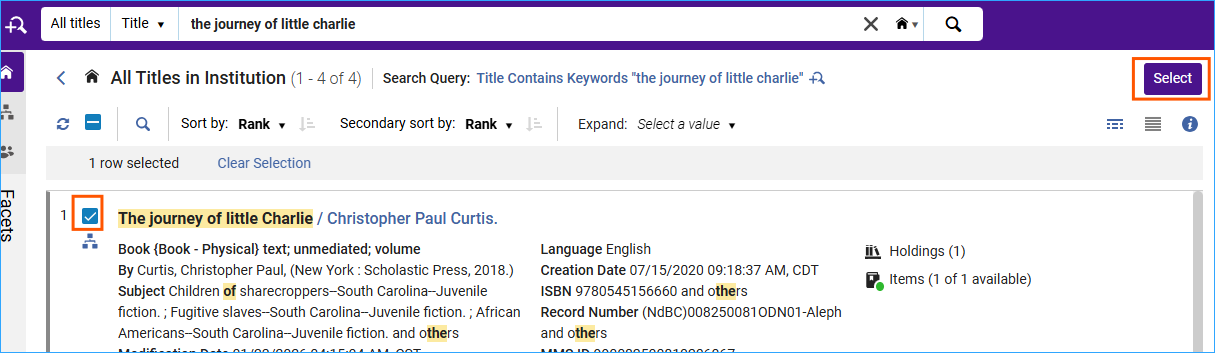
This opens a search screen where you can search for a title. Select the title and click the Select button to add it to the collection. A confirmation box appears, click Confirm.
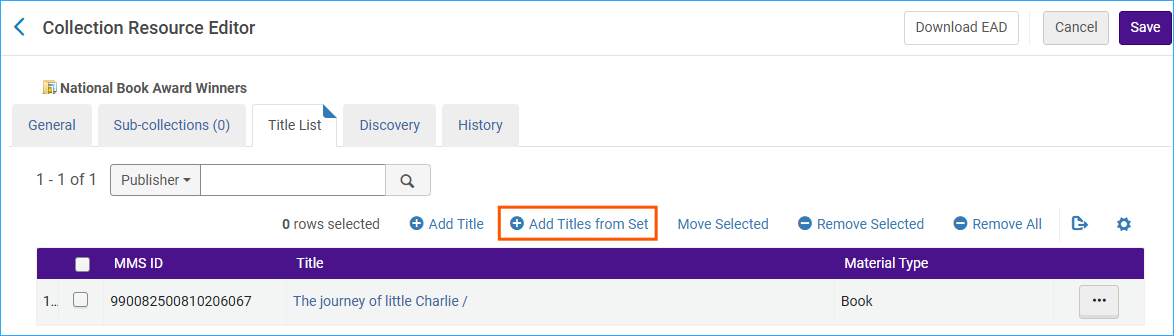
The title is now listed in the title list.

To add a set of titles, click +Add Titles from Set:
The manage sets screen appears where you can select a set of titles.
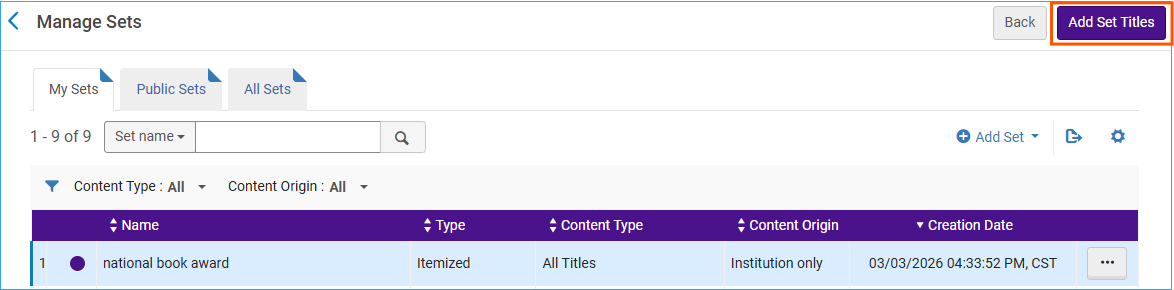
Click “Add Set Titles” button and confirm. A job starts that adds the titles to the collection. You are returned to the collection screen. Click Save.
It may take a few minutes for the books to appear. To refresh the list, you can click on a different tab and then back to the Title List tab.
Part 3: Appearance in Primo VE
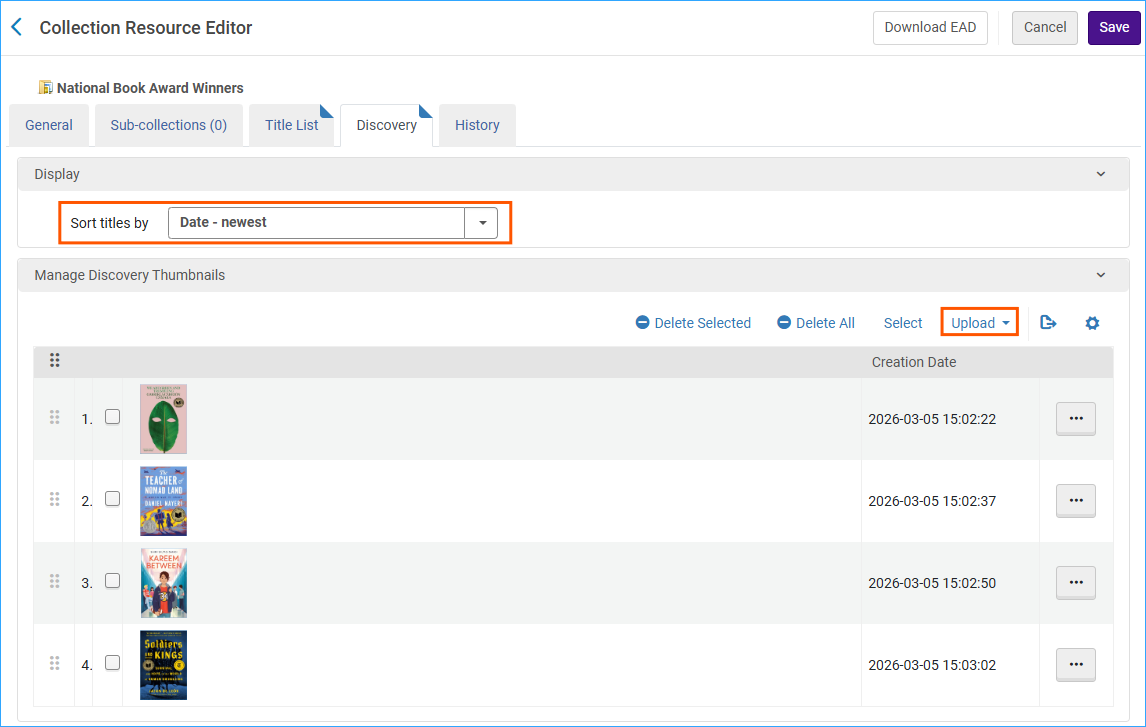
On the Discovery tab you can change the default sort order of the records in your collection.
This is also where you can upload more thumbnails. The system will display up to four images in the collection’s tile. The first image is used as the collection’s banner image. These images will override the image uploaded in Part 1.
The first four images map to the tile like this:
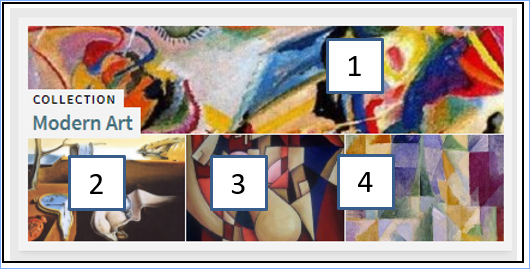
The collection tile is now a composite of the four book covers.

Part 4: Creating a Collection Based on a Logical Set
Sometimes it would be nice to have a collection that automatically updates itself, and that is where logical sets come in. In Alma, you can create a collection based on the contents of a logical set.
An example of this would be a new materials collection. The query for the logical set that populates the collection could be something like MMS Creation Date (Title) Is Within the Last (days) "100"
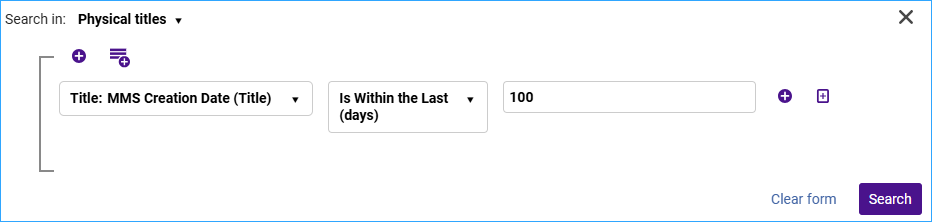
As titles age beyond 100 days they are automatically removed from the logical set and the collection.
Configurations for Logical Collections
There are two things you need to set up before you can create a collection based on a logical set.
Create an empty default collection.
Go to the Resource menu and select Manage Collections.
Click Add Top-Level Collection, give the collection a title, name, and check suppress from Discovery.
Image
Next, click on the Configuration menu, then Resources. Under the General column, find and select Resource Management Jobs Configuration.
In the section Synchronize All Logical Collections Job, change the status to Active.
In the Default Collection search box find the default collection you just created in step 1 and click Save.
Image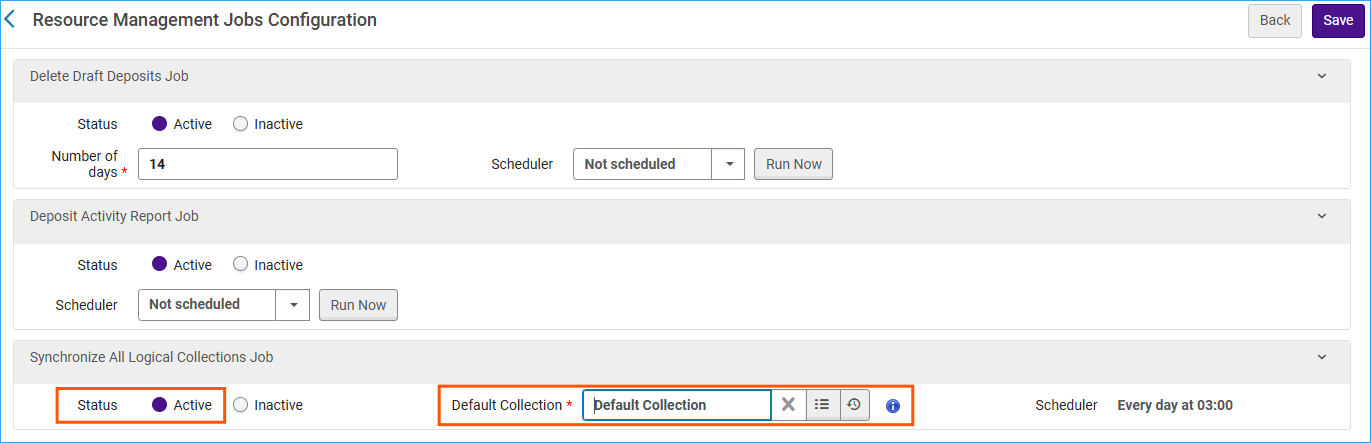
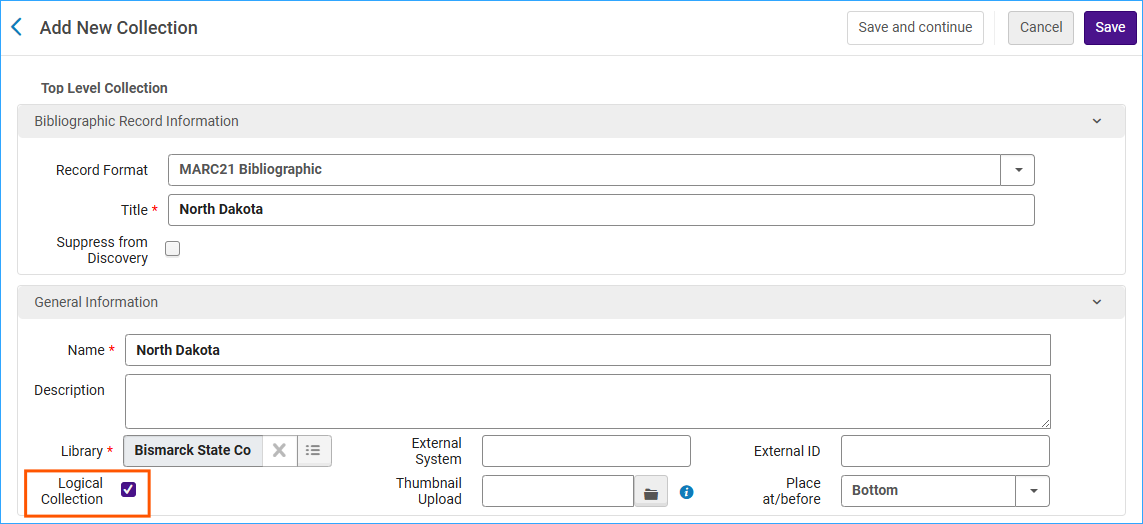
Navigate back to the Manage Collections page. Click Add Top-Level Collection. Everything about setting up a logical collection is the same except you need to click the check box Logical Collection.
Image