Editing User Records in Alma
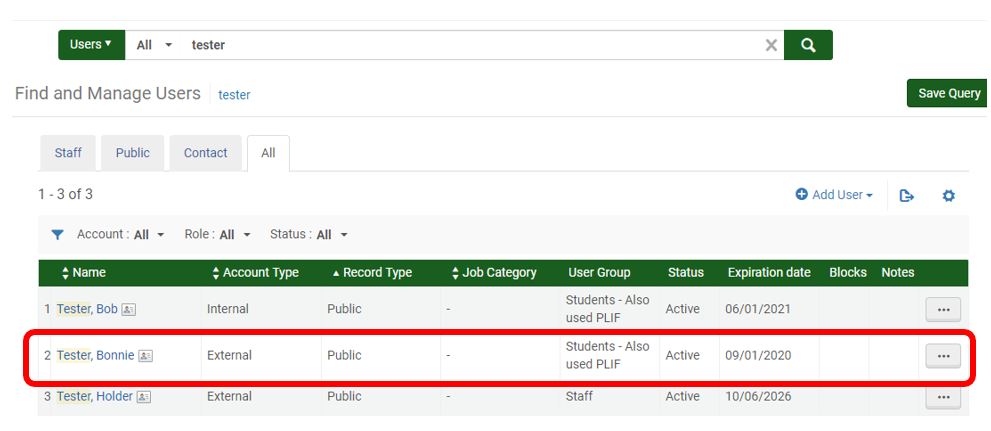
To access user records, change the search bar limiter to Users. Enter the user name or ID to retrieve the record.

Click on the record you wish to alter.
NOTE: External user details are control by the SIS loader, which pulls information from ConnectND. When updating External users, you must either click Open for Update or toggle the user to Internal.

If you open the record for update, you will receive a message indicating various information will NOT be retained unless you explicitly say so.
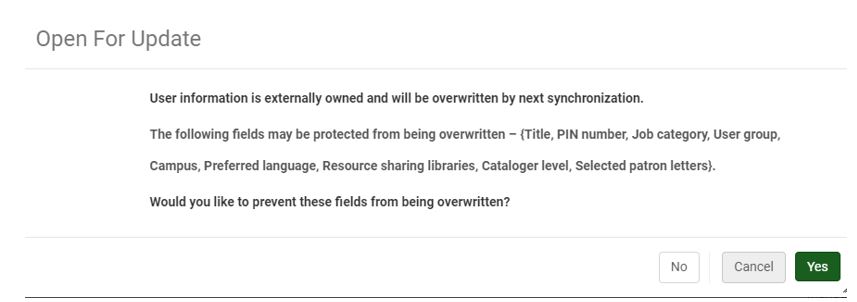
When toggling the patron to Internal, it will NO LONGER BE UPDATED BY SIS LOADS. This is not typically an action that should be taken. If you toggle a patron record to Internal, you will likely want to toggle it back to external after making updates.
Several components of the patron record can be viewed and potentially updated: General Information, Contact Information, Identifiers, Notes, Blocks, Fines/Fees, Statistics Attachments, Proxy For and History. Note: a tab with a ‘folded’ corner indicates there is information in that tab. Tabs without the folded corner are empty.

1. General Information
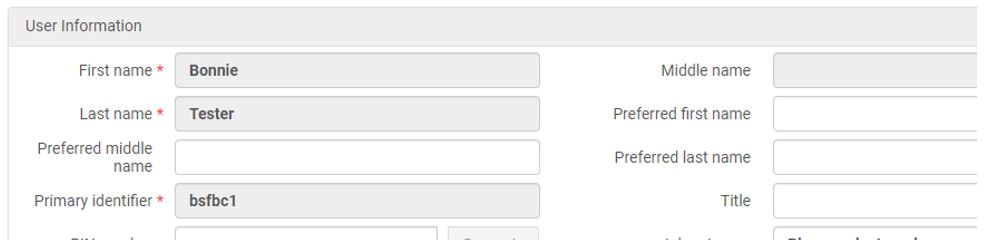
Information in this tab is basic information pertaining to the patron – such as name, expiration date and user group. Almost all the information in this tab is controlled by the SIS load and cannot be altered for External patrons. It can, however, be updated for Internal patrons.
2. Contact Information
Information that comes from ConnectND for External patrons cannot be edited or deleted, however you do have the ability to enter alternative information and set it as the patron’s ‘preferred’ contact. Any information for Internal patrons can be edited. Within the Contact tab, click on the + add type of information you wish to add (address, phone number, email).
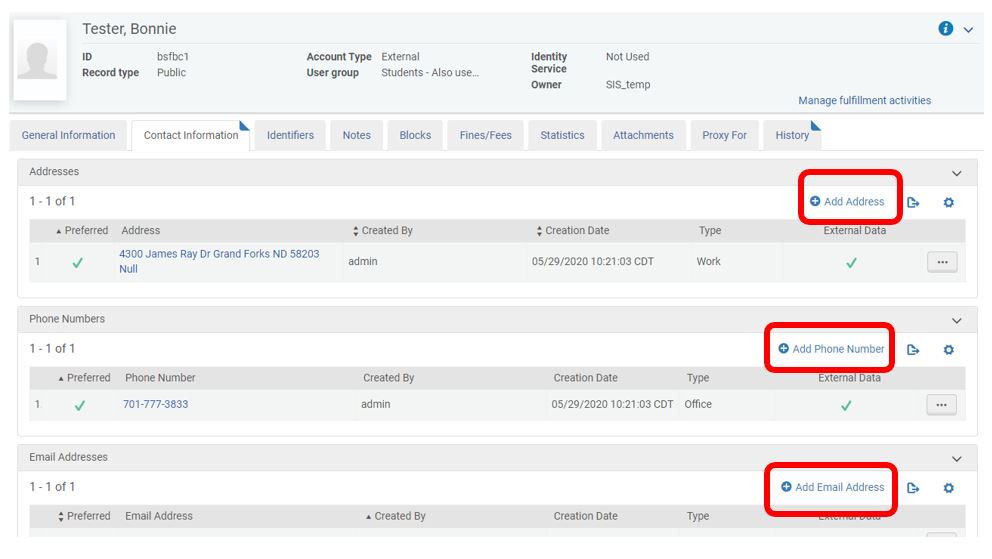
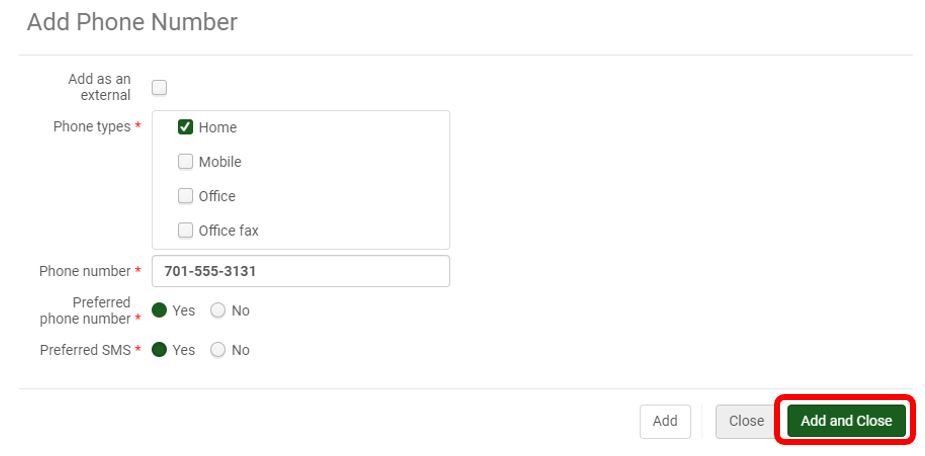
Enter information in the workform. Leave the Add as an external box UNCHECKED (this field displays only for External patrons). Select if the information should be considered preferred or not. Click Add and Close to save the information and close the workform.
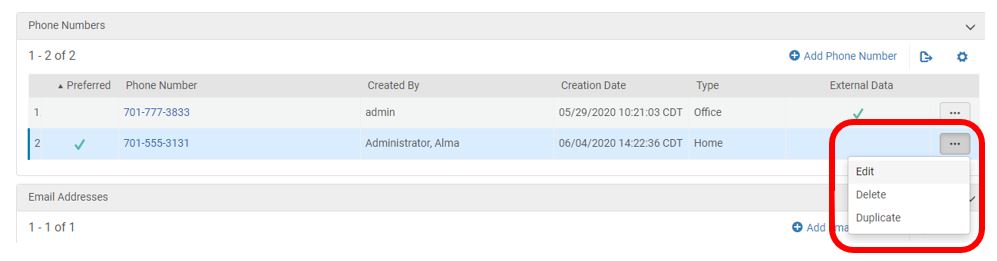
To edit contact information, click the ellipse next to contact information you wish to edit. REMEMBER: you are not permitted to edit or delete information from ConnectND (i.e. External Patron Data).
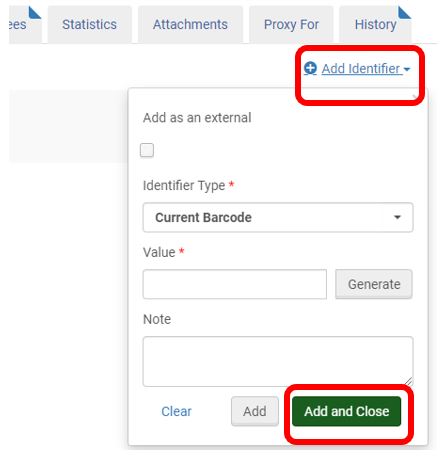
3. Identifiers
Additional identifiers – such as barcodes – can be added to a patron’s record. Within the Identifiers tab, click on the + Add Identifier link. Enter information in the workform. Leave the Add as an external box UNCHECKED (this field displays only for External patrons). Select the identifier type (current barcode, local system ID, etc.) and enter the value. You have the ability to add a note if applicable. Click Add and Close to save the information and close the workform.
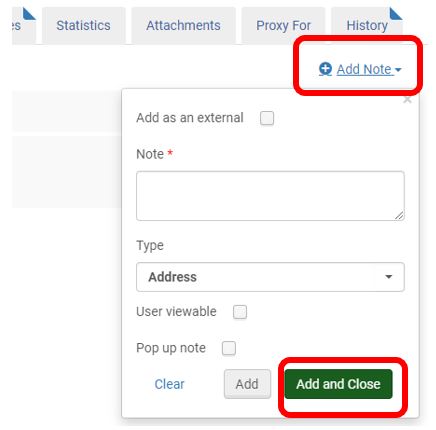
4. Notes
Notes can be added to a patron’s record. Within the Notes tab, click on the + Add Note link. Enter information in the workform. Leave the Add as an external box UNCHECKED (this field displays only for External patrons). Enter the note, and select the note type (address, circulation, etc.). Chose if the note should be viewable to the user when logged into Primo and/or if the note should appear as a pop-up when loaning material to the patron. Click Add and Close to save the information and close the workform.
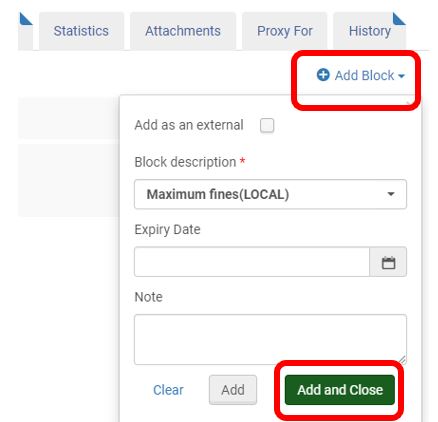
5. Blocks
Manual blocks can be added to a patron’s record. Note that most patron blocks – such as maximum fines or lost material – are applied automatically by Alma. In the Blocks tab, click on the + Add Block link. Enter information in the workform. Leave the Add as an external box UNCHECKED (this field displays only for External patrons). Select the Block Description (collection status, see librarian, etc.), enter any expiry date for the block and a note if either are applicable. Click Add and Close to save the information and close the workform.
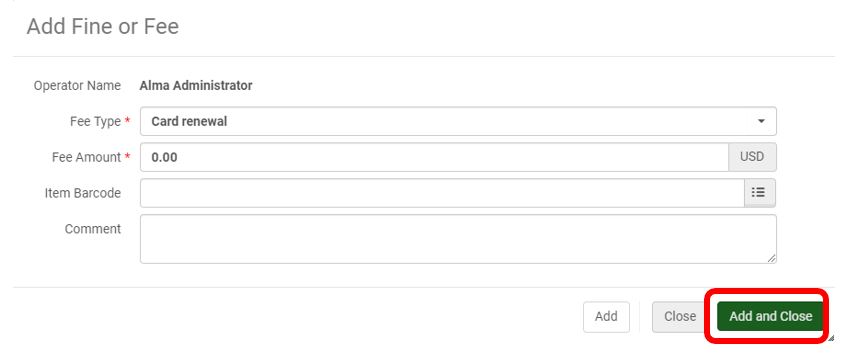
6. Fines / Fees
Fines/Fees can be added to a patron’s record. Note that to pay a fine or fee, you must use Manage Patron Services. Adding a fine or fee or waiving a fee can be done within the Fines/Fees tab. Click on the + Add Fine or Fee link. Select the fine type (damaged, card replacement) add the fee amount, enter an item barcode if applicable and a comment if desired. Click Add and Close to save the information and close the workform.
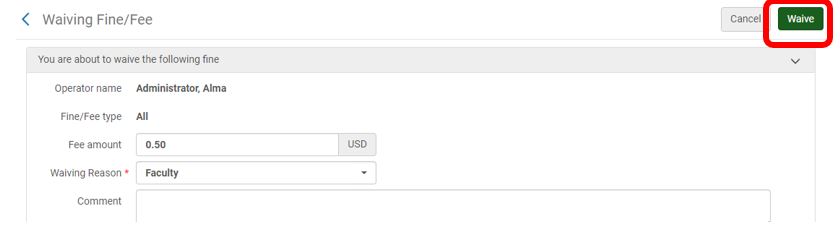
To waive a fee, check the box(es) next to the corresponding charge and click Waive Selected.
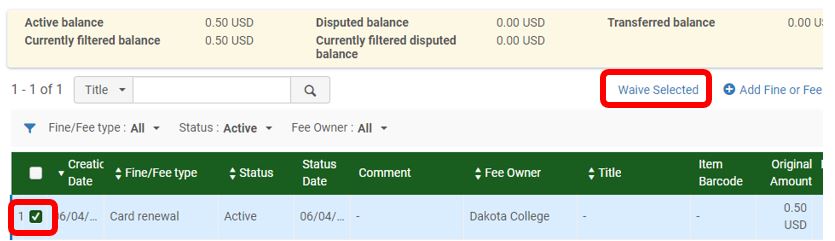
You can alter the fee amount, select a reason for the waive (item was found, technical issue, etc.), as well as add any applicable comment. When the form is completed, click Waive in the upper right.
7. Statistics
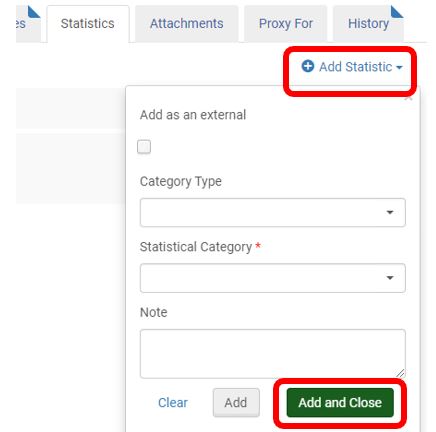
Statistics can be added to a patron’s record. Within the Statistics tab, click on the + Add Statistic link. Enter information in the workform. Leave the Add as an external box UNCHECKED (this field displays only for External patrons). Select the Category type if applicable, select the Statistical Category (Student, Faculty, etc.) from the dropdown list and add a note if applicable. Click Add and Close to save the information and close the workform.
8. Attachments
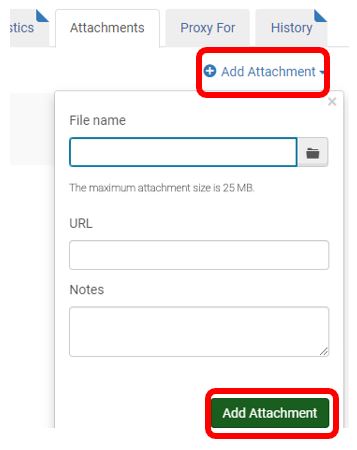
Attachments can be added to a patron’s record. Within the Statistics tab, click on the + Add Attachment link. Enter information in the workform. Navigate to the file name, enter the URL and/or add any applicable notes. Click Add and Close to save the information and close the workform.
9. Proxy For
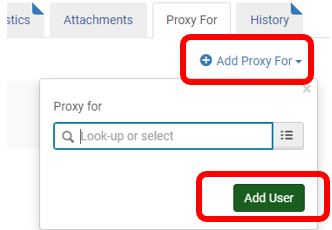
Proxies can be added to a patron’s record. Within the Proxy For tab, click on the + Add Proxy For link. Enter information in the workform. Look up the patron to be added, or enter their ID. Click Add and Close to save the information and close the workform.
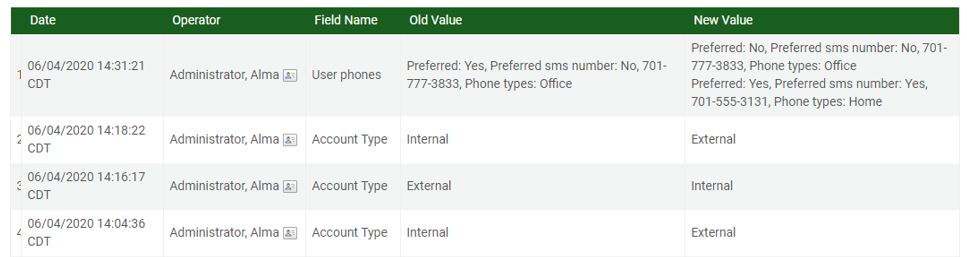
10. History
The History tab is not editable. It provides information regarding the history and changes to the patron record.