Polaris Client: Adding Items
Basic Information for adding item records to existing bibs via Polaris Cataloging in the Client.
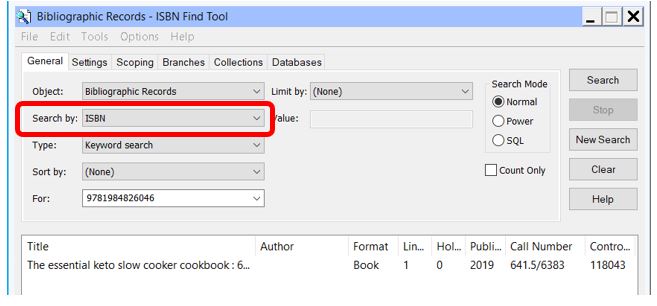
1. After logging into the client, conduct a search for a bibliographic record. The best search to yield a match to your item is an ISBN search. Double click on the record in order to view the full bib.
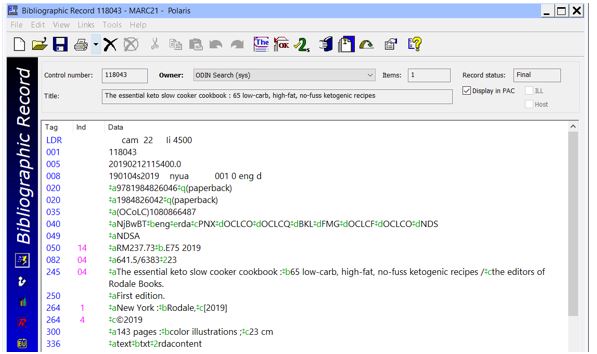
2. With the bib on the screen, it’s important to verify that the record matches the item you have in hand. Check for obvious matching fields – such as author, title, publisher, ISBN – but also look at the physical description field (for example to assure you are viewing a physical book record and not an e-book record).
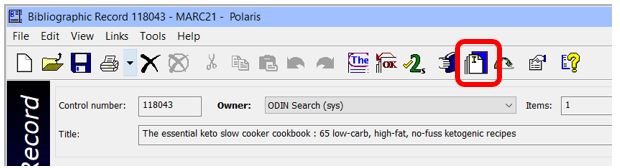
3. Use the Create Item Records icon to add a new item.
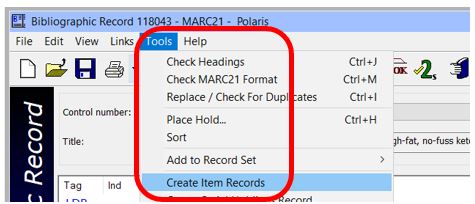
Alternatively, on the menu bar select Tools | Create Item Records
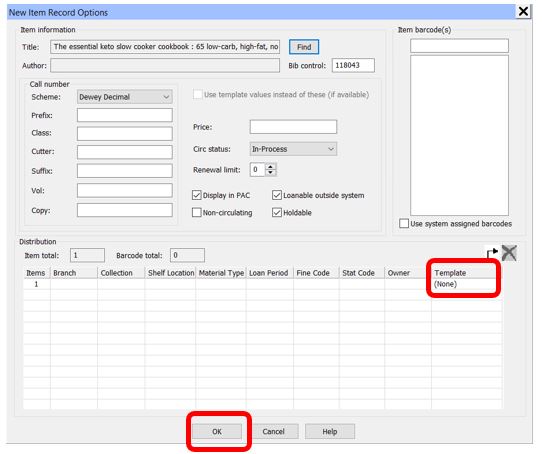
4. You retrieve the New Item Record Options dialog box. You are able to fill out information on this screen, and then use the New Item Record screen to verify the data, or click ‘OK’ to go directly to the New Item Record screen. If you wish to use an item template to populate some of the information, that is done on this screen.
5. Fill out the New Item Record form and click the Save Icon (or go to File | Save) to add your item to Polaris.
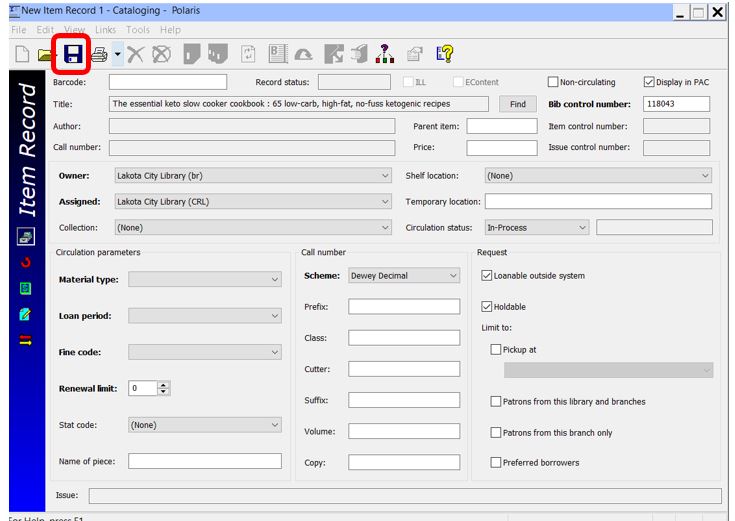
- Barcode – Scan or type in the barcode being assigned to the item
- Display in PAC – Check if the item should be displayed in the online catalog.
- Non-circulating – Check if the item is not allowed to circulate.
- Price – Enter the item price if desired.
- Owner – This field will default to the library you are logged in as.
- Shelf Location – Select a shelf location if applicable.
- Assigned – This field will default to the library you are logged in as.
- Collection – Select the collection.
- Circulation Status – Enter the circulation status of the item. If the circulation status is In-Process, before shelving the item it will be necessary to check in the item first. This is beneficial to catch any holds the item may have and is a recommended practice.
- Material Type – Select a material type.
- Loan Period – Select the loan period. In the case of non-circulating items, select a loan period in case the item is ever checked on a special circumstance.
- Fine Code (mandatory) – Select a fine code.
- Renewal Limit – Enter the number of times a patron may renew the item.
- Statistical Code – Select a statistical code if applicable.
- Call Number Scheme (mandatory) – Select the call number scheme. Dewey for nonfiction items or Other for fiction.
- Prefix – If your library uses prefixes on call numbers (prestamps) enter that information here.
- Class – Enter the call number of a nonfiction item, or the cutter of a fiction item.
- Cutter – Enter the cutter of a nonfiction item.
- Suffix – If your library uses suffixes on call numbers (post stamps) enter that information here.
- Volume – Enter a volume if applicable.
- Copy – Enter the copy number if applicable.
- Loanable outside system – Check if the item can be loaned outside the Polaris system.
- Holdable – Check if the item can be placed on hold.
- Limit to – Check any boxes that apply
- Restricted to a pick-up location
- Restricted to only patrons from your library
- Restricted to only patrons from your branch
- Restricted to only preferred borrowers