Returning an Item in Leap
The Polaris LEAP webapp is used for all circulation activity, including checking in material patrons have on loan. https://polaris.odinlibrary.org/leapwebapp
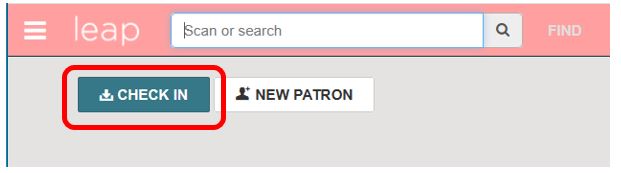
To check in material a patron has on loan, click the CHECK IN box at the top of the LEAP screen.
The system displays two options for the routine checking in of material – Normal and Bulk, and one option for specialized checking in of material - Missng Part. (In House and Inventory options will be discussed in other documentation).
Normal and Bulk check in work similarly. The primary difference between the two is if there is a fine for material checked in, Normal mode will stop at each check in and prompt you to either add the fine to the patron’s record, pay it or waive it. Bulk mode automatically adds any fines to the patron’s record and allows you to continually check in material without interruption.
I. Normal Check In
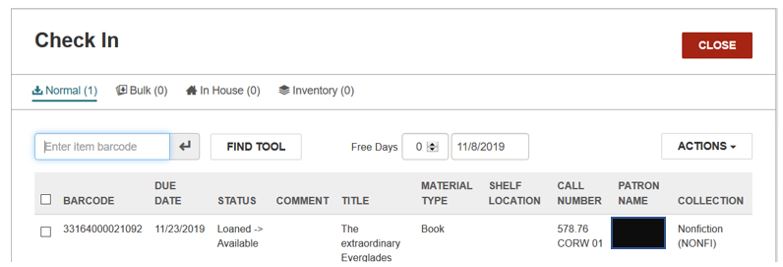
Scan or type the barcode into the item barcode field. If you type the barcode, you may also have to press enter to register the return.
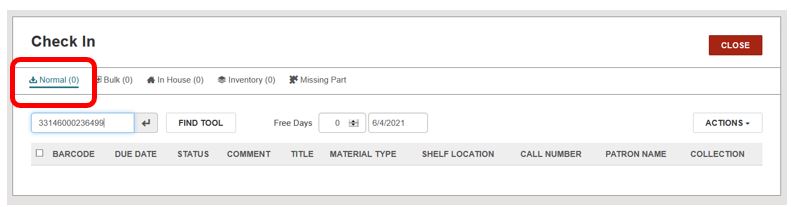
The return is registered. Continue to scan until all items have been returned.
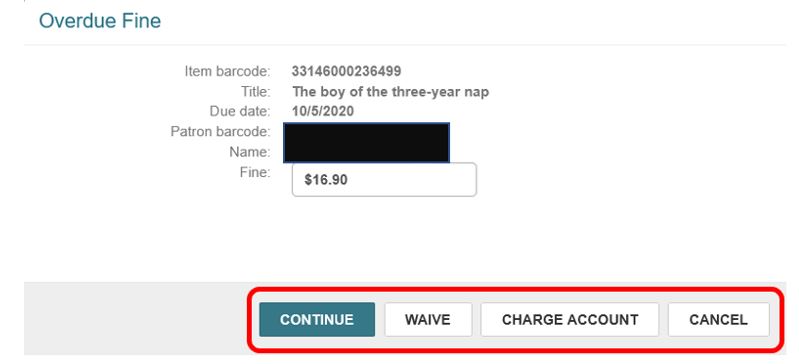
If material has a fine, the system will display a prompt asking what to do with the fine – Continue, Waive, Charge Account or Cancel. Continue and Charge Account options will add the charge to the patron’s account. The Waive option will waive the fine and not add it to the patron’s account. Cancel will cancel the return transactions.
II. Bulk Check-in
Scan or type the barcode into the item barcode field. If you type the barcode, you may also have to press enter to register the return.
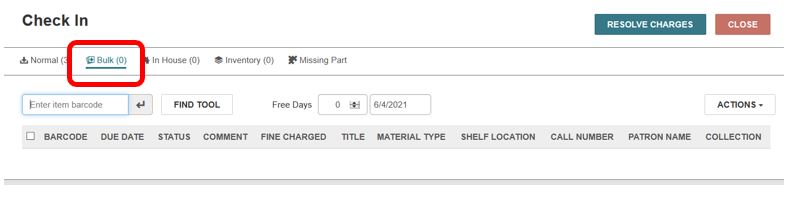
The return is registered. Continue to scan until all items have been returned.

If material is returned that has a fine, the system automatically adds it to the patron’s record without prompts.
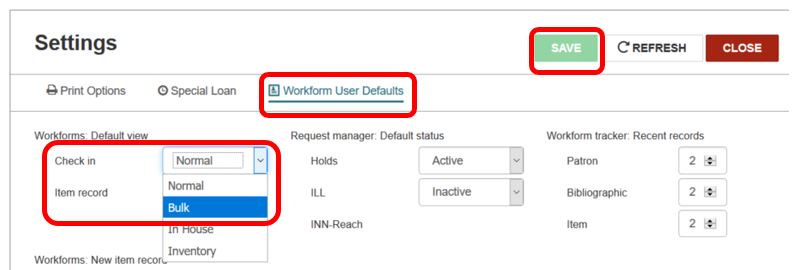
TIP: It is recommended to always use Bulk check in. In order to default LEAP to always default to the Bulk tab when going to the check in screen, choose this option on the Settings page. On the drop-down menu by the logged in username, select Settings.

On tab 3 of the settings page – Workform User Defaults – click the drop-down menu next to Check in and select Bulk. Click SAVE to save the changes. Until this setting is changed, each time you click the Check in button, the normal option will be active by default.
III. In House
In House check-ins are intended to register use of material inside the library. The check-in registers an in house statistic which may be used for reporting purposes.
IV. Inventory
Inventory is covered in a separate document.
V. Missing Parts
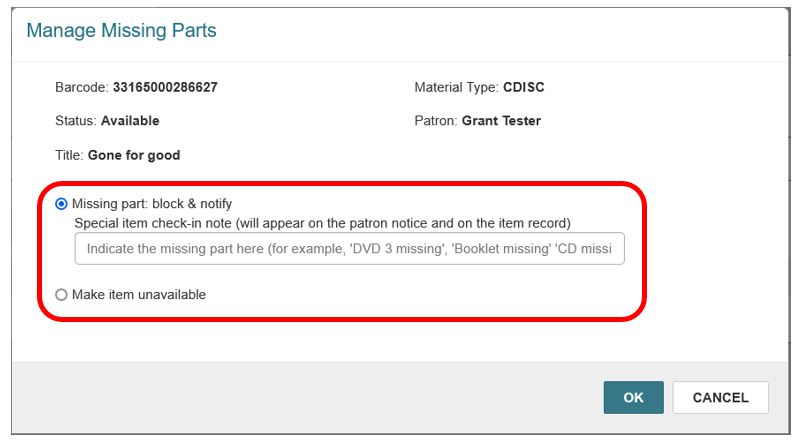
If it is noticed that material is returned with parts missing (such as a multi-cd set) the Missing Parts tab can be used to update the item and send a notice to the patron regarding the missing part. If the missing part is not noticed until after a normal or bulk check-in is conducted, another check-in via Missing Parts tab can still be conducted immediately after.
In the Manage Missing Parts workform, there are options to place a block on the item and notify the patron OR to make the item unavailable. If Block & Notify is selected, a note can be added indicating which part of the material is missing. This note will appear on the notice and on the item record. The item will be updated to a status of Claimed missing parts and a claim for the missing part is also entered on the patron’s record.
NOTE: The claim status and block in the item record and the claim in the patron record can both be cleared by conducting a normal or bulk check-in of the item record. Any note entered (as to what part was missing) must be cleared manually from the item record.
Backdating
Regardless if normal or bulk return is used to check in material, there is also an option to back-date the check in. This is useful in cases where you are checking in material that was left in the book drop, or perhaps checking in material after the library was unexpectedly closed. These are both circumstances where you don’t want patrons to incur fines for times the library was not accessible.
A number of Free Days can be entered, or if the date is clicked in the next field, a calendar opens, and a prior date can be selected as the effective check in date. After making the selection, check in materials as per usual, and Close out of the check in screen when finished.

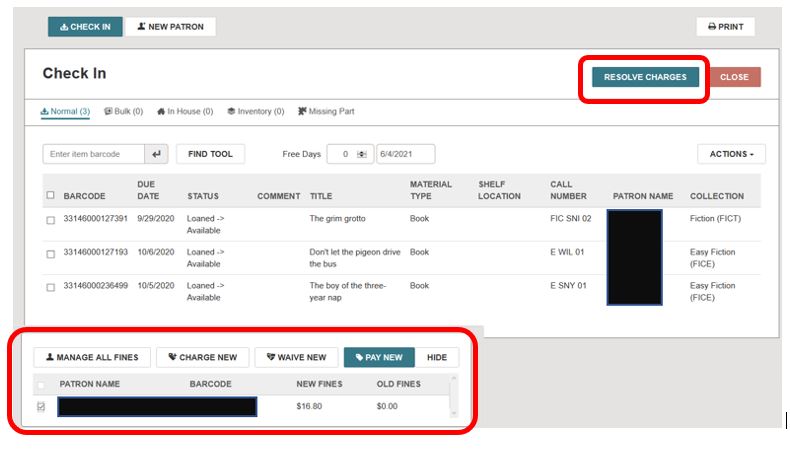
Resolve Charges
When items are checked in, there is an option to resolve overdue charges after the fact. Click Resolve Charges, and a workform opens at the bottom of the screen. Here you can select various charges, select to manage all charges (which includes charged not incurred in this check-in transaction), change a new charge, waive a new charge or pay a new charge.