Inventory in Polaris Leap
Updated: 3/7/2025
Overview:
- Method 1: Conducting Inventory using Leap/Simply Reports
- Method 2: Conducting Inventory using a Shelf List Report
Conducting inventory can be accomplished 1 of 2 ways:
- By scanning items directly into Leap, then running subsequent reports in Simply Reports to determine what is missing from the shelves or in the wrong status.
- By creating a Shelf List Report of all items found in your library (by collection), printing it out, and manually comparing the items in the report to what is found on the shelves.
It is not necessary to use both methods. You may choose one over the other depending on the equipment available at your library, staffing, time allotment, personal preference, etc. You may also opt to use a hybrid approach.
Tips:
- Conduct inventory collection by collection. This helps break down scanning, tracking, and reporting into more manageable portions.
- Take note of your ‘starting date’ and your ‘ending date.’ This date range will be used when running reports.
- Reports should be run as soon as possible after scanning each collection to ensure their accuracy.
- Keep an eye out for misshelved items. Leap will not notify you of misshelved items as you scan through your collections.
Method 1: Conducting Inventory using Leap/Simply Reports
Scanning Items
Log in to Leap, open the Check In Screen, click on the Inventory tab, and begin scanning your items:
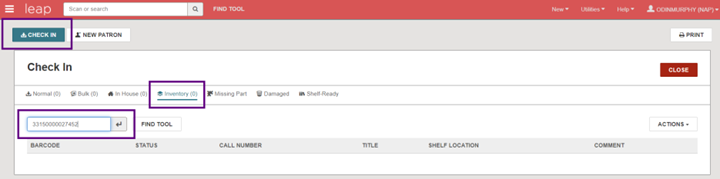
Scanning items into the Inventory tab does not check them in. It simply updates the Inventory Date in each item’s record to the current date:
The Inventory Date field will be used as the main criteria for running reports once scanning is complete.
Polaris assumes all items scanned to be in Available status (since they are found on the shelves). If you scan an item in an unexpected status (Missing, In-Transit, Loaned, etc.), Polaris will display a pop-up alert:
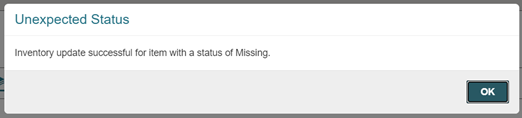
Items in an unexpected status must be Checked In to clear their current status and return them to Available.
If an item satisfies a hold or request, you will see the following alert:
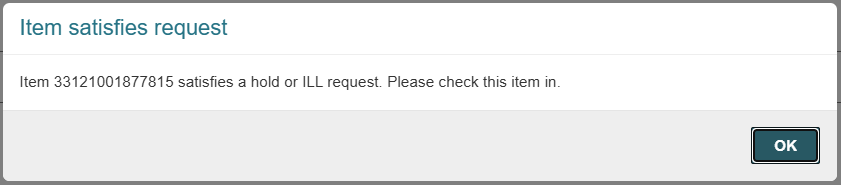
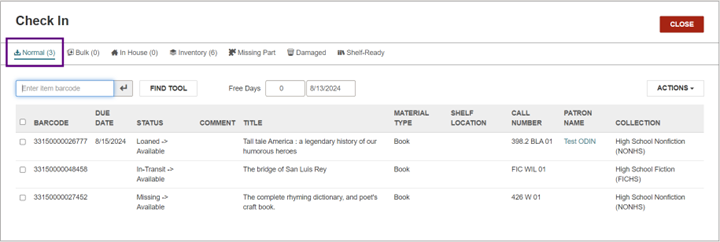
Click over to the Normal tab to check the item(s) in, then click back over to the Inventory tab to continue. Alternatively, you can set those items aside and check them in all at once later:
As you continue scanning your items, the Comment section of each line will summarize your progress:
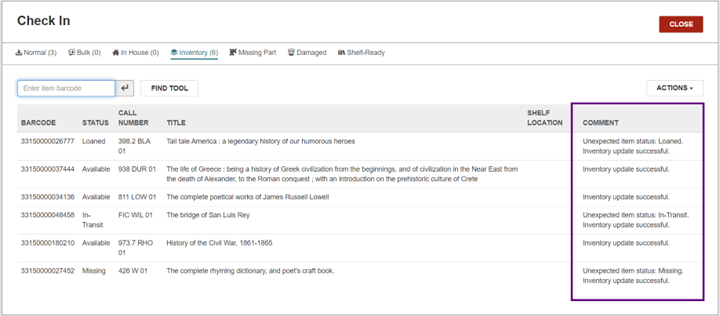
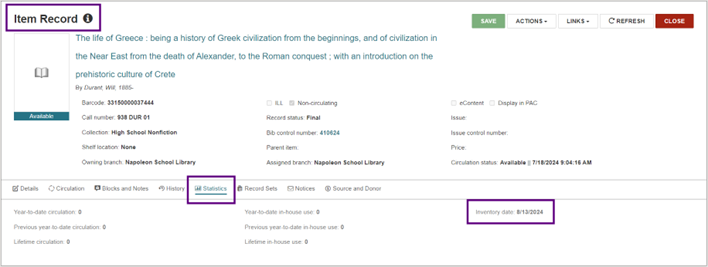
This progress will clear once you Close the Inventory screen, however, the Inventory Date in each of the scanned items will remain updated under the Statistics tab of each item record. You may ensure this by spot checking the records of some of your scanned items.
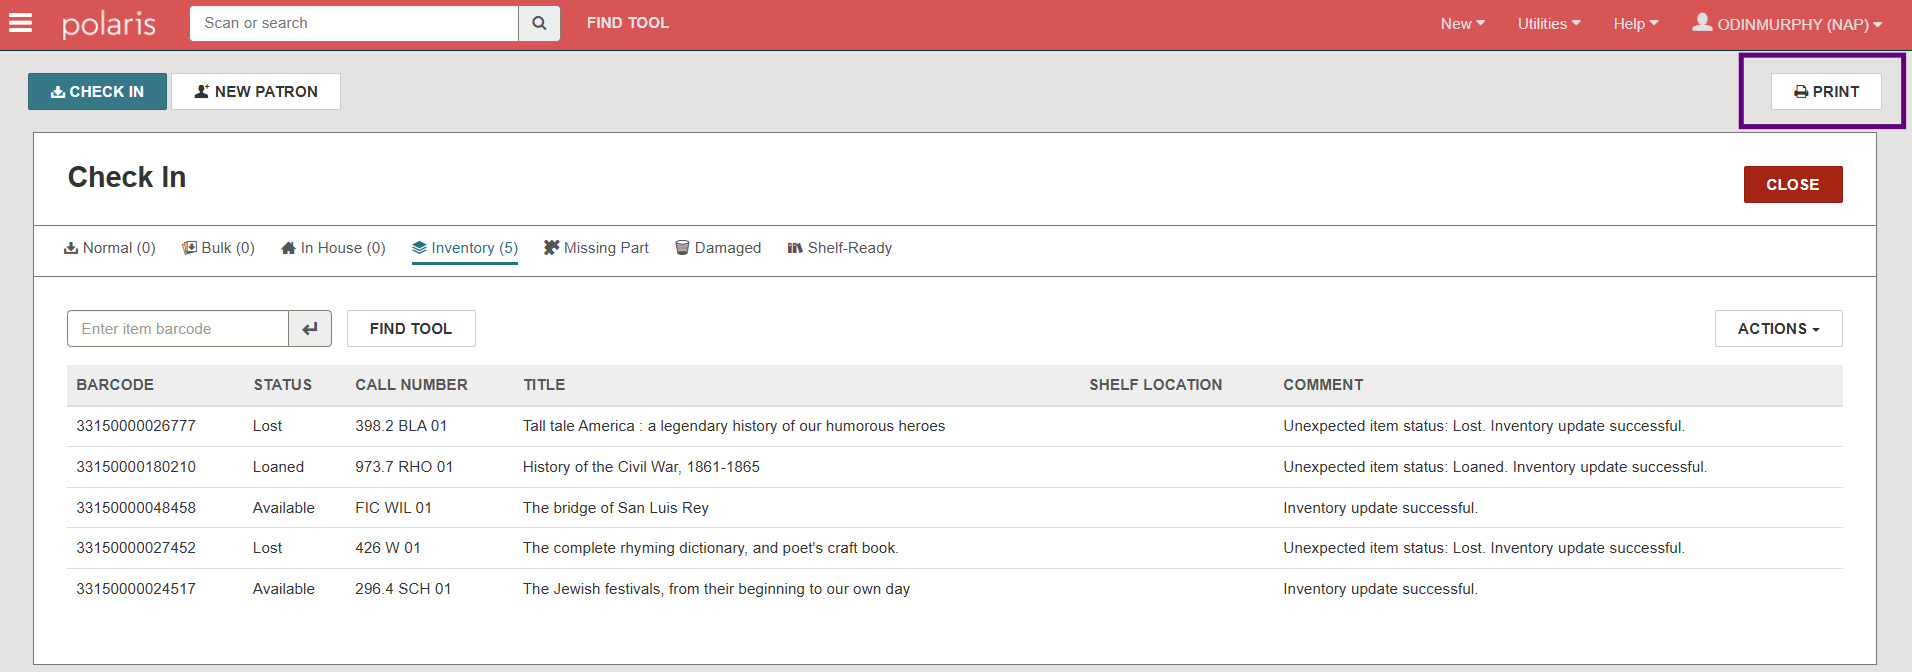
You may also choose to print a list of the scanned items before closing. To do this, click the Print button in the upper right-hand corner of the screen:
Uploading an Excel file (Alternative workflow)
You may opt to scan your items into an Excel file first, save it to your computer, then upload it into Leap.
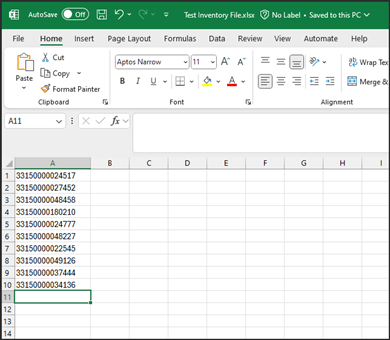
Scan your barcodes into the first column of your Excel sheet and Save the file to your computer. Leap will accept .xlsx .csv or .txt formats:
To upload the file into Leap, open the Check In Screen, click on the Inventory tab, navigate to the Actions menu, and choose Load from File:

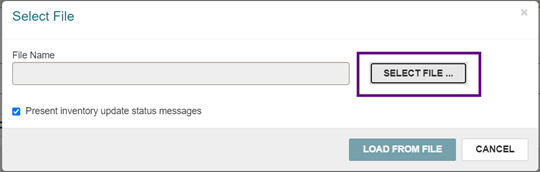
Choose Select File to browse your computer for your saved Excel file:
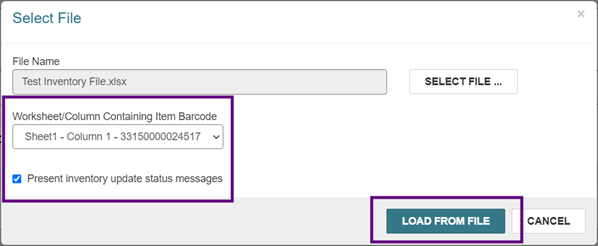
Once your file is selected, an additional box will appear asking you to designate the Sheet and Column your item barcodes are located. It will default to Sheet 1, Column 1. Verify the worksheet/column information, then click Load from File:
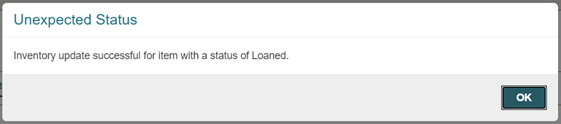
If you left the Present Inventory Update Status Messages box checked, you will receive Unexpected Status pop-up messages as your inventory list is built. These must be manually cleared each time by clicking OK:
Once the upload is finished, consult the Comment section and take note of items found in unexpected statuses (Missing, Loaned, In-transit, etc.). These items need to be Checked in to clear their current statuses and return them to Available.
Running Inventory Reports in Simply Reports
Once all items from each collection are scanned/entered into Leap, you are ready to run your reports.
There are 4 inventory reports available:
- Items Not Inventoried (no inventory date)
- Items Not Inventoried (old inventory date)
- Incorrect Status Report
- Inventory List – Optional report, Informational only
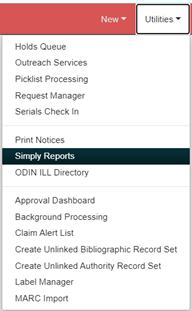
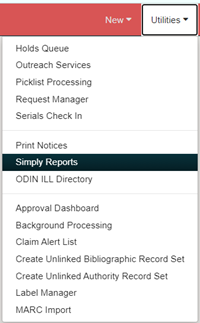
Navigate to Simply Reports directly from Leap under the Utilities menu:
Log in using your Leap credentials. Navigate to the Items tab and choose Item List Reports:

Report 1: Items Not Inventoried (no inventory date)
This report lists items that were not scanned during inventory. Those that show an Available status and a Last Circ Status Change Date of 6 months ago or more are likely missing.
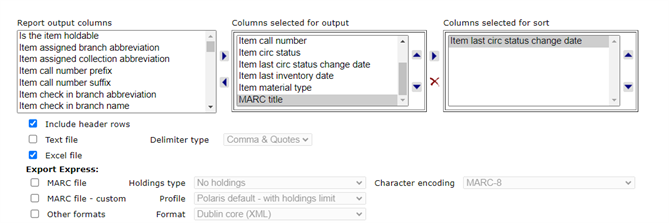
Add your criteria to Columns Selected for Output and sort by Last Circ Status Change Date. Leave Include Header Rows and Excel File checked:
For further details on adding & removing fields from these menus, visit our Simply Reports Basics tutorial.
- Criteria (can be adjusted as needed):
- Columns Selected for Output
- Item Assigned Branch name (Optional)
- Item Assigned Collection name (Recommended)
- Item Barcode (Required)
- Item Call Number (Recommended)
- Item Circ Status (Required)
- Item Last Circ Status Change Date (Required)
- Item Last Inventory Date (Recommended)
- Item Material Type (Optional)
- MARC Title (Recommended)
- Columns Selected for Sort
- Item Last Circ Status Change Date
- Columns Selected for Output
Once your chosen criteria are entered, add your filters.
- Filters
- Item General Filters
- Assigned Branch (choose your branch)
- Collection (Choose your desired reporting collection)
- Record Status = Final
- Item Date Filters
- Last Inventory Date = Select 'Not Present' checkbox
- Item General Filters
Once all criteria and filters are in place, click Submit. Your Report Preview will appear:

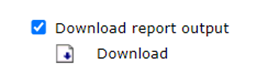
To download your full report results, click the checkbox next to Download report output and select Download:
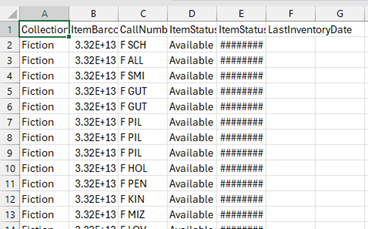
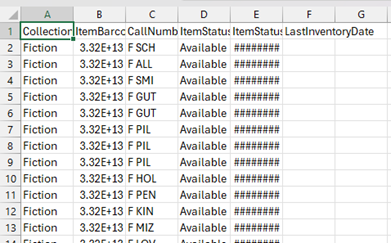
Your file will be downloaded to your computer’s Downloads folder. Access the folder and open the file as an Excel spreadsheet. The spreadsheet will require some initial clean-up involving widening columns or changing the barcode column to a number format:
Once you have completed your adjustments, save your spreadsheet as an Excel Workbook (.xlsx):

Print out a copy if necessary.
For items showing an Item Status of Available AND an Item Last Circ Status Change Date more than 6 months ago (or your preferred timeframe), they are likely missing. Access each item record and update the Circ Status field to Missing.
Items with statuses other than Available should show a relatively recent Last Circ Status Change Date. If not, follow up on those records as necessary.
If you need the ODIN Office to update records in bulk, you may create a record set by clicking the checkbox next to Create Item Record Set from Report Results. Give it a recognizable name and click Save record set:
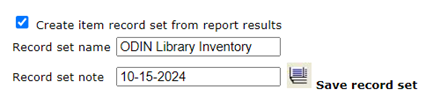
Please include this record set name in your ODIN Help Ticket when requesting the bulk update.
Report 2: Items Not Inventoried (old inventory date)
This report lists items that were not scanned during inventory, as they still have a date from a previous inventory. Those that show an Available status with a Last Circ Status Change Date of 6 months ago or more are likely missing.
- Criteria (can be adjusted as needed)
- Columns Selected for Output
- Item Assigned Branch name (optional)
- Item Assigned Collection name (Recommended)
- Item Barcode (Required)
- Item Call Number (Recommended)
- Item Circ Status (Required)
- Item Last Circ Status Change Date (Required)
- Item Last Inventory Date (Required)
- Item Material Type (Optional)
- MARC Title (Recommended)
- Columns Selected for Sort
- Item Last Circ Status Change Date
- Columns Selected for Output
- Filters
- Item General Filters
- Assigned Branch (choose your branch)
- Collection (choose your desired reporting collection)
- Record Status = Final
- Item Relative Date Filters (prior to a specified date)
- Last Inventory Date More Than = enter period of time prior to the start date of your most recent inventory
- Item General Filters
Click Submit and your Report Preview will appear.
Download your report results into an Excel spreadsheet and adjust report columns/cells as needed.
For items showing an Item Status of Available AND an Item Last Circ Status Change Date more than 6 months ago (or your preferred timeframe), they are likely missing. Access each item record and update the Circ Status field to Missing.
Items with statuses other than Available should show a relatively recent Last Circ Status Change Date. If not, follow up on those records as necessary.
Create an Item Record Set if you need the ODIN Office to bulk update the records.
Report 3: Incorrect Status Report
This report lists items scanned during inventory that are still appearing in the wrong status (Missing, Loaned, In-Transit, etc.).
- Criteria (can be adjusted as needed)
- Item Assigned Branch name (optional)
- Item Assigned Collection name (Recommended)
- Item Barcode (Required)
- Item Call Number (Recommended)
- Item Circ Status (Required)
- Item Last Inventory Date (Recommended)
- Item Material Type (Optional)
- MARC Title (Recommended)
- Filters
- Item General Filters
- Assigned Branch (choose your branch)
- Collection (choose your desired reporting collection)
- Circ Status = Select everything but Available
- Item Date Filters
- Last Inventory Date = enter at least one day before start date and current date
- Item General Filters
Click Submit and your Report Preview will appear.
Download your report results into an Excel spreadsheet (if necessary).
Log into Leap and Check In each item listed to return its Circ Status to Available.
Report 4: Inventory List Report
This report lists all items scanned during inventory. It is an optional report and for informational purposes only.
- Criteria (can be adjusted as needed)
- Item Assigned Branch name (optional)
- Item Assigned Collection name (Recommended)
- Item Barcode (Required)
- Item Call Number (Recommended)
- Item Circ Status (Recommended)
- Item Last Inventory Date (Recommended)
- Item Material Type (Optional)
- Item Record Status Name (Recommended)
- MARC Title (Recommended)
- Filters
- Item General Filters
- Assigned Branch (choose your branch)
- Collection (choose your desired reporting collection)
- Item Date Filters
- Last Inventory Date = enter at least one day before start date and current date
- Item General Filters
Click Submit and your Report Preview will appear.
Download your report results into an Excel spreadsheet if needed and save it for your records.
All items should show Final for Item Record Status. If any show a Deleted status, you may choose to access the item record in Leap to Undelete it OR you may choose to leave it in Deleted status and pull the item from the shelves.
Method 2: Conducting Inventory using a Shelf List Report
Navigate to Simply Reports directly from Leap under the Utilities menu:
Log in using your Leap credentials. Navigate to the Items tab and choose Item List Reports:

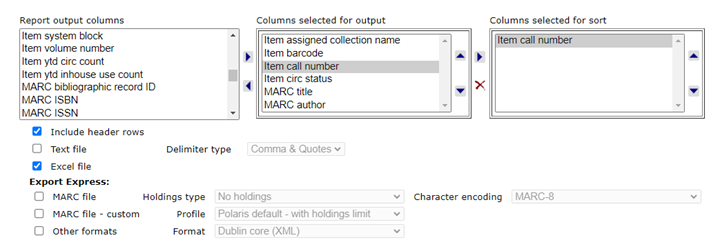
Add your criteria to Columns Selected for Output and sort by Item Call Number. Leave Include Header Rows and Excel File checked:
For further details on adding & removing fields from these menus, visit our Simply Reports Basics tutorial.
- Criteria (can be adjusted as needed)
- Columns Selected for Output
- Item Assigned Branch Name (Optional)
- Item Assigned Collection Name (Required)
- Item Barcode (Required)
- Item Call Number (Required)
- Item Circ Status (Required)
- Item Material Type (Optional)
- MARC Title (Required)
- MARC Author (Optional)
- Columns Selected for Sort
- Item Call Number
- MARC Title
- Columns Selected for Output
Once your chosen criteria are entered, add your filters.
- Filters
- Item General Filters
- Assigned Branch (choose your branch)
- Collection (choose your desired reporting collection)
- Record Status = Final
- Item General Filters
Once all criteria and filters are in place, click Submit. Your Report Preview will appear:
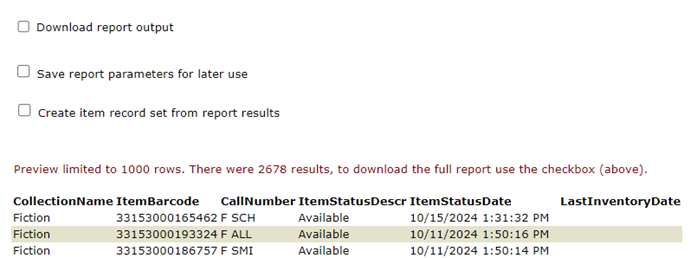
Download your full report results by clicking the checkbox next to Download report output and selecting Download:

Your file will be downloaded to your computer’s Downloads folder. Access the folder and open the file as an Excel spreadsheet. The spreadsheet will require some initial clean-up involving widening columns or changing the barcode column to a number format:
Once you have completed your adjustments, save your spreadsheet as an Excel Workbook (.xlsx):

Print out your report and use it as a basis of comparison for the items found on your shelves.
If any items with an Available status are missing from your shelves, update the record's Circ Status to Missing in Leap.