Receiving and Invoicing in Polaris Acquisitions
Creating Invoices and Attaching/Receiving Items
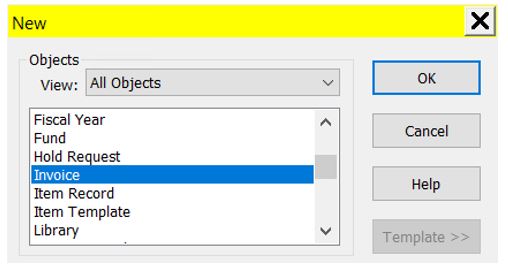
1. In order to create an invoice, from the toolbar click File | New, click on the new icon or use the hot-key Ctrl+N.
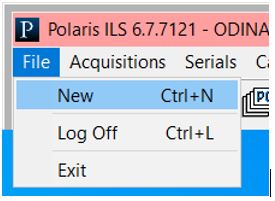
Select Invoice from the list.
2. Fill in the General view of the invoice workform.
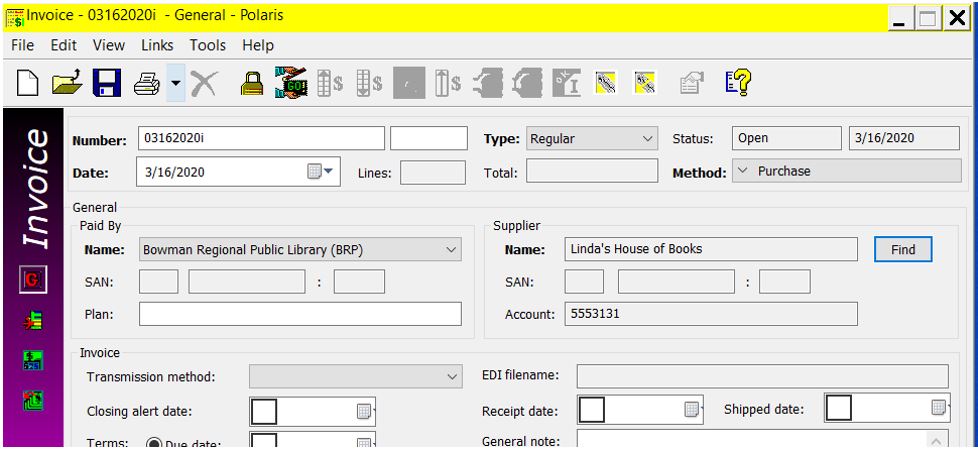
- Number (mandatory): Enter a number for your Invoice. Field has a 30 character limit.
- Suffix: enter the suffix in the box to the right of the number. A suffix is not mandatory, but you can search for invoices by their suffix. Field has an 8 character limit.
- Type (mandatory): select the type of invoice
- Regular
- Approval Plan – no funds are encumbered, only expended
- Blanket Order – no funds are encumbered, only expended
- Miscellaneous – can be used to account for charges other than material (such as lump payment to serial vendor for all subscriptions). Line items are not associated with a bib record.
- Status: The status is automatically populated, and will change during various states of the invoice.
- Date: The date is defaulted to the day the invoice is entered.
- Paid by: the logged in user’s library is defaulted as the name of the organization paying the invoice, and associated SAN is displayed.
- Plan
- Supplier Name: Use the Find tool to locate the supplier being used. Once the supplier is selected their SAN, Account number and claiming information are pulled from the supplier record and entered. This is default information and can be changed if necessary.
- Invoice Transmission Method: Select the method you received the invoice – paper, fax or electronic.
- Save the invoice by clicking the save icon
- Closing alert Date –
- Terms – enter the terms of the invoice payment – due date or x number of days
- Receipt date – enter the date the material was received
- Shipped date – enter the date the material was shipped.
3. Add lines items to the invoice either manually or via Rapid Receipt.
- To manually add line items to the invoice, go to the line items view of the invoice and click on the new icon from the submenu. NOTE: no link to the PO is made, and item is not marked received.
Image
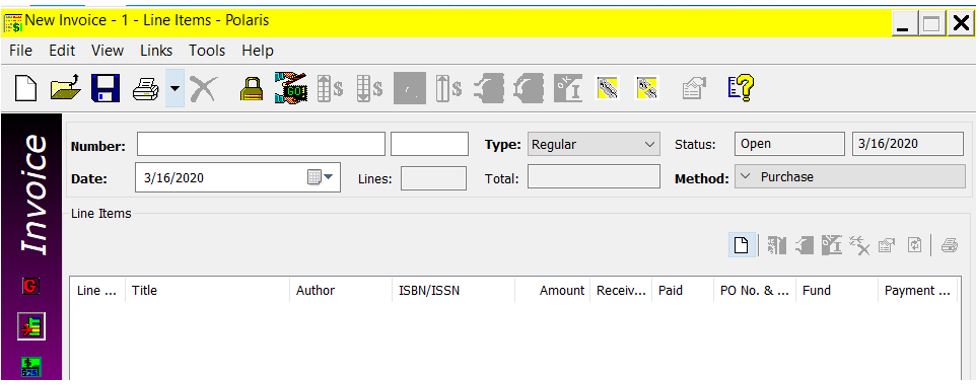
Enter the ISBN or use the Find button to locate in item to be added to the invoice.
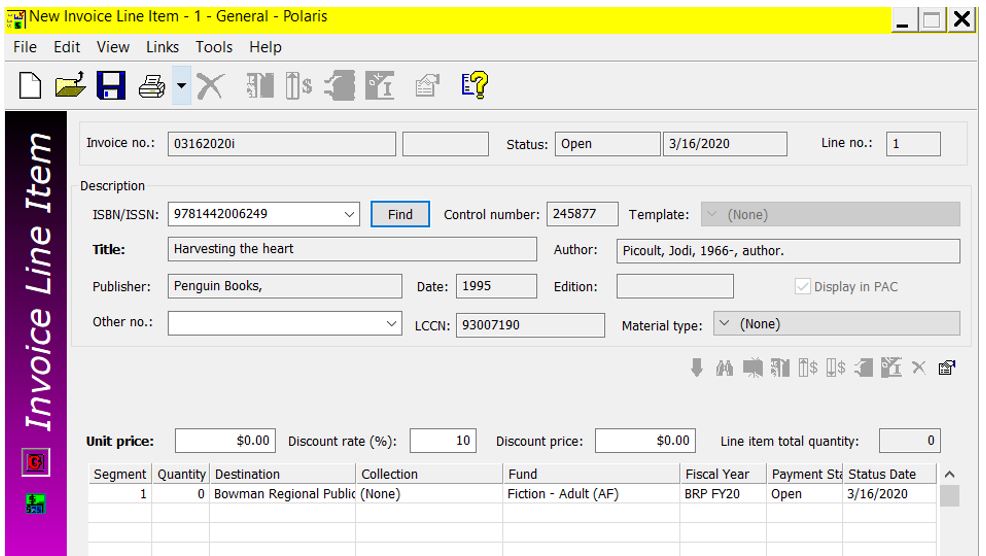
Enter the Unit price of the item, and then save it by clicking on the save icon. Follow these steps until all line items are added to the invoice.
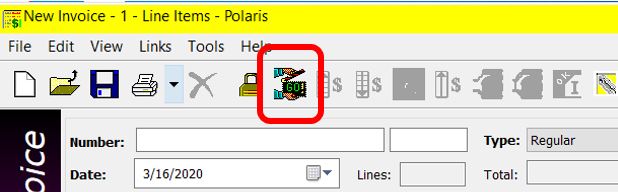
- Use Rapid Receipt to add line items to the invoice. Note: This method updates the status of the ordered item to received and any linked on-order item records are updated to in-process. All copies ordered of a title must be received to use Rapid Receipt. Click on the Rapid Receipt icon.
Image
Enter the ISBN or title of the item. This will retrieve all associated information from the PO. Verify the price and bib data.
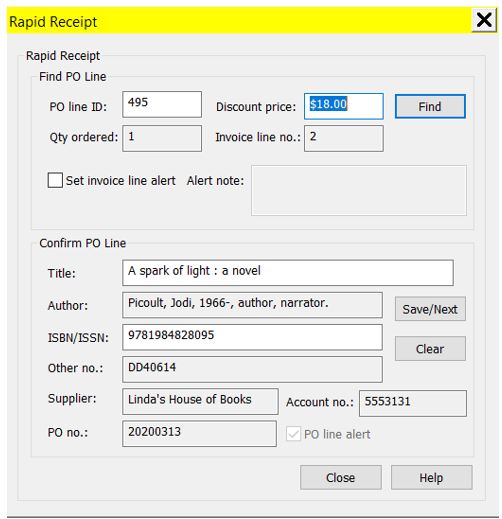
Click Save/Next to save the line item and clear the workform in order to add another line item. Continue to enter ISBN's or titles until you reach the end of your list. Click Close when you are finished adding line items.
Receiving Items from the PO and Copying to an Invoice
1. Search for the PO or PO line item for the material you wish to receive. On the menu select Acquisitions | Purchase orders or click the Purchase Orders Line Items Icon.

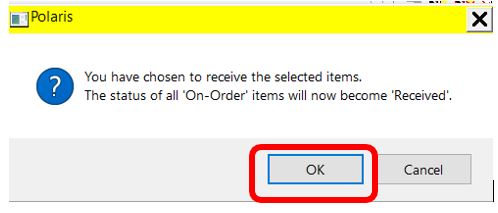
2. With the PO on the screen, navigate to the items view. You can highlight on line, several lines or all lines and click on the receive icon on the line item submenu. This allows for the option to receive a portion of a PO, or a portion of a line item (example: one copy of two). You also have the option to undo any line item receipts by highlighting appropriate lines and clicking the undo line item receipt icon.

3. Confirmation is received that selected line items will be updated. Click OK to continue.
4. Once line items have been received, they can be easily copied to an invoice. Highlight the applicable lines and click the copy to invoice or purchase or icon. Alternatively you can right-click within the highlighted items and choose 'Copy to...' from the menu.
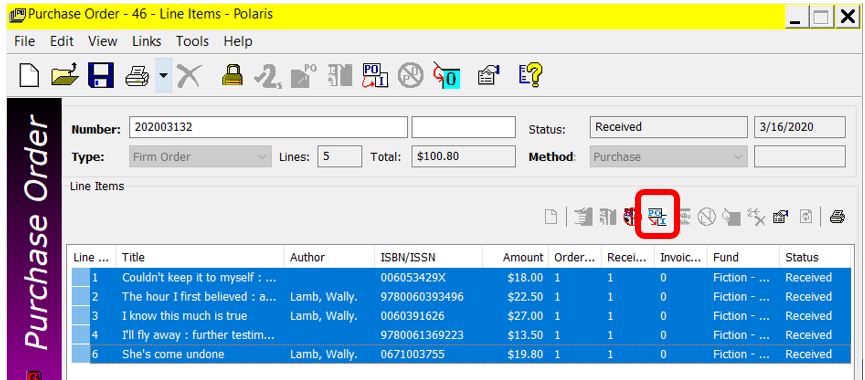
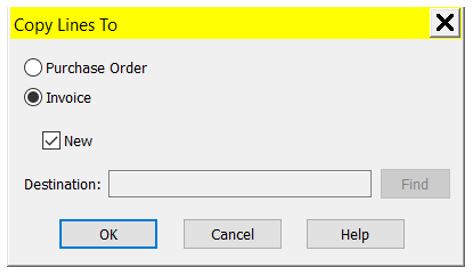
5. At the prompt, select copy to invoice. If an invoice hasn't previously been created, check the New box. If an invoice has already been created, enter the invoice number of click Find to search for the invoice.
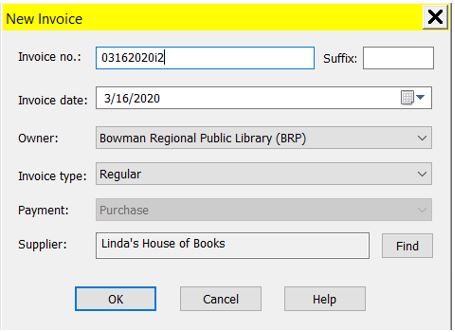
6. If create a new invoice was selected, enter the invoice number / suffix, and update any of the defaulted information as necessary. Click OK to create the invoice and copy the line items to it.
Paying an Invoice
After line items have been copied or added to an invoice, the invoice can be balanced and pai.
1. If there are additional charges to add to an invoice - such as shipping - they should be added at this time.
Additional charges can be entered under header charges. Select the type of charge, enter the amount and select the fund to charge the fees. Click Add to add the header charge.

Alternatively, additional charges can be distributed amongst the various line items. On the menu bar select Tools | Distribute | Charges or click the distribute charges icon.
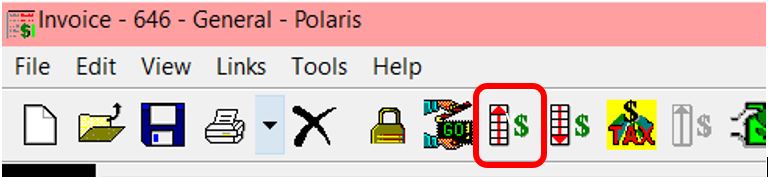
You receive a dialog box where you can enter what type of charge (Cataloging services, Special handling, Service, Shipping, Binding format or Other), what action to take (overwrite the existing charge or add to the existing charge), how to distribute the charge (evenly or prorated) and the amount of the charge. Click OK to continue.
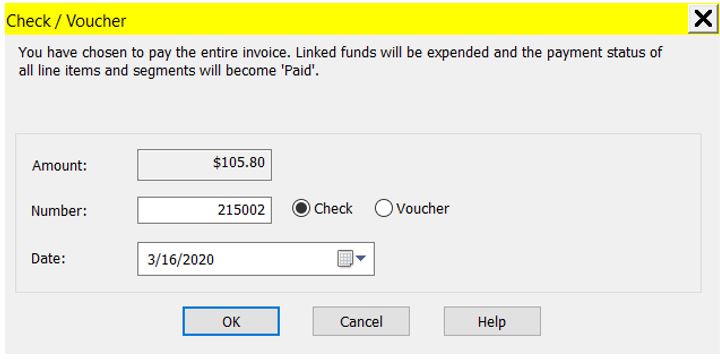
2. Pay the invoice by selecting Tools | Pay on the menu bar or by clicking the Pay Invoice icon.
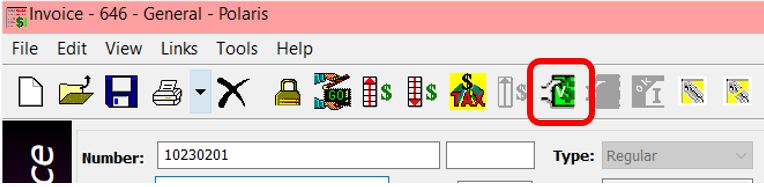
The amount is automatically calculated. You can enter a check/voucher number and edit the date of payment if desired. Click OK to pay the invoice. This will update the status of the invoice from open to paid, and all linked funds are disencumbered and expended. All items on the invoice must be received before the invoice can be paid. The check, voucher number and date can be edited on the Payment History view of the invoice.